Dinner · Part 2 of 3: Instructions
Pull-Apart Meat-Stuffed Pide Bread Step-by-step instructions
- Prep
- Cook
- Total
- Serves
- 8
Before you start
Before starting, make sure the water is warm but not hot—about 110°F (43°C)—to activate the yeast. Have the olive oil measured and the flour ready. The ground beef should be at room temperature for easier browning, but keep it refrigerated until ready to cook.
Shred the mozzarella if not using pre-shredded, and chop the onion and garlic. Grease a 9x13-inch baking pan with olive oil. Set out a clean surface for kneading and rolling the dough.
Ingredients at a glance (15)
- 3 1/2 cups all-purpose flour
- 2 1/4 tsp active dry yeast
- 1 tbsp sugar
- 1 1/2 tsp kosher salt
- 1/4 cup olive oil, plus more for greasing
- 1 1/2 cups warm water (110°F/43°C)
- 1 lb ground beef
- 1 medium onion, finely chopped
- 2 cloves garlic, minced
- 1 tsp smoked paprika
- 1/2 tsp ground cumin
- 1/2 tsp kosher salt
- 1/4 tsp black pepper
- 2 cups shredded mozzarella cheese
- 1 large egg, beaten
Instructions
Making the Dough and Filling
- Make the DoughIn a large bowl, whisk together the flour, yeast, sugar, and salt. Add the olive oil and warm water, then stir with a wooden spoon until a shaggy dough forms. Turn the dough out onto a lightly floured surface and knead for 8 to 10 minutes, until smooth and elastic. Place the dough in a greased bowl, cover with plastic wrap or a towel, and let rise in a warm spot for 1 hour, or until doubled in size.Look for The dough should be soft, smooth, and bounce back when pressed gently.Tip If the dough is too sticky, add a tablespoon of flour at a time until it pulls away from the bowl.
- Cook the FillingWhile the dough rises, heat a large skillet over medium-high heat. Add the ground beef and cook, breaking it up with a spatula, until browned and no longer pink, about 6 to 8 minutes. Add the onion and garlic and cook for 3 to 4 minutes more, until softened. Stir in the smoked paprika, cumin, salt, and black pepper. Remove from the heat and let cool slightly.Look for The beef is browned and crumbly, and the onions are translucent.Safe temperature 160°F (71°C) internal temperature (ground meat)Tip Drain excess fat if necessary, but leave a little for flavor.
At the end of this phase, the dough should be smooth, elastic, and doubled in size after rising, with a faint yeasty aroma. The filling should be browned and seasoned, with the onions softened and the spices fragrant. The beef should be fully cooked to 160°F (71°C) and free of any pink. The filling should be slightly cooled so it doesn't melt the cheese prematurely during assembly.
Assembling and Baking
- Assemble the PidePreheat the oven to 400°F (200°C). Punch down the risen dough and roll it out on a lightly floured surface into a large rectangle, about 12 by 16 inches. Transfer the dough to a 9x13-inch baking pan, letting the edges hang over slightly. Spread the cooked beef filling evenly over the dough, then sprinkle the shredded mozzarella over the top. Use a knife or your fingers to press deep parallel ridges into the dough and filling, creating a striped pattern.Look for The dough is covered with filling and cheese, with distinct ridges pressed through to the bottom.Tip Press firmly to create deep trenches so the bread separates easily after baking.
- Bake the PideBrush the beaten egg over the exposed dough edges and the ridges. Place the pan in the oven and bake for 20 to 25 minutes, until the crust is deep golden brown and the cheese is bubbling and blistered. The dough should be puffed and cooked through. Remove from the oven and let rest for 5 minutes before serving.Look for The top is golden brown, the cheese is blistered, and the bread sounds hollow when tapped.Safe temperature 160°F (71°C) internal temperature (egg dishes)Tip If the top browns too quickly, tent loosely with foil for the last 5 minutes.
The assembled pide should have deep, distinct ridges that run across the pan, with the filling and cheese visible in the troughs. The egg wash should be evenly brushed over the dough edges.
As it bakes, the dough will puff up and turn golden, and the cheese will melt and blister. The kitchen will smell of toasted bread and spices. The top should be deeply browned and the cheese bubbling.
Pulling Apart and Serving
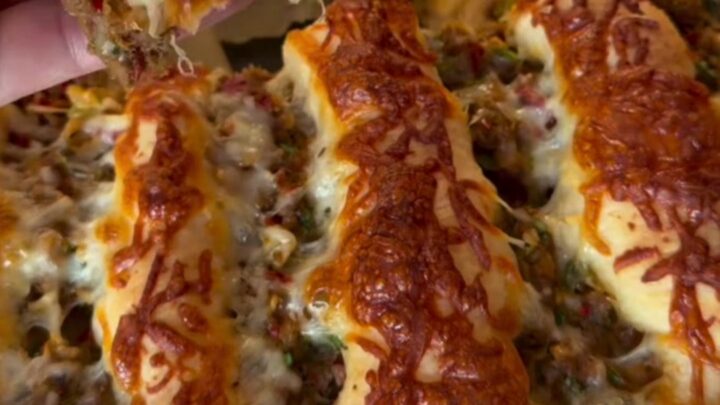
- Pull Apart and ServeUsing a spatula, lift a thick slice from one end, pulling it away from the pan. The cheese should stretch and the bread should be fluffy and cotton-soft inside. Serve warm, pulling apart pieces with your hands. The ridges make it easy to tear into individual portions.Look for The slice lifts easily, showing a soft, airy crumb and gooey cheese.Tip For clean slices, use a serrated knife along the ridges before pulling apart.
The finished pide should be golden brown all over, with a crisp crust and a soft, airy interior. When a slice is lifted with a spatula, it should separate easily along the ridges, revealing a fluffy crumb and gooey, stretchy cheese. The bread should be warm and inviting, with the filling juicy and well-seasoned. Serve immediately for the best texture and cheese pull.
Common mistakes
One common mistake is overworking the dough after it rises, which can make the bread tough. Handle it gently when rolling and shaping. Another is not pressing the ridges deep enough—they need to reach the bottom of the pan to create clean tear lines.
If the ridges are too shallow, the bread won't pull apart as easily. Also, avoid overbaking, as the bread can dry out; bake just until golden and puffed, and let it rest for a few minutes before serving.
How to tell it’s done
The pide is done when the crust is a deep golden brown and the cheese is bubbling and blistered in spots. The internal temperature of the bread should be around 190°F (88°C) to ensure the dough is fully baked.
The ground beef filling is already cooked before baking, but it should reach 160°F (71°C) when reheated in the oven. The bread should sound hollow when tapped on the bottom, and a skewer inserted into the center should come out clean.
- Ground meat: 160°F (71°C) in the thickest part
- Egg dishes: 160°F (71°C) in the thickest part
Up next · Part 3 of 3
4 variations · storage & make-ahead · 5 answers · printable card
Tips, FAQ & printable recipe (Part 3)← Back to the ingredients (Part 1)