Dinner · Part 2 of 3: Instructions
Puerto Rican Carne Mechada Olive-Stuffed Beef Roast Step-by-step instructions
- Prep
- Cook
- Total
- Serves
- 6
Before you start
Before starting, ensure your beef roast is completely thawed if it was frozen. Prepare your ingredients by peeling and slivering the garlic and ensuring your olives are pitted.
Clear your workspace and have your slow cooker ready on a stable surface near an electrical outlet.
Ensure you have a carving board and a sharp knife ready for the final step. Having all components measured and ready to go before you begin the layering process will make the preparation seamless and efficient.
Ingredients at a glance (6)
- 3.5 lb eye of round beef roast
- 80 g pimiento green olives
- 4 cloves garlic, peeled and slivered
- 150 g recao sofrito
- 1 packet sazon seasoning
- 400 ml tomato broth
Instructions
Prep and Stuffing
- Stuffing the RoastUsing a sharp paring knife, pierce deep holes into the eye of round roast. Insert the pimiento green olives and garlic slivers into the holes, ensuring they are distributed evenly throughout the meat to guarantee flavor in every slice.Look for The beef should be studded with olives and garlic visible on the surface.Tip Ensure the holes are deep enough so the olives do not pop out during the long cooking process.
The roast should be thoroughly pierced with holes and stuffed with the olives and garlic. Ensure the olives are pushed deep into the meat so they do not fall out when the roast is placed into the slow cooker.
Layering the Pot
- Setting the Slow CookerPlace the stuffed beef roast into the ceramic slow cooker. Pour the recao sofrito, sazon seasoning, and tomato broth over the meat. Cover the lid tightly to trap all the aromatic steam and juices.Look for The roast should be partially submerged in the liquid base.Tip Do not skip the sazon, as it provides the essential color and signature flavor profile for this dish.
The beef should be placed centrally in the slow cooker with the liquid ingredients poured evenly around it. Ensure the lid fits snugly to maintain a consistent environment for the slow-cooking process.
Slow Cooking and Finishing
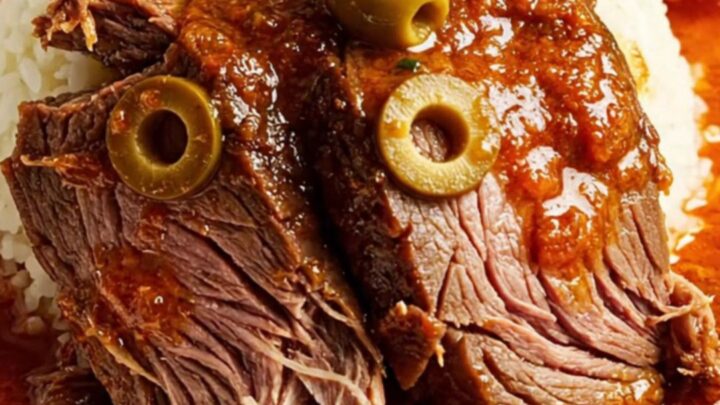
- Slow Cooking and ShreddingSet the slow cooker to low and cook for 8 hours. Once the time is up, verify the beef is fork-tender. The internal temperature must reach at least 145°F (63°C). Transfer the roast to a cutting board, let it rest for at least 10 minutes, then slice or shred as desired.Look for The meat should be extremely tender and easily pull apart with a fork while the sauce has thickened.Safe temperature 145°F (63°C) internal temperature (steaks, chops and roasts)Tip Resting the meat is critical for retaining juices before carving.
The beef should be fork-tender and the sauce should have thickened into a rich, aromatic gravy. Check the internal temperature to ensure it has reached the safe minimum of 145°F (63°C) before letting it rest.
Common mistakes
Avoid skipping the resting period after cooking, as this can lead to dry meat. Do not open the slow cooker lid during the first 6 hours of cooking, as this releases heat and steam, significantly increasing the required cooking time.
Ensure the roast is well-pierced to allow the flavors to penetrate, but do not shred the meat before it is fully tender. Finally, avoid using high heat, which will toughen the beef instead of breaking down the fibers for that signature tender consistency.
How to tell it’s done
The beef is perfectly cooked when it reaches an internal temperature of at least 145°F (63°C) and is fork-tender throughout. Use a meat thermometer inserted into the thickest part of the roast to verify the temperature.
The meat should pull apart easily with the slightest pressure from a fork. If the roast feels resistant, continue cooking for another 30 minutes. Once the temperature is reached, allow the roast to rest for at least 10 minutes before slicing to ensure the meat remains juicy.
- Steaks, chops and roasts: 145°F (63°C) in the thickest part, then a 3-minute rest
Up next · Part 3 of 3
2 variations · storage & make-ahead · 3 answers · printable card
Tips, FAQ & printable recipe (Part 3)← Back to the ingredients (Part 1)