Desserts · Part 2 of 3: Instructions
Pretty Pink Strawberry White Chocolate Mousse Cake Step-by-step instructions
- Prep
- Cook
- Total
- Serves
- 12
Before you start
Before starting, ensure all ingredients are at the right temperature: mascarpone should be softened, and heavy cream should be very cold.
Have the pink sponge cake layer ready, either store-bought or baked ahead. Prepare the pink glaze according to the package or recipe, and keep it at room temperature.
Gather all equipment: a 9-inch ring mold or springform pan, a box grater, a piping bag with a large round tip, and an offset spatula. Chill the bowl and whisk for the whipped cream to help it reach stiff peaks faster.
Ingredients at a glance (7)
- 2 lb fresh strawberries, hulled and halved
- 8 oz Belgian white chocolate, finely grated
- 1 cup mascarpone cheese, softened
- 1 1/2 cups heavy cream, cold
- 1/2 cup confectioners' sugar
- 1 pink sponge cake layer, store-bought or made ahead
- 1 cup glossy pink glaze, store-bought or made ahead
Instructions
Prep and Mousse
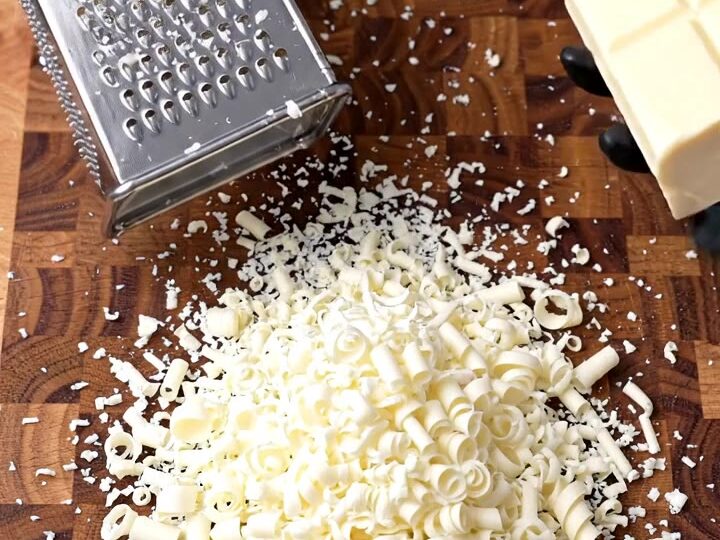
- Prepare the Strawberries and ChocolateHull the strawberries and slice them in half lengthwise so they are uniform. Set aside about 12 perfect halves for the garnish. Grate the white chocolate on the large holes of a box grater into a bowl, creating fluffy curls. Keep the grated chocolate in the refrigerator until ready to use.Look for Strawberries are evenly halved; chocolate curls are light and fluffy, not melted.Tip Chill the white chocolate bar for 15 minutes before grating to get cleaner curls.
- Make the Mascarpone MousseIn a large bowl, beat the mascarpone with the confectioners' sugar until smooth. In a separate bowl, whip the cold heavy cream to stiff peaks. Gently fold the whipped cream into the mascarpone mixture in three additions, until no streaks remain. Transfer the mousse to a piping bag fitted with a large round tip.Look for Mousse is thick, creamy, and holds its shape when piped.Tip Keep the cream very cold for the best volume. Fold gently to keep the mousse airy.
At the end of this phase, the strawberries are neatly halved, the white chocolate is grated into fluffy curls, and the mousse is thick and pipeable. The mousse should hold its shape when piped and have a smooth, creamy texture. If the mousse is too soft, refrigerate it for 10 minutes before piping.
Assemble the Cake
- Line the Ring with StrawberriesPlace a 9-inch ring mold or springform pan on a serving plate. Arrange the strawberry halves around the inside edge of the ring, cut side facing outward, pressing them gently so they stick to the sides. The strawberries should line the entire circumference, creating a colorful border.Look for The ring is fully lined with strawberry halves, with no gaps.Tip Use strawberries of similar size for a neat appearance. Press them firmly so they stay in place.
- Pipe Mousse and Layer SpongePipe a layer of mousse over the bottom of the ring, covering the strawberry bases. Place the pink sponge cake layer on top of the mousse, pressing gently. Sprinkle diced strawberries over the sponge, then pipe another layer of mousse over the strawberries, spreading it evenly with an offset spatula. Repeat with another sponge layer and mousse, finishing with a smooth top.Look for The cake is fully assembled with even layers and a smooth mousse top.Safe temperature 160°F (71°C) internal temperature (egg dishes)Tip Trim the sponge to fit the ring if needed. Chill the assembled cake for 30 minutes before glazing.
The ring is fully lined with strawberries, and the layers are stacked evenly. The top of the cake should be smooth and level. The sponge layers are visible in the cross-section, and the mousse is evenly distributed. The cake should look neat and well-structured.
Glaze and Finish
- Glaze and GarnishWarm the pink glaze until it is pourable but not hot. Pour the glaze over the top of the cake, using an offset spatula to spread it evenly to the edges. Let the glaze set for a few minutes. Garnish with the reserved strawberry halves and white chocolate curls. Refrigerate for at least 2 hours before serving.Look for The glaze is smooth and glossy, and the garnishes are neatly arranged.Tip For a clean slice, use a warm knife and wipe it between cuts.
The glaze is glossy and smooth, covering the top completely. The garnishes are arranged attractively. The cake is chilled and firm to the touch. When sliced, the layers are distinct, and the strawberries are visible around the edge.
Common mistakes
One common mistake is over-whipping the cream, which can cause it to become grainy and separate. Stop when stiff peaks form and the cream holds its shape. Another issue is not folding the cream into the mascarpone gently, which can deflate the mousse.
Use a spatula and fold in a circular motion. Also, ensure the strawberries are dry before lining the ring, as excess moisture can make the mousse slide. Finally, do not pour hot glaze over the cake, as it will melt the mousse.
How to tell it’s done
The cake is done when the mousse is fully set and the glaze has firmed up. To check, gently press the top of the cake; it should feel firm and spring back slightly.
The internal temperature of the cake should be 40°F (4°C) if using a thermometer, as it is served chilled. The mousse should be sliceable without oozing. If the cake is too soft, refrigerate for another hour before serving.
- Egg dishes: 160°F (71°C) in the thickest part
Up next · Part 3 of 3
4 variations · storage & make-ahead · 5 answers · printable card
Tips, FAQ & printable recipe (Part 3)← Back to the ingredients (Part 1)