Desserts · Part 2 of 3: Instructions
Pistachio Rose Cardamom Milk Chocolate Bars Step-by-step instructions
- Prep
- Cook
- Total
- Serves
- 8
Before you start
Before you begin, make sure you have all your ingredients measured and ready. Chop the pistachios and measure the cardamom and rose water. If using roasted buckwheat or rice cereal, have it measured and set aside. Line a baking sheet with parchment paper.
If you are grating a solid block of chocolate, place it in the freezer for 15 minutes to firm up, which makes grating easier and produces cleaner curls. Have a box grater, a heatproof bowl, and a silicone spatula ready. You will also need a chef's knife for slicing the finished bars.
Ingredients at a glance (5)
- 1 1/2 lb Swiss milk chocolate, finely chopped
- 1 cup shelled pistachios
- 1/2 tsp ground cardamom
- 1 tbsp rose water
- 1/2 cup crisp golden pieces (such as roasted buckwheat or toasted rice cereal)
Instructions
Phase 1: Prepare the Components
- Prepare the Crisp Golden PiecesSlice the crisp golden ingredients into small, uniform pieces. If using roasted buckwheat or toasted rice cereal, pulse them briefly in a food processor or chop with a knife until they are about the size of small peas. Set aside in a bowl.Look for The pieces should be uniformly small and golden, with a crunchy texture.Tip Keep the pieces dry and crisp; any moisture will soften them in the chocolate.
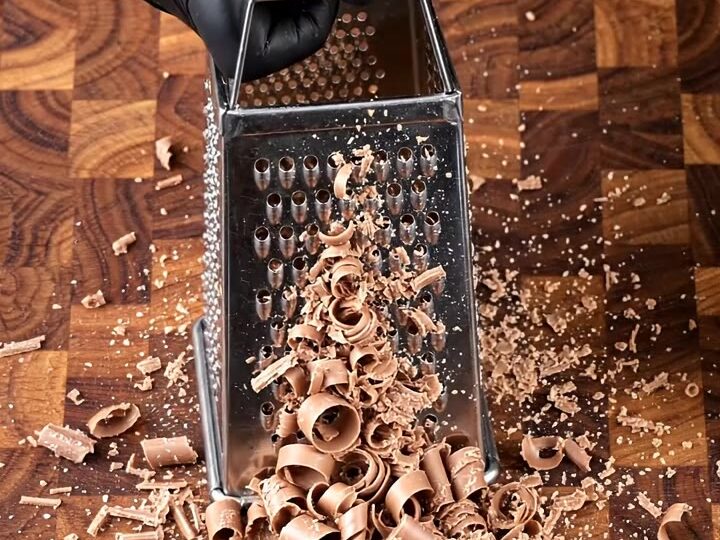
- Grate the ChocolateUsing a box grater, grate the solid block of Swiss milk chocolate into a large bowl. You should have a fluffy pile of chocolate curls. Reserve about 1/4 of the grated chocolate for later use.Look for The chocolate should be in light, airy curls, not fine powder.Tip Chill the chocolate block for 15 minutes before grating for cleaner curls.
- Make the Pistachio Cardamom PralineIn a food processor, combine the shelled pistachios, ground cardamom, and rose water. Pulse until the mixture forms a thick, spreadable paste. If it is too thick, add a teaspoon of water or milk to loosen it. Set aside.Look for The praline should be a smooth, thick paste with a vibrant green color.Tip For a smoother praline, process for a few minutes until the oils release.
At this stage, you should have crisp golden pieces ready in a bowl, a pile of fluffy grated chocolate, and a smooth, vibrant green pistachio cardamom praline. The praline should be thick enough to hold its shape when dropped from a spoon.
The grated chocolate should be light and airy, not compacted. If the praline is too thick, add a tiny bit of water or milk; if it is too thin, add more ground pistachios. Everything should be ready to assemble.
Phase 2: Assemble the Slab
- Melt the ChocolateMelt the remaining grated chocolate (the reserved portion) in a heatproof bowl set over a pan of simmering water, or in the microwave in 30-second bursts, stirring frequently. Stir until completely smooth and glossy.Look for The chocolate should be smooth, shiny, and free of lumps.Tip Do not overheat; chocolate should not exceed 115°F (46°C) or it will seize.
- Pour the Chocolate BaseLine a baking sheet with parchment paper. Pour the melted chocolate onto the prepared sheet and spread it into an even rectangle, about 1/2 inch thick. Use an offset spatula to smooth the surface.Look for The chocolate layer should be even and about 1/2 inch thick.Tip Tap the sheet gently on the counter to release any air bubbles.
- Swirl in the PralineDrop spoonfuls of the pistachio cardamom praline over the melted chocolate. Use a knife or skewer to swirl the praline through the chocolate, creating a marbled pattern. Scatter the crisp golden pieces evenly over the top.Look for The praline should be swirled in streaks, not fully mixed, and the golden pieces should be visible.Tip Work quickly before the chocolate sets.
The melted chocolate should be smooth, glossy, and completely free of lumps. When you pour it onto the parchment-lined sheet, it should spread easily into an even rectangle about 1/2 inch thick. After swirling in the praline, you should see distinct green streaks and pockets of praline throughout the chocolate. The golden pieces should be scattered evenly across the surface, not clumped together. The slab should look marbled and inviting.
Phase 3: Set and Slice
- Set the ChocolateRefrigerate the chocolate slab for at least 2 hours, or until completely firm and set. Once set, remove from the refrigerator and let it sit at room temperature for 5 minutes.Look for The chocolate should be firm to the touch and release cleanly from the parchment.Tip Do not refrigerate for more than 4 hours to avoid condensation.
- Slice into BarsUsing a sharp chef's knife, slice the chocolate slab into thick bars, about 2 inches wide. Then lift one bar and snap it cleanly in half to reveal the layered cross-section. Serve immediately or store in an airtight container.Look for The bars should be thick, with a clean snap and visible layers of chocolate and praline.Tip For clean cuts, warm the knife under hot water and dry it before slicing.
After chilling, the chocolate slab should be completely firm and lift cleanly off the parchment. When you slice into bars, the knife should glide through with minimal resistance, and the bars should have clean edges. When you snap a bar in half, it should break with a sharp crack, revealing a beautiful cross-section with layers of chocolate, green praline swirls, and golden crunch pieces. The bars should be thick and substantial.
Common mistakes
One common mistake is overheating the chocolate, which can cause it to seize and become grainy. Always melt it gently, using a double boiler or short bursts in the microwave, and stir frequently. Another issue is adding the praline while the chocolate is too warm, which can cause it to melt and blend in completely rather than swirl.
Let the chocolate cool slightly before swirling if needed. Also, be sure to spread the chocolate evenly; if it is too thin in spots, the bars will be fragile and break unevenly. Finally, do not skip the chilling time—it is essential for a clean snap.
How to tell it’s done
The chocolate bars are done when the slab is completely firm to the touch and releases cleanly from the parchment paper. When you slice into bars, they should break with a clean, sharp snap, revealing a layered cross-section with the green praline swirl and golden pieces clearly visible.
If the chocolate is too soft, it is not fully set—return it to the refrigerator for another 30 minutes. If it is too hard and cracks when slicing, let it sit at room temperature for 5 minutes to soften slightly. There is no protein in this recipe, so no temperature check is needed.
Up next · Part 3 of 3
4 variations · storage & make-ahead · 5 answers · printable card
Tips, FAQ & printable recipe (Part 3)← Back to the ingredients (Part 1)