Desserts · Part 2 of 3: Instructions
Pistachio Kataifi Croissant Bake with Milk and Dark Chocolate Step-by-step instructions
- Prep
- Cook
- Total
- Serves
- 6
Before you start
Gather every ingredient and tool before you turn on the oven, because this bake moves quickly once the croissants are open. Set the oven to 350°F (175°C) and position a rack in the centre. Toast the kataifi shreds in a dry skillet over medium heat until golden and crisp, then transfer them to a plate so they cool and stay brittle.
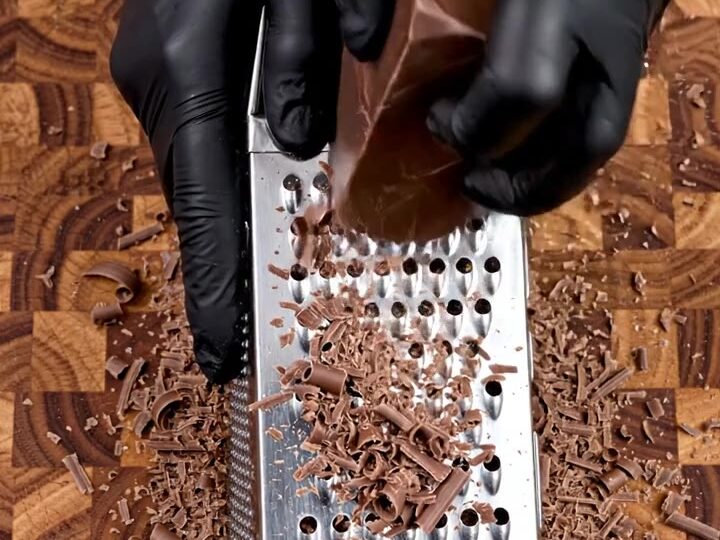
Chop half the pistachios coarsely and crush the rest roughly for the topping. Grate the milk chocolate bar on a box grater over a plate so the fine shavings are ready for garnish. Melt the butter and brush the inside of a 9 by 13-inch baking dish. Set the pistachio cream out so it spreads easily, and melt the dark chocolate and keep it warm in a small pitcher.
Ingredients at a glance (7)
- 6 baked croissants, store-bought or made ahead
- 4 oz kataifi shredded pastry, toasted until golden
- 1/2 cup whole pistachios, shelled, divided
- 2 oz milk chocolate bar, for grating
- 1 cup pistachio cream, store-bought or made ahead
- 3 oz dark chocolate, melted and kept warm
- 2 tbsp unsalted butter, melted, for the dish
Instructions
Layered croissants with cream
- Prepare the pastry and chocolateToast the kataifi shreds in a dry skillet over medium heat, tossing often, until golden and crisp. Chop half the pistachios coarsely and set them aside. Grate the milk chocolate on a box grater so fine shavings collect on the board.Look for Kataifi turns golden and crisp, and the grated chocolate falls in fine shavings.Tip Keep the toasted kataifi loose so it crisps evenly in the oven.
- Open the croissantsSlice each baked croissant lengthwise with a long serrated knife, leaving the back intact to form a pocket. Open the pocket gently so it can hold the filling without tearing through the pastry.Look for Each croissant opens into a clean pocket with its base still attached.Tip Use a sawing motion with the serrated knife to avoid crushing the layers.
The kataifi should look golden and feel crisp and dry when you lift a strand, with no soft or pale spots left. The croissants should open cleanly into pockets, with the base still joined and the layers intact. Check that the grated chocolate is in fine shavings and the pistachios are chopped and crushed in separate piles.
Before you go on, make sure the pistachio cream is spreadable and the dish is buttered, because the assembly phase needs everything ready at once. A quick check of the pastry will show whether the croissants are firm enough to hold the cream without tearing. Look closely at the edges of the kataifi, since any burnt bits will taste bitter once baked under the cream and chocolate.
Golden, glossy and finished
- Layer the croissant bakeBrush the baking dish with melted butter. Arrange the croissants in the dish and scatter kataifi strands between and around them. Spread pistachio cream generously along each opening and over the seams.Look for The croissants sit snugly with kataifi tucked between them and cream filling every opening.Tip Press the cream into the openings so no pocket is left empty.
- Top with cream and pistachiosSpread more pistachio cream over the tops of the croissants. Sprinkle the remaining pistachios, coarsely crushed, over the top along with a little more toasted kataifi for crunch.Look for The tops look glossy and green, speckled with crushed pistachios and crisp kataifi.Tip Crush the pistachios roughly so some pieces stay visible on top.
- Bake until goldenBake the dish in the preheated oven at 350°F (175°C) for about 15 minutes, until the pastry is golden and glossy, the kataifi is crisped and the pistachio cream is warmed through.Look for Pastry is deep golden, kataifi edges are crisp and the cream looks warm and glossy.Tip Rotate the dish halfway through the bake for even colour.
After layering, the croissants should sit close together in the dish with kataifi tucked between them and pistachio cream visible in every opening and along each seam. The top should look glossy and green, speckled with crushed pistachios and a few crisp strands of kataifi. Check that no pocket is empty and that the cream covers the tops evenly so the surface bakes uniformly. The bake is ready for the oven when the pastry looks uniform and the toppings are secure. A slight shine on the cream is expected and shows that the filling is well spread. If any kataifi has slipped off the sides, press it back gently so it crisps in the heat rather than burning on the rim of the dish.
Chocolate drizzle and serving
- Finish with dark chocolateMelt the dark chocolate until smooth and keep it warm. Let the bake rest for about 5 minutes. Drizzle the warm dark chocolate over the croissants from a small pitcher, then top with the grated milk chocolate shavings.Look for The chocolate pours in a smooth ribbon and the shavings settle on the glossy top.Tip Drizzle while the chocolate is warm so it stays fluid and glossy.
- Serve and pull apartServe the bake straight from the dish, garnished with chocolate curls, chopped pistachios and shredded kataifi. Pull the croissants apart with tongs so the molten pistachio filling shows inside each portion.Look for The filling stretches and oozes when the croissants are pulled apart.Tip Serve while still warm so the pistachio cream stays soft and creamy.
When the bake comes out of the oven, the pastry should be deep golden and glossy, the kataifi crisp at the edges, and the pistachio cream warm and smooth in the openings. Let the dish rest briefly, then check that the dark chocolate is still fluid enough to drizzle in a steady ribbon. The milk chocolate shavings should settle on the surface without melting into the cream.
Before serving, confirm that the croissants hold together when lifted with tongs and that the filling is still soft inside. Taste a small section to confirm the balance of sweetness, pistachio and chocolate. If the chocolate has thickened, warm it gently for a few seconds before pouring, taking care not to scorch it or let it seize.
Common mistakes
The most common problem is overfilling the croissants so the cream runs out onto the dish and burns. Spread the cream generously but keep it inside the pockets and along the seams. Another mistake is skipping the toasting step for the kataifi, which leaves the strands soft and pale instead of crisp. Toast them until golden and let them cool before layering. Pouring the dark chocolate too early, before the bake has rested, can cause it to set unevenly or slide off. Wait the short rest before drizzling. Finally, do not cut into the croissants too deeply, because a clean pocket holds the filling better than a split that tears through the base.
How to tell it’s done
The bake is done when the pastry is deep golden and glossy on top, the kataifi is crisp and brittle at the edges, and the pistachio cream is warmed through and softened in the openings. Look for a gentle bubbling at the seams and a uniform surface colour without any dry or dark spots. Pull one croissant apart with tongs: the filling should be creamy and smooth, not stiff or cold at the centre.
Because this bake contains no raw meat, poultry or fish, no protein temperature applies. The eggs and butter in the croissants are fully baked when the pastry is set and the layers look dry and crisp rather than pale or doughy. If the top is browning too fast, lower the rack or tent the dish loosely with foil for the final minutes.
Up next · Part 3 of 3
4 variations · storage & make-ahead · 5 answers · printable card
Tips, FAQ & printable recipe (Part 3)← Back to the ingredients (Part 1)