Desserts · Part 1 of 3: Ingredients
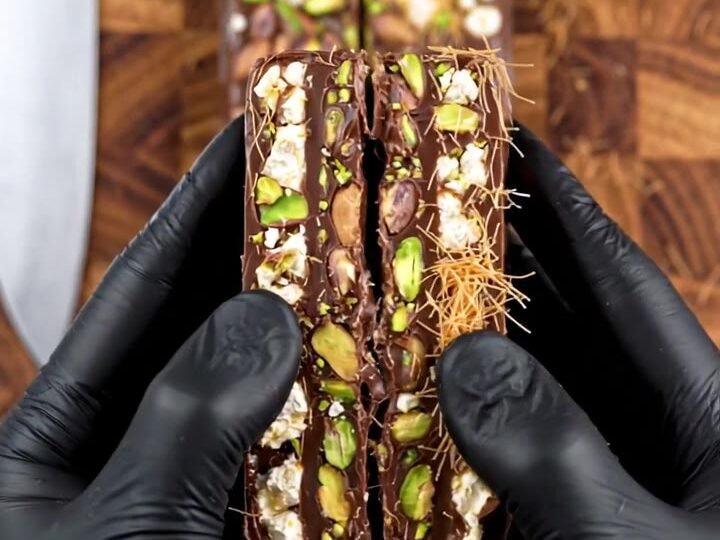
Pistachio Halva Kataifi Dark Chocolate Bars
- Prep
- Cook
- Total
- Serves
- 8
These pistachio halva kataifi dark chocolate bars are a study in texture and flavor. A thick, crunchy kataifi base meets a rich dark chocolate layer, all topped with vibrant pistachio tahini and crumbled sesame halva.
The result is a bar that snaps cleanly, revealing beautiful layers of dark, emerald, and golden. Perfect for a special occasion or a sophisticated treat, these bars are surprisingly simple to make at home.
Inspired by Mediterranean sweets, this recipe combines kataifi dough, pistachio tahini, and sesame halva with high-quality dark chocolate. The kataifi is baked until golden and crisp, then layered with a thick chocolate base and a creamy pistachio tahini spread.
Crumbled halva adds a sweet, nutty finish. The bars are chilled until set, then sliced into thick rectangles that showcase the striking cross-section. Each bite offers a satisfying crunch, a deep chocolate flavor, and the aromatic notes of pistachio and sesame.
Ingredients
- 4 oz kataifi dough
- 3 tbsp unsalted butter, melted
- 12 oz 72% dark coverture chocolate
- 1/2 cup pistachio tahini
- 4 oz sesame halva, crumbled
Why this recipe works
The method here is all about building texture. Baking the kataifi dough until deeply golden transforms it into a crisp, airy crunch that contrasts beautifully with the smooth chocolate and creamy tahini. Grating the chocolate rather than melting it creates a base that is both dense and tender, and it sets firmly when chilled, giving the bars their clean snap.
Layering the ingredients in a specific order—chocolate, tahini, kataifi, halva—ensures that each component is distinct and visible in the final slice.
The tahini acts as an adhesive, holding the kataifi in place while adding its own rich, nutty flavor. Chilling the assembled slab allows the chocolate to set completely, making it easy to slice into neat bars that hold their shape.
Notes and substitutions
Kataifi dough is a shredded phyllo dough available in Middle Eastern markets and some supermarkets. It has a delicate, stringy texture that crisps up beautifully in the oven.
If you can't find it, you can use shredded phyllo or even crushed phyllo sheets, though the texture will be slightly different. The dough is typically sold frozen and should be thawed before use.
Pistachio tahini is a paste made from ground pistachios, similar to peanut butter but with a vivid green color and a rich, nutty flavor. It is available in specialty stores and online. Sesame halva is a dense, crumbly confection made from sesame paste and sugar. Both are essential to the flavor profile of these bars, but substitutions are possible if needed.
- kataifi dough: Shredded phyllo dough (thawed) can be used; it will create a similar crunchy texture.
- pistachio tahini: Regular tahini mixed with finely ground pistachios can substitute, though the color and flavor will differ.
- sesame halva: Use a combination of toasted sesame seeds and honey if halva is unavailable, though the texture will be less crumbly.
- 72% dark coverture chocolate: Any high-quality dark chocolate (60-70% cacao) can be used; avoid chocolate chips as they may not melt as smoothly.
Equipment
- Box grater
- Metal tray (9x13-inch)
- Baking sheet
- Parchment paper
- Spatula
- Chef's knife
- Cutting board
Up next · Part 2 of 3
6 steps · 15 min of cooking · what to look for at each stage
Step-by-step instructions (Part 2)