Desserts · Part 1 of 3: Ingredients
Pistachio Cannoli Tart with Chocolate and Ricotta
- Prep
- Cook
- Total
- Serves
- 8
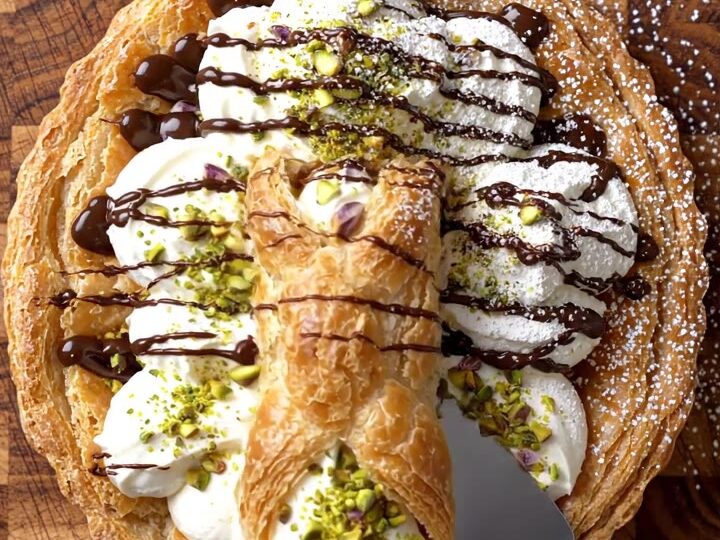
This pistachio cannoli tart takes everything beloved about classic cannoli — creamy ricotta, chocolate, pistachios, and candied orange — and sets it on a crisp puff pastry base. It’s an elegant dessert that comes together in under an hour, yet looks like it came from a pastry shop.
The combination of textures and flavors is irresistible: flaky pastry, velvety filling, crunchy nuts, and rich chocolate curls. Perfect for a dinner party or a special family treat, this tart is as fun to make as it is to eat.
Imagine a cannoli, but transformed into a stunning tart that serves a crowd. The base is a sheet of puff pastry baked until golden and flaky. On top, a cloud of sweetened ricotta is whipped until light and airy, then studded with dark chocolate chips.
The whole thing is finished with a shower of pistachios, candied orange peel, and delicate chocolate curls. This recipe captures the spirit of a Sicilian pastry in a simple, modern format. Whether you’re a seasoned baker or a beginner, this tart is straightforward and rewarding.
Ingredients
- 1 sheet puff pastry, thawed
Filling
- 2 cups whole-milk ricotta
- 3/4 cup confectioners' sugar
- 1 tsp vanilla extract
- 1/2 cup dark chocolate chips
Topping
- 1/2 cup shelled pistachios, coarsely chopped
- 1/4 cup candied orange peel, chopped
- 4 oz 70% dark chocolate, grated
- 2 oz dark chocolate, melted
- 2 tbsp powdered sugar
Why this recipe works
Puff pastry is the ultimate shortcut for a crisp, buttery base. It bakes up flaky and sturdy enough to hold the creamy ricotta without becoming soggy.
The key is to bake it fully and let it cool completely before adding the filling. That way, every bite has a satisfying crunch that contrasts beautifully with the smooth ricotta.
Whipping the ricotta with confectioners’ sugar transforms it into a mousse-like filling. The air beaten into the ricotta makes it light and billowy, mimicking the texture of traditional cannoli cream.
Folding in chocolate chips adds little pockets of richness without overwhelming the delicate flavor of the cheese.
Notes and substitutions
Use whole-milk ricotta for the best texture. Low-fat or part-skim ricotta tends to be watery and less creamy. If your ricotta looks wet, drain it in a fine-mesh sieve for 30 minutes before using. The confectioners’ sugar not only sweetens the filling but also helps stabilize it, keeping the peaks intact.
Dark chocolate with at least 70% cocoa is ideal for grating into curls. The higher cocoa content makes it firm enough to grate cleanly. Candied orange peel adds a bright, slightly bitter note that balances the sweetness. If you can’t find it, use fresh orange zest mixed with a little sugar.
- Puff pastry: Frozen puff pastry can be replaced with a homemade rough puff or a sheet of pie crust, though the texture will differ.
- Candied orange peel: Use orange zest mixed with a little sugar, or omit for a simpler flavor.
- 70% dark chocolate: Semi-sweet or bittersweet chocolate (60-70%) works well; avoid milk chocolate for the grated curls.
- Ricotta: Full-fat ricotta is best; a well-drained cottage cheese can be substituted in a pinch.
Equipment
- Box grater
- Baking sheet
- Parchment paper
- Electric mixer
- Spatula
- Pastry brush
- Cooling rack
Up next · Part 2 of 3
6 steps · 25 min of cooking · what to look for at each stage
Step-by-step instructions (Part 2)