Dinner · Part 2 of 3: Instructions
A5 Wagyu Steak Bites with Soy-Cured Egg Yolk Step-by-step instructions
- Prep
- Cook
- Total
- Serves
- 2
Before you start
Start by chilling the wagyu in the freezer for 20 minutes if it isn’t already very cold. This makes cubing easier and helps the meat sear properly. Prepare the curing mixture by whisking tamari and mirin in a small bowl.
Carefully add the egg yolks and refrigerate for at least 2 hours, or overnight for a deeper flavor. When ready to cook, heat the griddle to 450°F (232°C) and have all your tools ready.
Ingredients at a glance (6)
- 12 oz A5 Wagyu striploin, well chilled
- 1/2 tsp flaky sea salt
- 2 organic egg yolks
- 3 tbsp aged tamari
- 3 tbsp mirin
- fresh grated wasabi, for serving
Instructions
Cure and Prep
- Cure the egg yolksIn a small bowl, whisk together the aged tamari and mirin. Carefully add the two egg yolks, making sure they remain intact. Cover and refrigerate for at least 2 hours or up to 24 hours.Look for The yolks should be slightly thickened and deeply colored from the marinade.Tip Use the freshest eggs you can find; the yolks will hold together better.
- Prep the wagyuRemove the chilled A5 Wagyu striploin from the refrigerator. Using a sharp knife, cut the meat into 1-inch cubes. Season all sides generously with the flaky sea salt.Look for The cubes should be uniform and cold; the salt will cling to the surface.Tip Keep the meat as cold as possible until just before searing to ensure a good crust.
The egg yolks should be submerged in the tamari-mirin mixture and refrigerated. They will become slightly firmer and darker in color. The wagyu cubes should be evenly cut and seasoned with salt.
The salt will start to draw out a little moisture, which is fine. You should see the yolks looking glossy and thick, and the meat cubes uniform and cold.
Sear and Rest
- Heat the griddlePlace a dry teppanyaki griddle or heavy stainless steel skillet over high heat. Heat until it reaches 450°F (232°C) on an instant-read thermometer or until a drop of water sizzles and evaporates immediately.Look for The surface should be smoking slightly, but not burning.Tip Do not add any oil; the wagyu will render its own fat.
- Sear the cubesCarefully place the wagyu cubes on the hot surface in a single layer, leaving space between each piece. Sear for 35 seconds per side, turning with tongs, until all sides have a deep golden-brown, lacy crust. The interior should remain warm and tender, not fully cooked through. Let it rest for 3 minutes before slicing.Look for The crust will be dark and crispy, with the fat rendering and sizzling.Safe temperature 145°F (63°C) internal temperature (steaks, chops and roasts)Tip Work in batches if necessary to avoid overcrowding, which would lower the pan temperature.
- Rest the meatTransfer the seared wagyu cubes to a plate and let them rest for at least 3 minutes. The internal temperature should reach 145°F (63°C) for medium-rare; if you prefer more doneness, continue cooking in 10-second intervals.Look for The meat should be glossy and the crust should remain crisp.Safe temperature 145°F (63°C) internal temperature (steaks, chops and roasts)Tip Resting allows the juices to redistribute; do not skip this step.
The griddle should be smoking hot, and the wagyu cubes should sizzle immediately when placed on it. After 35 seconds per side, the crust should be deep brown and crisp, with the fat rendered and bubbling. The interior should still be pink and tender. After resting, the meat should be juicy and the crust should remain crunchy.
Finish and Serve
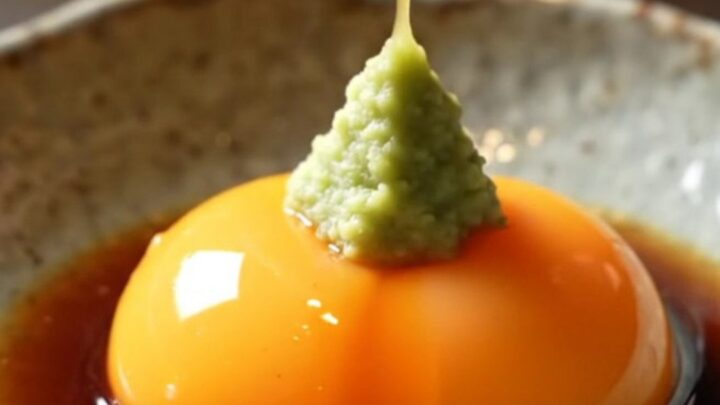
- Finish with yolk and wasabiRemove the cured egg yolks from the marinade and place them on a small plate. Grate fresh wasabi over them. To serve, swirl each wagyu cube through the yolk so it coats the crust, then add a tiny dab of wasabi on top.Look for The yolk should be glossy and thick, clinging to the meat.Safe temperature 160°F (71°C) internal temperature (egg dishes)Tip If the yolk is too loose, it may not have cured long enough; refrigerate longer next time.
The cured egg yolks should be thick and glossy, with a deep amber color. The wasabi should be freshly grated and fragrant. When you swirl a cube through the yolk, it should coat the meat evenly. The combination of crispy crust, tender meat, and creamy yolk should be balanced by the sharpness of the wasabi.
Common mistakes
One common mistake is overcrowding the pan, which lowers the temperature and steams the meat instead of searing. Another is using oil, which is unnecessary and can make the crust greasy.
Also, don’t skip the resting period; cutting into the meat too soon will release the juices. Finally, be careful not to overcook the wagyu; it’s best enjoyed medium-rare. If you’re unsure, use a thermometer.
How to tell it’s done
The wagyu cubes are done when they reach an internal temperature of 145°F (63°C) for medium-rare. The crust should be deep golden-brown and crisp, with the fat rendered and glossy. The interior should be warm and tender, not raw but still juicy.
For the egg yolks, if you prefer them fully cooked, you can poach them gently in simmering water until the whites are set and the yolks reach 160°F (71°C). However, this recipe is designed for the yolks to be served soft and creamy.
- Steaks, chops and roasts: 145°F (63°C) in the thickest part, then a 3-minute rest
- Egg dishes: 160°F (71°C) in the thickest part
Up next · Part 3 of 3
4 variations · storage & make-ahead · 5 answers · printable card
Tips, FAQ & printable recipe (Part 3)← Back to the ingredients (Part 1)