Dinner · Part 2 of 3: Instructions
Pepperoncini Ranch Butter Pot Roast: 5-Ingredient Crockpot Dinner Step-by-step instructions
- Prep
- Cook
- Total
- Serves
- 6
Before you start
Before you start, ensure the slow cooker is clean and dry. Pat the beef roast dry with paper towels—this helps the seasonings adhere and promotes better browning if you choose to sear it first (though it's not required).
Measure out the ranch and au jus mixes, and have the pepperoncini and butter ready. If you plan to serve over mashed potatoes, prepare them just before the roast is done, or keep them warm in a covered pot. This recipe requires minimal prep, so you can get it into the slow cooker in just a few minutes.
Ingredients at a glance (5)
- 3 1/2 lb beef bottom round roast
- 1 oz dry ranch dressing mix (1 packet)
- 1 oz dry au jus gravy mix (1 packet)
- 10 whole pepperoncini peppers
- 1/2 cup salted butter (1 stick)
Instructions
Phase 1: Assemble the Roast
- Prepare the Roast and SeasoningsPlace the beef bottom round roast in the center of the slow cooker. Sprinkle the dry ranch dressing mix and dry au jus gravy mix evenly over the top of the roast, covering as much surface as possible.Look for The roast should be fully coated with the seasonings.Tip Pat the roast dry with paper towels before adding to help the seasonings stick.
- Add Pepperoncini and ButterScatter the whole pepperoncini peppers over the seasoned roast, then place the stick of salted butter on top. The butter will melt and create a rich, savory sauce as it cooks.Look for The butter sits on top of the roast, ready to melt.Tip If using a smaller roast, reduce the butter to 1/4 cup.
At the end of this phase, the roast is seasoned and topped with butter and peppers. The slow cooker is covered and ready to cook. You should see a layer of seasonings coating the beef, with the butter pat sitting on top and pepperoncini scattered around. The raw beef should look fresh and moist, and the seasonings should be evenly distributed.
Phase 2: Slow Cook to Tenderness
- Slow Cook Until Fork-TenderCover the slow cooker and cook on LOW for 8 hours, or on HIGH for 4-5 hours, until the beef is fork-tender and easily shreds. The internal temperature should reach at least 145°F (63°C) for safety, but for best texture, cook until it exceeds 190°F (88°C) for shredding. Let it rest for 3 minutes before slicing.Look for The meat should be very tender and the sauce bubbling gently.Safe temperature 145°F (63°C) internal temperature (steaks, chops and roasts)Tip Avoid opening the lid during cooking to keep the heat steady.
- Rest the RoastOnce the roast is fork-tender, turn off the slow cooker and let the meat rest in the juices for at least 10 minutes. This allows the juices to redistribute and makes the meat even more succulent.Look for The meat is no longer bubbling and has slightly cooled.Safe temperature 145°F (63°C) internal temperature (steaks, chops and roasts)Tip Resting also makes the meat easier to handle when shredding.
After 8 hours on LOW, the kitchen will smell rich and savory. The beef should be visibly darker and shrunken, and the liquid should be bubbling gently.
The butter will have melted and combined with the meat juices, creating a golden, aromatic sauce. The meat should be fork-tender and easily pull apart. The pepperoncini will have softened and may have split, releasing their tangy flavor.
Phase 3: Shred and Serve
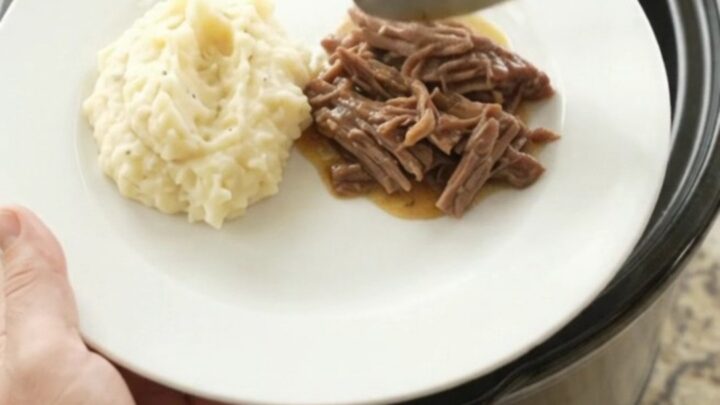
- Shred and ServeUsing two forks, shred the beef directly in the slow cooker, mixing it with the pepperoncini and pan juices. Serve hot over mashed potatoes or crusty bread, spooning extra sauce over the top.Look for The beef shreds easily and soaks up the buttery, tangy sauce.Tip For a thicker sauce, remove the beef and simmer the liquid on the stovetop for a few minutes.
Once shredded, the beef should be moist and glistening with sauce. The sauce should coat the meat and have a balanced flavor—savory, tangy, and buttery. The pepperoncini will be soft and can be mixed in or left whole. The dish is ready to serve immediately over mashed potatoes or with bread. The final texture should be tender, not dry or stringy.
Common mistakes
One common mistake is opening the slow cooker too often, which lets heat escape and extends cooking time. Another is using a lean cut that can dry out if overcooked; bottom round is perfect because it benefits from long cooking.
Don't skip the resting step—it allows the juices to redistribute, keeping the meat moist. Also, avoid adding extra liquid; the roast and seasonings create enough moisture as they cook. Finally, be careful not to overseason if using salted butter and regular mixes, as they can be salty.
How to tell it’s done
The roast is done when it is fork-tender: a fork inserted into the thickest part should twist easily and the meat should shred with little resistance.
The internal temperature should reach at least 145°F (63°C) for food safety, but for shredding, it needs to be higher—around 190°F (88°C)—so the collagen has fully broken down. If the meat is still tough, continue cooking and check every 30 minutes. The sauce should be bubbling gently and the pepperoncini soft.
- Steaks, chops and roasts: 145°F (63°C) in the thickest part, then a 3-minute rest
Up next · Part 3 of 3
4 variations · storage & make-ahead · 5 answers · printable card
Tips, FAQ & printable recipe (Part 3)← Back to the ingredients (Part 1)