Dinner · Part 2 of 3: Instructions
Pepper Jack Roasted Garlic Scalloped Potatoes: Crockpot Step-by-step instructions
- Prep
- Cook
- Total
- Serves
- 8
Before you start
Before starting, make sure the slow cooker is clean and ready. If using a mandoline, set it to 1/8 inch for even slices. Have the caramelized onions and roasted garlic cream sauce prepared, or use store-bought versions.
Shred the pepper jack cheese from a block for better melting. Measure out the crispy French-fried onions. No need to preheat anything—just assemble the layers and let the slow cooker do the rest.
Ingredients at a glance (5)
- 3 lb Yukon Gold potatoes, thinly sliced (about 1/8 inch thick)
- 1 1/2 cups caramelized onions
- 2 cups roasted garlic cream sauce
- 2 cups shredded pepper jack cheese
- 1 cup crispy French-fried onions
Instructions
Layer and Pour
- Layer the Potatoes and OnionsSlice the Yukon Gold potatoes into thin rounds, about 1/8 inch thick, using a mandoline or sharp knife. Spread one-third of the potato slices in an even layer in the bottom of a 6-quart slow cooker. Top with half of the caramelized onions, spreading them evenly over the potatoes.Look for The first potato layer should cover the bottom completely, with onions scattered evenly.Tip Use a mandoline for uniform slices so the potatoes cook evenly.
- Repeat the LayersAdd another third of the potato slices over the onions. Top with the remaining caramelized onions. Arrange the final third of the potato slices on top, creating a third layer.Look for The layers should be visible from the side, with potatoes and onions alternating.Tip Press down gently on each layer to compact it slightly.
- Pour the Cream SaucePour the roasted garlic cream sauce evenly over the layered potatoes and onions. Use a spatula to gently spread the sauce so it seeps between the layers.Look for The sauce should cover the top and pool around the edges.Tip Tilt the slow cooker insert slightly to help the sauce distribute.
At the end of this phase, the slow cooker insert is filled with alternating layers of potato slices and caramelized onions, topped with a generous pour of roasted garlic cream sauce.
The sauce should be evenly distributed, and the layers should look neat and uniform. The potatoes should be tightly packed but not compressed. This is the foundation of the dish, so take a moment to ensure the layers are even.
Top and Cook
- Add the Cheese and Crispy OnionsSprinkle the shredded pepper jack cheese evenly over the top of the potato mixture. Then scatter the crispy French-fried onions over the cheese, covering the surface completely.Look for The top should be fully covered with cheese and crispy onions.Tip For extra crunch, add the French-fried onions halfway through cooking instead of at the start.
- Slow-Cook Until TenderCover the slow cooker and cook on low for 4 to 5 hours, or on high for 2 to 3 hours, until the potatoes are fork-tender and the sauce is bubbling around the edges. Do not stir during cooking, as this can break up the layers.Look for The sauce will be bubbly and the top golden brown; a knife inserted into the center meets no resistance.Tip Check for doneness at the shortest time, as slow cookers vary.
After adding the cheese and crispy onions, the top of the casserole is completely covered. During cooking, the sauce will start to bubble around the edges, and the cheese will melt and turn golden. The kitchen will smell of roasted garlic and onions. The potatoes should be fork-tender when tested. The top will look puffy and golden, with the crispy onions adding a dark, crunchy layer.
Rest and Serve
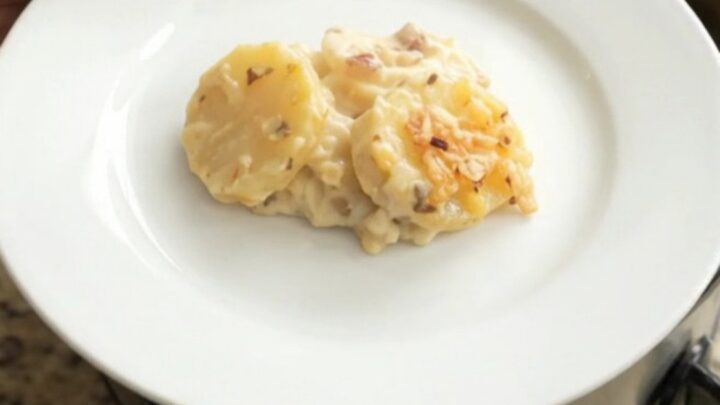
- Serve the Scalloped PotatoesOnce the potatoes are tender, turn off the slow cooker. Let the dish rest for 10 minutes before serving. Use a large spoon to scoop out portions onto plates, making sure to include the crispy topping.Look for The potatoes should be creamy and hold their shape when scooped.Tip For a cleaner serve, use a spatula to lift portions from the bottom.
Once the slow cooker is off, the casserole needs a brief rest to set. The sauce will thicken slightly as it cools. When scooping, the potatoes should hold their shape and the layers should be visible. The top should have a crispy, golden crust that contrasts with the creamy interior. Serve warm, and enjoy the perfect balance of textures and flavors.
Common mistakes
One common mistake is stirring the potatoes during cooking, which can break apart the layers and create a mashed texture. Another is using too much sauce, which can make the dish soupy—stick to the measured amount.
If the potatoes are sliced too thick, they may not cook through in time; use a mandoline for consistent thin slices. Also, be careful not to overcook, as the potatoes will eventually turn mushy. Finally, avoid lifting the lid frequently, as this releases heat and extends cooking time.
How to tell it’s done
The scalloped potatoes are done when a knife or fork slides through the center with almost no resistance. The sauce should be bubbling gently at the edges, and the top should be golden brown with melted cheese. The potatoes should be tender but not falling apart.
If the potatoes are still firm after the suggested cooking time, continue cooking in 30-minute increments until they are fork-tender. The internal temperature of the casserole should be at least 165°F (74°C) for food safety, though this dish contains no raw meat.
Up next · Part 3 of 3
4 variations · storage & make-ahead · 5 answers · printable card
Tips, FAQ & printable recipe (Part 3)← Back to the ingredients (Part 1)