Desserts · Part 2 of 3: Instructions
Decadent Peanut Butter Crunch Lasagna Step-by-step instructions
- Prep
- Cook
- Total
- Serves
- 12
Before you start
Before beginning, ensure all ingredients are measured and ready to go. The cream cheese must be softened to room temperature for at least thirty minutes before you start mixing; this is crucial for achieving a smooth, lump-free filling.
Clear enough space in your refrigerator to accommodate the 9x13 inch baking dish, ensuring it sits on a level surface so the layers remain even while chilling.
Ingredients at a glance (4)
- 16 oz cream cheese, softened
- 1 cup creamy peanut butter
- 1 cup chocolate fudge sauce
- 1/2 cup peanut butter chips
Instructions
Creaming the base
- Prepare the peanut butter creamIn a large mixing bowl, combine the softened cream cheese and creamy peanut butter. Use an electric hand mixer on medium speed to beat the mixture until it is completely smooth and fluffy, ensuring there are no lumps remaining in the cream.Look for The mixture should reach a light, airy, and uniform consistency.Tip Ensure the cream cheese is at room temperature before starting to avoid any stubborn lumps.
The peanut butter and cream cheese mixture should be completely smooth, with a pale color and a light, whipped texture that holds soft peaks when the mixer is lifted and moved.
Layering the components
- Assemble the layersSpread the peanut butter cream mixture evenly into the bottom of a 9x13 inch baking dish using an offset spatula. Drizzle the rich chocolate fudge sauce over the cream layer, using a knife or spatula to gently swirl it throughout for a marble effect.Look for The fudge should be swirled enough to create distinct ribbons of chocolate.Tip Clean your offset spatula between spreading layers to keep the colors distinct and clean.
The cream layer should be spread to the edges of the dish, and the chocolate fudge should be visible as distinct, appealing swirls that do not completely muddy the peanut butter base.
Final setting
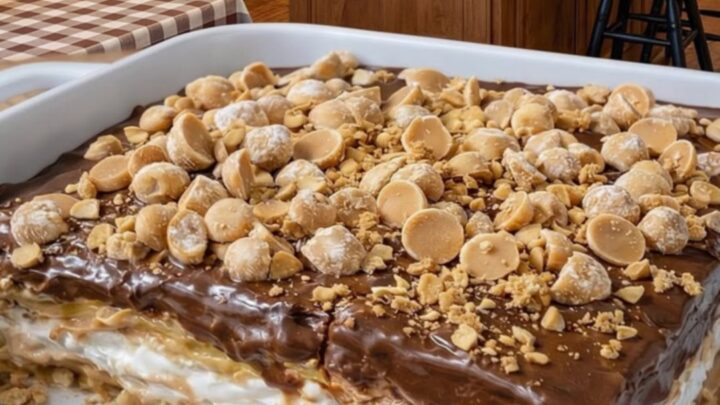
- Finish and chillScatter the peanut butter chips evenly over the top of the lasagna. Place the assembled dish in the refrigerator for at least two hours to allow the layers to set properly before slicing and serving. This ensures the clean, professional look of each slice.Look for The lasagna is fully set when it feels firm to the touch.Tip Use a warm, dry knife for the cleanest slices when serving this dessert.
After chilling, the lasagna should be firm and cool to the touch. The surface should look clean, with the peanut butter chips sitting clearly on top, ready to be sliced cleanly into individual portions.
Common mistakes
A common mistake is using cream cheese that is still cold, which leads to a lumpy filling that will not spread evenly. Another error is over-swirling the chocolate fudge, which can blend it completely into the cream rather than leaving distinct ribbons.
Finally, failing to chill the dessert for the full two hours often results in messy slices, as the layers need sufficient time to bond and firm up properly.
How to tell it’s done
The dessert is considered done when the layers have firmed up sufficiently in the refrigerator.
After the two-hour chill time, the peanut butter cream should feel set, and the entire lasagna should be stable enough to hold its shape when lifted with a spatula.
There is no internal temperature to monitor for this no-bake dessert, as all ingredients are shelf-stable or ready to eat.
Up next · Part 3 of 3
2 variations · storage & make-ahead · 3 answers · printable card
Tips, FAQ & printable recipe (Part 3)← Back to the ingredients (Part 1)