Desserts · Part 1 of 3: Ingredients
Peanut Butter Caramel Crunch Dark Chocolate Fudge Bars
- Prep
- Cook
- Total
- Serves
- 16
This dark chocolate fudge is anything but ordinary. A thick, dense base of rich 70% chocolate is topped with a crisp, golden crunch and swirled with creamy peanut butter and salted caramel.
Each bar offers a satisfying snap, revealing beautiful layers of flavor and texture. Perfect for holiday trays, gift boxes, or a weekend baking project, these fudge bars are as impressive to look at as they are delicious to eat.
This recipe turns a classic fudge into a showstopping layered dessert. The base is a deeply chocolatey fudge made from grated dark chocolate and sweetened condensed milk, giving it a dense, fudgy texture that holds its shape when sliced.
On top, a quick stovetop crunch made from crispy rice cereal and brown sugar adds a golden, buttery crispness.
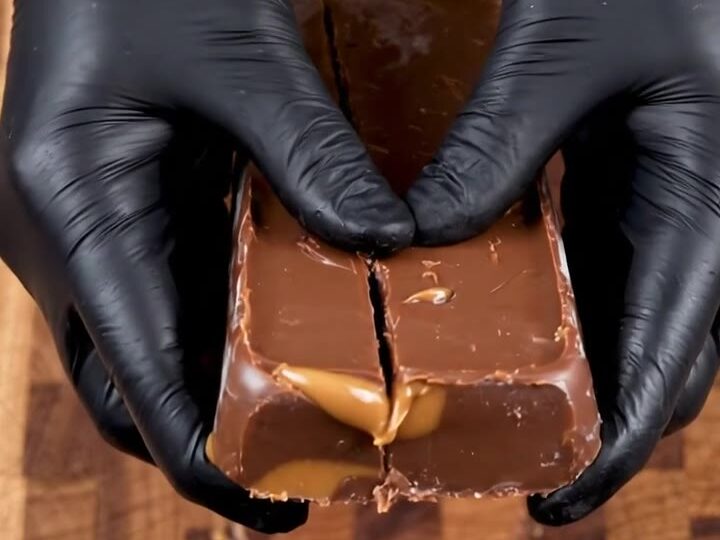
Swirls of creamy peanut butter and salted caramel are pulled through the fudge before it sets, creating ribbons of nutty and salty-sweet flavor. The result is a bar that snaps cleanly, revealing a beautiful cross-section of dark chocolate, caramel, and peanut butter.
Ingredients
Crunch Topping
- 1 1/2 cups crispy rice cereal
- 3 tbsp unsalted butter
- 2 tbsp light brown sugar
Fudge Base
- 1 1/2 lb 70% dark chocolate, finely grated
- 1 can (14 oz) sweetened condensed milk
- 1 tsp vanilla extract
- 1/4 tsp salt
Swirls
- 1/2 cup creamy peanut butter
- 1/3 cup salted caramel sauce
Why this recipe works
Grating the chocolate rather than chopping it allows it to melt quickly and evenly into the sweetened condensed milk, creating a smooth, lump-free fudge base.
The fine shreds dissolve with gentle heat, preventing the chocolate from seizing or scorching. This technique also gives the fudge a silky, dense texture that sets firmly without becoming hard or crumbly.
The stovetop crunch is made by coating crispy rice cereal with melted butter and brown sugar, then toasting it until golden. This creates a brittle, caramelized coating that stays crisp even after being pressed onto the fudge. The contrast between the crunchy top and the creamy fudge is what makes these bars so satisfying to bite into.
Notes and substitutions
Use a high-quality 70% dark chocolate for the best flavor. The percentage matters—it gives the fudge a deep, slightly bitter edge that balances the sweetness of the condensed milk and caramel. If you prefer a sweeter fudge, you can use a 60% chocolate, but the texture will be slightly softer.
The peanut butter should be creamy and well-stirred. Natural peanut butter that has separated can be used, but it may make the swirls less smooth. The salted caramel sauce can be store-bought or homemade; if using store-bought, look for one with a thick consistency so it doesn't sink into the fudge.
- crispy rice cereal: crushed cornflakes or crushed graham crackers for a different crunch
- creamy peanut butter: crunchy peanut butter for extra texture, or almond butter for a different nut flavor
- salted caramel sauce: store-bought caramel sauce with a pinch of flaky sea salt added
- 70% dark chocolate: semi-sweet chocolate (about 60%) for a sweeter fudge
Equipment
- Box grater
- Parchment paper
- 9x9-inch baking pan
- Medium saucepan
- Rubber spatula
- Sharp knife
- Cutting board
Up next · Part 2 of 3
8 steps · 10 min of cooking · what to look for at each stage
Step-by-step instructions (Part 2)