Dinner · Part 2 of 3: Instructions
Parmesan Meatball Marinara Tortellini Crockpot Dinner Step-by-step instructions
- Prep
- Cook
- Total
- Serves
- 6
Before you start
Before starting, make sure the slow cooker is clean and dry. If using fresh meatballs, you can place them straight in; no need to brown. Set out the tortellini, marinara, and cheeses so they're ready to layer. Have a large spoon ready for serving.
There's no chopping or pre-cooking required, so the prep is just about gathering ingredients and measuring. If you want a lighter version, you can use part-skim mozzarella, but the flavor will be slightly less rich.
Ingredients at a glance (5)
- 2 lb homestyle Italian beef meatballs
- 20 oz refrigerated three-cheese tortellini
- 24 oz crushed San Marzano marinara sauce
- 2 cups shredded Italian four-cheese blend
- 1/2 cup freshly grated Parmigiano-Reggiano
Instructions
Layer and Top
- Layer the IngredientsPlace the beef meatballs in an even layer in the bottom of a 6-quart slow cooker. Scatter the refrigerated three-cheese tortellini over the meatballs. Pour the crushed San Marzano marinara sauce evenly over the top, covering the pasta and meatballs as much as possible.Look for The slow cooker should be about half full, with the sauce pooling around the meatballs and tortellini.Tip No need to stir—the layers will meld as they cook.
- Add the CheesesSprinkle the shredded Italian four-cheese blend evenly over the sauce, then top with the freshly grated Parmigiano-Reggiano. Cover the slow cooker with the lid.Look for The top is completely covered with a thick layer of cheese.Tip Grating the Parmesan fresh gives the best melt and flavor.
At this stage, the slow cooker is filled with even layers: meatballs on the bottom, tortellini scattered on top, and marinara poured over everything. The cheese blend and Parmesan form a snowy cap. The colors are vibrant: deep red sauce, white cheese, and the golden hue of the tortellini. Everything is ready for the lid to go on. There's no need to stir; the layers will meld during cooking.
Slow-Cook and Check
- Slow CookCook on LOW for 4 to 5 hours, or on HIGH for 2 to 3 hours, until the meatballs are cooked through and the tortellini are tender. Do not stir during cooking, as that can break up the tortellini and disturb the cheese crust. If the edges start to brown more than you like, that's fine—it adds flavor.Look for The sauce is bubbling gently around the edges and the cheese is melted and golden in spots.Safe temperature 160°F (71°C) internal temperature (ground meat)Tip Resist the urge to lift the lid; every peek releases heat and extends cooking time.
- Check the MeatballsAfter the minimum cooking time, check that the meatballs are fully cooked. Insert an instant-read thermometer into the center of a meatball; it should read at least 160°F (71°C). If not, continue cooking for another 30 minutes and check again.Look for The meatballs are firm and have no pink in the center.Safe temperature 160°F (71°C) internal temperature (ground meat)Tip If using frozen meatballs, they may need the longer end of the time range.
After a few hours, the aroma of simmering marinara and melting cheese fills the kitchen. The sauce is bubbling around the edges, and the cheese has melted into a glossy, golden layer. The meatballs are cooked through, and the tortellini are tender. The texture is saucy and rich, with the cheese stretching when you lift the lid. A quick temperature check confirms the meatballs are safe to eat.
Scoop and Serve
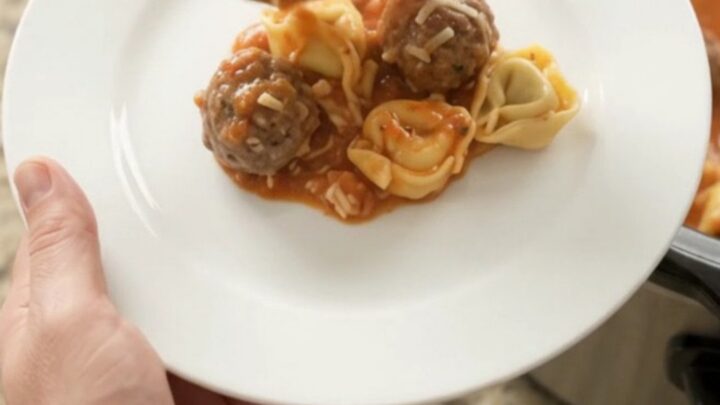
- ServeTurn off the slow cooker. Using a large spoon, gently scoop the meatball and tortellini mixture onto plates or into bowls, making sure to get some of the cheesy sauce. Serve hot, with extra Parmesan on the side if desired.Look for The cheese stretches as you scoop, and steam rises from the creamy sauce.Tip For a nice presentation, spoon onto a white plate so the colors pop.
The finished dish is bubbling and fragrant, with a golden cheese crust that crackles slightly when you spoon into it. The sauce is thick and clinging to the pasta and meatballs.
When served, the cheese stretches in long ribbons, and steam rises from the bowl. The meatballs are fork-tender, and the tortellini are plump and juicy. It's ready to eat immediately, though letting it rest for a few minutes helps the sauce set.
Common mistakes
One common mistake is lifting the lid too often to check on the dish, which lets out heat and extends cooking time. Another is over-stirring, which can break up the tortellini and turn the sauce cloudy.
Be careful not to overcook, or the tortellini will become mushy and the cheese may burn on the edges. Also, don't skip the cheese layer—it's what creates that golden crust. If the sauce seems too thick at the end, stir in a splash of water or broth to loosen it.
How to tell it’s done
The dish is done when the meatballs are cooked through and the tortellini are tender. The internal temperature of the meatballs should reach at least 160°F (71°C). The sauce should be bubbling gently around the edges, and the cheese on top should be fully melted and starting to brown in spots.
The tortellini should be plump and soft when pierced with a fork, but not falling apart. If the mixture looks too saucy, let it sit for 5 minutes before serving to thicken slightly.
- Ground meat: 160°F (71°C) in the thickest part
Up next · Part 3 of 3
4 variations · storage & make-ahead · 5 answers · printable card
Tips, FAQ & printable recipe (Part 3)← Back to the ingredients (Part 1)