Desserts · Part 2 of 3: Instructions
Decadent Oreo Icebox Cake with Whipped Cream Step-by-step instructions
- Prep
- Cook
- Total
- Serves
- 8
Before you start
Ensure the heavy whipping cream is thoroughly chilled before starting, as cold cream whips much faster and maintains a more stable structure.
Prepare a clean, dry 8-inch square glass dish and verify that the electric mixer is ready for use. Have the cookies unpacked and ready for assembly to maintain the flow of the layering process once the cream is prepared.
Ingredients at a glance (2)
- 1 lb chocolate sandwich cookies
- 3 cups heavy whipping cream
Instructions
Whipping the cream
- Prepare the whipped creamPour the heavy whipping cream into a large, chilled mixing bowl. Using an electric mixer, beat the cream on medium-high speed until stiff peaks form, ensuring it is thick enough to hold its shape between the cookie layers.Look for The cream should form stiff, glossy peaks that stand up straight on the whisk.Tip Chill your mixing bowl in the freezer for ten minutes before whipping the cream for faster results.
The whipped cream should be thick, voluminous, and hold stiff, glossy peaks. When the beaters are lifted, the cream should remain attached and maintain its shape perfectly. If the cream appears thin or liquid at the bottom of the bowl, continue beating for another minute, but be careful not to overbeat, which would turn it into butter.
Layering the dessert
- Assemble the cake layersSpread a thin, even layer of whipped cream on the bottom of an 8-inch square glass dish. Arrange a single layer of chocolate sandwich cookies over the cream, breaking them as needed to cover the gaps. Continue alternating layers of cream and cookies until all ingredients are used, finishing with a generous layer of cream on top.Look for Ensure the cream is spread to the edges of the dish to create clean, visible layers.Tip Use a small offset spatula to smooth the cream layers for a professional appearance.
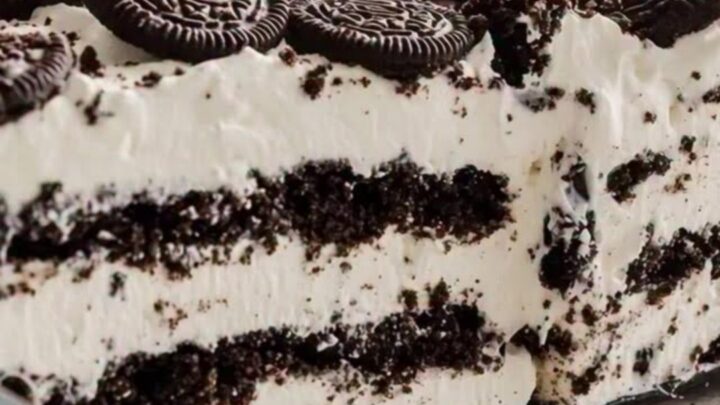
The layers should be uniform, with the cream spread edge-to-edge to ensure every cookie is adequately covered. The dish should look neat, with clean lines of dark cookie and white cream visible through the sides of the glass. Ensure the final layer of cream is smooth and even, providing a clean canvas for the final garnish of crushed cookies.
Chilling and setting
- Chill and garnishTop the cake with crushed chocolate sandwich cookies. Cover the dish and refrigerate for at least four hours, or preferably overnight, to allow the cookies to soften into a cake-like texture. Serve cold directly from the refrigerator.Look for The cake is ready when the cookies have softened and the layers are set firmly.Tip Cover the top with plastic wrap to prevent the cream from absorbing other refrigerator odors.
After the required chilling time, the dessert should be completely set and firm to the touch. The cookies should have softened significantly, absorbing the moisture from the cream.
The overall appearance will be more compact than when it was first assembled, reflecting the successful integration of the two primary components into a single, cohesive dessert.
Common mistakes
A common mistake is using cream that has not been whipped to stiff peaks, which leads to a runny cake that fails to hold its shape when sliced.
Another error is failing to chill the cake for the full duration, as the cookies require sufficient time to absorb the moisture from the cream. Rushing the assembly or using uneven layers can also result in a messy presentation that lacks the signature layered look.
How to tell it’s done
The cake is considered done when the cookies have fully softened, which can be tested by gently pressing a small knife into the center; it should meet no resistance from hard cookie pieces.
The structure should feel firm and set when the dish is tilted slightly, and the layers should appear distinct and cohesive without any pooling of liquid cream at the bottom of the dish.
Up next · Part 3 of 3
2 variations · storage & make-ahead · 3 answers · printable card
Tips, FAQ & printable recipe (Part 3)← Back to the ingredients (Part 1)