Desserts · Part 2 of 3: Instructions
Decadent Oreo Earthquake Cake with Cream Cheese Layers Step-by-step instructions
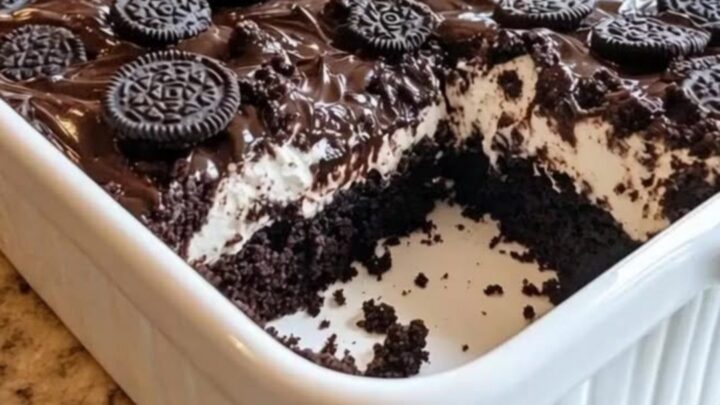
- Prep
- Cook
- Total
- Serves
- 12
Before you start
Before beginning, ensure the cream cheese is at room temperature, as this facilitates a smoother mixture. Preheat your oven early to ensure it reaches the correct temperature. Gather your mixing bowls, an electric mixer, and a spatula.
Prepare your baking dish by greasing it thoroughly with non-stick spray or butter to ensure the finished cake lifts cleanly. Have a clean cutting board ready for chopping the cookies into uniform pieces before you start the mixing process.
Ingredients at a glance (3)
- 1 box chocolate cake mix, prepared according to package instructions
- 8 oz cream cheese, softened
- 15 Oreo cookies, coarsely chopped
Instructions
Base Preparation
- Prepare the BasePreheat the oven to 350°F (175°C). Prepare the chocolate cake mix in a large bowl according to the package directions. Pour the batter into a greased 9x13 inch baking dish, spreading it out evenly with a spatula to ensure a uniform base for the subsequent layers.Look for The batter should be smooth and spread evenly in the baking dish without any large air bubbles remaining.Tip Ensure the baking dish is well-greased so the cake releases easily after baking.
The cake batter should be smooth, shiny, and spread into a perfectly level layer across the bottom of the baking dish. Ensure no air pockets are trapped underneath the batter.
Swirling the Cream Cheese
- Create the Creamy SwirlIn a separate bowl, beat the softened cream cheese until the mixture is smooth. Drop spoonfuls of this cream cheese mixture over the chocolate cake batter. Use a knife or spatula to gently swirl the mixture into the cake batter to create the signature earthquake effect.Look for The cream cheese mixture should be creamy and free of lumps before being swirled into the chocolate base.Tip Do not over-mix the swirl; keeping distinct ribbons of cream cheese is what gives the cake its classic look.
The cream cheese mixture should be visibly swirled through the chocolate batter.
You are looking for a marbled effect where the white cheesecake is visible against the dark chocolate base, ensuring that the cream cheese is distributed throughout the pan for consistent flavor in every single bite that you serve.
Baking to Completion
- Top and BakeSprinkle the chopped Oreo cookies generously over the top of the cake. Place the baking dish in the preheated oven and bake for 40 to 45 minutes, or until a toothpick inserted into the center comes out with just a few moist crumbs. Remove from the oven and allow the cake to cool on a wire rack before serving.Look for The cake is done when the chocolate portion is set and the cream cheese layer is firm to the touch.Tip Letting the cake rest for at least 20 minutes helps the layers set perfectly for easier slicing.
The cake should have risen, and the top will appear slightly craggy and uneven, just like an earthquake. The cookie topping should be toasted and fragrant, and the center should be firm to the touch, indicating that the cake is fully cooked and ready to be removed from the oven to cool down properly.
Common mistakes
A common mistake is using cream cheese that is still cold from the refrigerator, which leads to lumps in the cheesecake mixture that will not swirl properly. Another error is over-mixing the cheesecake layer into the chocolate batter; remember that you want distinct swirls, not a completely blended color.
Finally, ensure the oven is fully preheated; placing the cake into a cold oven will prevent the proper rise, leading to a flat, dense cake rather than the characteristic earthquake texture.
How to tell it’s done
The cake is considered done when the chocolate base is fully set and firm to the touch. The cream cheese layer should be slightly golden in specific spots where it has broken through the surface.
Use a wooden toothpick to test the center; it should come out with a few moist crumbs attached, indicating the cake is perfectly baked and not dried out. If the toothpick comes out covered in raw batter, continue baking for an additional three minutes.
Up next · Part 3 of 3
2 variations · storage & make-ahead · 3 answers · printable card
Tips, FAQ & printable recipe (Part 3)← Back to the ingredients (Part 1)