Dinner · Part 2 of 3: Instructions
One Skillet Mexican Rice Casserole Step-by-step instructions
- Prep
- Cook
- Total
- Serves
- 4
Before you start
Before starting the cooking process, organize and measure all the ingredients to ensure a smooth workflow. Dice the colorful bell peppers into uniform, bite-sized pieces so they cook evenly. Drain the canned black beans thoroughly.
Measure out the pre-cooked Mexican rice, corn, and shredded cheese. Having everything prepared beforehand prevents the vegetables from overcooking and ensures the casserole comes together quickly and seamlessly.
Ingredients at a glance (5)
- 1 cup colorful bell peppers, diced
- 1 cup sweet corn
- 1 cup black beans, drained
- 3 cups cooked Mexican rice
- 1 1/2 cups shredded cheese
Instructions
Sautéing the Vegetables
- Sauté the VegetablesHeat a large skillet over medium heat. Add the diced colorful bell peppers and sweet corn, sautéing for about three to four minutes until the peppers begin to soften and become fragrant.Look for The vegetables should sizzle gently and release a sweet, roasted aroma.Tip Keep the vegetables moving in the pan to prevent them from sticking or browning too quickly.
The bell peppers should be slightly softened and fragrant, while the corn looks vibrant and lightly caramelized. You will hear a gentle sizzling sound in the skillet and smell the sweet, roasted aroma of the fresh vegetables cooking together.
Heating the Rice and Beans
- Combine with Rice and BeansStir the drained black beans and cooked Mexican rice directly into the skillet with the sautéed vegetables. Cook for three to five minutes, stirring frequently, until the mixture is completely heated through and well combined.Look for The rice should be steaming hot and evenly mixed with the colorful vegetables.Tip Use pre-cooked or leftover Mexican rice to keep the preparation quick and prevent the grains from turning mushy.
The pre-cooked Mexican rice and black beans should be thoroughly incorporated with the vegetables, and the entire mixture should be steaming hot. The rice grains should look moist and tender, with no cold spots remaining in the skillet.
Melting the Cheese Topping
- Add the Cheese LayerSpread the shredded cheese evenly over the top of the hot rice and vegetable mixture, covering the entire surface of the skillet.Look for The steam rising from the rice will immediately begin to soften the cheese.Tip Use freshly shredded cheese for a smoother, creamier melt and a better cheese pull.
- Melt and ServeCover the skillet with a lid and keep the heat on low for an additional three minutes, allowing the cheese to melt fully and bubble around the edges of the pan. Remove from heat and let rest for five minutes before serving.Look for The cheese must be completely melted, gooey, and stretchy when scooped.Tip Letting the casserole rest helps the flavors meld and makes serving much cleaner.
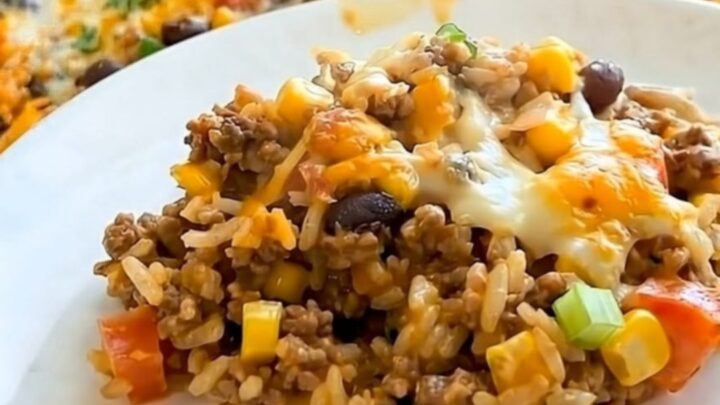
The cheese should be completely melted, bubbly, and slightly golden around the edges of the skillet. When you lift a portion with a spatula, you should see a dramatic, stretchy cheese pull with steam rising from the hot rice underneath.
Common mistakes
A common mistake is using cold, clumped rice directly from the refrigerator without breaking it up first, which can lead to uneven heating.
To avoid this, gently crumble the pre-cooked Mexican rice with your hands or a fork before adding it to the skillet.
Another error is leaving the lid off while trying to melt the cheese, which allows heat to escape and results in a dry top layer rather than a gooey, bubbly cheese pull.
How to tell it’s done
The casserole is fully cooked when the rice and vegetables are steaming hot throughout and the cheese on top is entirely melted and bubbling vigorously. Test this by gently inserting a fork into the center of the skillet; the rice should feel soft and hot.
Because this recipe contains no raw meats, poultry, or raw eggs, there is no internal target temperature required, making it exceptionally easy to gauge readiness by texture and appearance alone.
Up next · Part 3 of 3
3 variations · storage & make-ahead · 4 answers · printable card
Tips, FAQ & printable recipe (Part 3)← Back to the ingredients (Part 1)