Dinner · Part 2 of 3: Instructions
One-Pan Uncooked Shell Pasta with Peppers and Mozzarella Step-by-step instructions
- Prep
- Cook
- Total
- Serves
- 4
Before you start
Before starting, chop the onion and green pepper, mince the garlic, and measure out all the ingredients. Having everything ready makes the process smooth.
You'll also want a large skillet with a tight-fitting lid and a wooden spoon for stirring. No pre-cooking or boiling is needed—everything goes into the pan raw.
Ingredients at a glance (11)
- 2 cups uncooked pipe rigate shell pasta
- 1 can (14.5 oz) diced tomatoes
- 1 medium chopped onion
- 1 medium chopped green pepper
- 3 cloves minced garlic
- 2 tbsp butter
- 2 tbsp olive oil
- 1 tsp paprika
- 1/2 tsp ground cumin
- 2 1/2 cups water
- 1 cup shredded mozzarella cheese
Instructions
Combine and Boil
- Combine IngredientsIn a large skillet, combine the uncooked pipe rigate pasta, diced tomatoes with their juices, chopped onion, chopped green pepper, minced garlic, butter, olive oil, paprika, and ground cumin. Pour in the water and stir everything together until well mixed.Look for The pasta is submerged in the liquid with vegetables evenly distributed.Tip Use a wide skillet so the pasta cooks evenly; a 12-inch skillet works well.
- Bring to a BoilPlace the skillet over high heat and bring the mixture to a full boil. Once boiling, reduce the heat to low, cover the skillet with a lid, and let it simmer gently.Look for Bubbles break the surface and steam rises from the skillet.Tip Keep the lid on to trap steam and cook the pasta evenly.
At the end of this phase, the skillet should be bubbling gently with the pasta and vegetables submerged in a reddish liquid.
The butter and oil have melted, and the spices are fragrant. Give everything a quick stir to make sure nothing is stuck to the bottom.
Simmer and Thicken
- Simmer Until Pasta is TenderLet the pasta simmer covered for about 15 to 20 minutes, stirring occasionally to prevent sticking. The pasta should absorb most of the liquid and become tender.Look for The pasta is al dente and the sauce has thickened slightly.Tip If the liquid evaporates too quickly, add a splash of water and continue cooking.
- Stir in CheeseRemove the lid and stir the pasta gently. Sprinkle the shredded mozzarella over the top, then stir until the cheese melts and creates a creamy, velvety sauce.Look for The cheese pulls into long, gooey strands as you stir.Tip For extra creaminess, stir in the cheese off the heat so it doesn't clump.
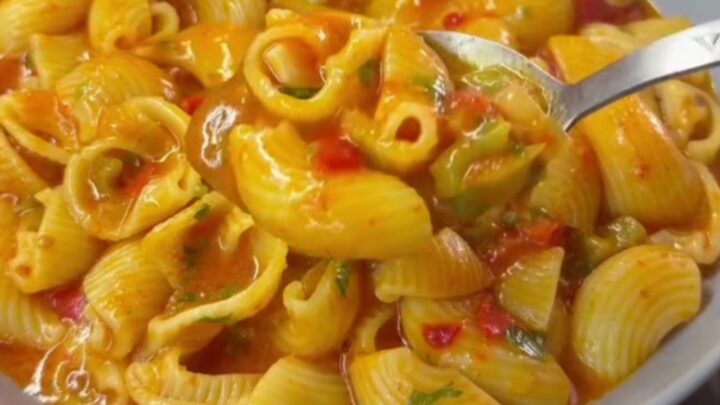
The pasta has absorbed most of the liquid and looks plump and tender. The sauce has thickened and clings to the shells. The kitchen smells of tomatoes and warm spices. Stir gently to see that the pasta moves freely and isn't sticking.
Cheese and Serve
- Serve ImmediatelyScoop generous portions of the creamy pasta into bowls. Serve hot, with extra cheese or a sprinkle of black pepper if desired.Look for The sauce coats each shell and the cheese is fully melted.Tip This dish is best enjoyed right away while the cheese is stretchy.
The mozzarella has melted into a glossy, creamy sauce that coats every shell. When you lift the spoon, the cheese stretches in long strands. The pasta is fully tender and the dish is ready to be served immediately.
Common mistakes
One common mistake is lifting the lid too often while the pasta simmers, which lets steam escape and can leave the pasta undercooked. Trust the process and keep the lid on.
Another issue is not stirring enough—pasta can stick to the bottom of the skillet, especially as the liquid reduces. Stir gently every few minutes to prevent burning. Also, avoid over-stirring the cheese, which can make it clump; fold it in just until melted.
How to tell it’s done
The pasta is done when it is tender but still has a slight bite (al dente), and the sauce has thickened to a creamy consistency. The cheese should be fully melted and stretchy when stirred.
If the pasta is still hard and the liquid has evaporated, add a few tablespoons of water and continue cooking covered for a few more minutes. There are no raw proteins in this dish, so no internal temperature check is needed.
Up next · Part 3 of 3
4 variations · storage & make-ahead · 5 answers · printable card
Tips, FAQ & printable recipe (Part 3)← Back to the ingredients (Part 1)