Dinner · Part 2 of 3: Instructions
One-Pan Roasted Tomato Rigatoni Bake Step-by-step instructions
- Prep
- Cook
- Total
- Serves
- 4
Before you start
Before starting, gather all ingredients and equipment. Preheat the oven to 400°F (200°C) for roasting. Place a large pot of salted water on the stove to boil for the pasta. Have a colander ready for draining. Measure out the heavy cream, grated parmesan, and shredded mozzarella so they are ready to go.
Set the pasta cooking water aside in a measuring cup after draining. Ensure the cast iron skillet is clean and dry. If using fresh basil, wash and dry the leaves, then pick them from the stems. This prep will make the cooking process smooth and efficient.
Ingredients at a glance (12)
- 6 ripe Roma tomatoes
- 4 whole garlic cloves
- 3 tbsp olive oil
- 1 tsp dried oregano
- 1 tsp kosher salt
- 1/2 tsp black pepper
- 1/2 cup heavy cream
- 1/2 cup grated parmesan
- 1/2 cup pasta cooking water
- 12 oz rigatoni pasta
- 2 cups shredded mozzarella
- 1/4 cup fresh basil leaves
Instructions
Roast and Sauce
- Roast the TomatoesPreheat the oven to 400°F (200°C). Place the Roma tomatoes and whole garlic cloves in a cast iron skillet. Drizzle with olive oil, then sprinkle with dried oregano, kosher salt, and black pepper. Toss to coat. Roast for 20-25 minutes, until the tomatoes are soft and blistered.Look for The tomatoes will be collapsed, charred in spots, and the garlic will be golden and tender.Tip Use a skillet that fits all tomatoes in a single layer for even roasting.
- Make the SauceRemove the skillet from the oven and let cool slightly. Using a potato masher or fork, crush the roasted tomatoes and garlic directly in the skillet. Stir in the heavy cream and grated parmesan. Add the pasta cooking water and stir until the sauce is smooth and velvety.Look for The sauce will be thick and creamy, with small tomato chunks.Tip For a smoother sauce, blend the mixture with an immersion blender before adding cream.
At the end of this phase, the tomatoes should be soft, collapsed, and blistered with charred edges. The garlic cloves should be golden and tender. When crushed, they will release a sweet, roasted aroma.
The sauce should be thick and creamy, with a deep red-orange color from the tomatoes and cream. It should taste balanced—sweet from the roasted tomatoes, savory from the parmesan, and subtly herbal from the oregano. The sauce should coat the back of a spoon and have a velvety texture.
Cook and Combine
- Cook the PastaBring a large pot of salted water to a boil. Add the rigatoni and cook according to package directions until al dente. Reserve 1/2 cup of pasta water before draining. Drain the pasta and set aside.Look for The pasta should be tender but still firm to the bite.Tip Reserve more pasta water than needed in case the sauce needs thinning.
- Combine Pasta and SauceAdd the drained rigatoni to the skillet with the sauce. Toss well to coat every piece of pasta with the creamy tomato sauce.Look for Each rigatoni should be coated with sauce, and the mixture should look glossy.Tip Use a wooden spoon to gently fold the pasta without breaking it.
- Top with MozzarellaSprinkle the shredded mozzarella evenly over the top of the pasta mixture.Look for The cheese should cover the surface completely.Tip For extra browning, use a mix of mozzarella and parmesan.
The pasta should be al dente, cooked but still firm to the bite. When tossed with the sauce, each piece of rigatoni should be evenly coated, and the mixture should look glossy and inviting. The sauce should cling to the pasta rather than pooling at the bottom. The mozzarella should be sprinkled evenly over the top, completely covering the pasta. At this point, the skillet will be full and ready for the broiler.
Broil and Serve
- Broil Until GoldenPreheat the broiler. Place the skillet under the broiler and cook for 2-4 minutes, until the cheese is melted, bubbly, and golden brown in spots.Look for The cheese will be bubbling and browned at the edges.Tip Watch carefully to prevent burning; broilers vary in intensity.
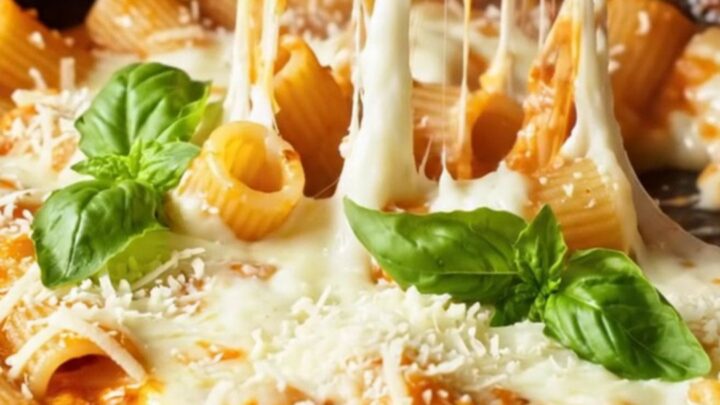
- Garnish and ServeRemove from the broiler and scatter fresh basil leaves over the top. Serve hot, scooping out portions with a large spoon to show off the cheese pull.Look for The basil will wilt slightly from the heat, releasing its aroma.Tip Let the dish rest for 2 minutes before serving to allow the cheese to set slightly.
The cheese should be melted, bubbly, and golden brown in spots, with a few darker blisters for flavor. The edges of the skillet will have crispy bits of cheese that are irresistible. The basil leaves will be bright green, slightly wilted from the heat. When you scoop into the dish, you should see long, stretchy cheese pulls. The aroma is intensely savory and comforting, with notes of roasted garlic and tomatoes.
Common mistakes
One common mistake is not roasting the tomatoes long enough. If they are not blistered and soft, the sauce will lack depth. Roast for the full 20-25 minutes, or until the skins are charred in spots. Another mistake is skipping the pasta water; it is essential for achieving the right sauce consistency.
If the sauce is too thick, add more pasta water a tablespoon at a time. Overcooking the pasta is another pitfall—cook it just until al dente, as it will continue to cook slightly when combined with the hot sauce and broiled. Finally, do not walk away from the broiler; cheese can go from golden to burnt in seconds.
How to tell it’s done
The dish is done when the cheese is fully melted, bubbly, and golden brown in spots, which typically takes 2-4 minutes under the broiler. The sauce should be thick and creamy, coating the pasta evenly. To check doneness, insert a knife into the center; it should come out hot.
The pasta should be al dente—tender but with a slight bite. There is no raw protein in this dish, so no internal temperature check is needed. Let the dish rest for 2 minutes before serving to allow the cheese to set slightly, making it easier to serve and enhancing the cheese pull.
Up next · Part 3 of 3
4 variations · storage & make-ahead · 5 answers · printable card
Tips, FAQ & printable recipe (Part 3)← Back to the ingredients (Part 1)