Dinner · Part 2 of 3: Instructions
One-Pan Roasted Sausage and Onion Bake Step-by-step instructions
- Prep
- Cook
- Total
- Serves
- 4
Before you start
Before beginning, ensure the oven rack is positioned in the center to allow for even heat circulation. Remove the sausages from the refrigerator about 20 minutes before cooking to take the chill off, which helps them roast more evenly. Have your cutting board and a sharp knife ready for slicing the onions.
Ensure your baking tray is clean and placed on a stable surface. Preheating the oven is essential; do not place the tray inside until the temperature has fully reached 400°F (200°C) to ensure the roasting process starts immediately upon entry.
Ingredients at a glance (2)
- 8 fresh ground pork sausages
- 3 large yellow onions, sliced
Instructions
Onion Foundation
- Prepare the IngredientsPreheat the oven to 400°F (200°C). Peel the yellow onions and slice them into thick, uniform half-moons. Arrange the sliced onions across the bottom of the aluminum baking tray to create a flavorful bed for the sausages.Look for The oven is preheated and the onions are evenly distributed.Tip Cut the onions into thicker slices so they maintain their texture while roasting alongside the sausages.
The onions should be sliced into uniform pieces and spread across the bottom of the pan. This layer is crucial for creating the base of the dish and should be thick enough to withstand the heat of the oven without burning. Ensure the pan is properly prepared before adding the protein.
Sausage Arrangement
- Arrange the SausagesPlace the fresh ground pork sausages on top of the onion bed in the tray. Ensure the sausages are not crowded too tightly to allow the heat to circulate properly and achieve better browning.Look for The sausages are arranged evenly on the bed of onions.Tip Ensure the sausages are not crowded too tightly to allow the heat to circulate properly and achieve better browning.
The sausages are nestled atop the onion layer. Check that the sausages are arranged so they do not overlap, which allows for consistent heat exposure. Everything should look ready for the oven with the ingredients distributed evenly across the base of the tray.
Roasted Perfection
- Roast and FinishTransfer the tray to the oven and roast for 30 to 35 minutes, or until the sausages are browned and the onions are caramelized and tender. Ensure the sausages reach an internal temperature of 160°F (71°C) before removing them from the oven. Let the dish rest for 5 minutes before serving.Look for The pan juices are bubbling, and the sausages are firm and browned.Safe temperature 160°F (71°C) internal temperature (ground meat)Tip If the sausages brown too quickly, lightly cover the tray with foil for the final few minutes of roasting.
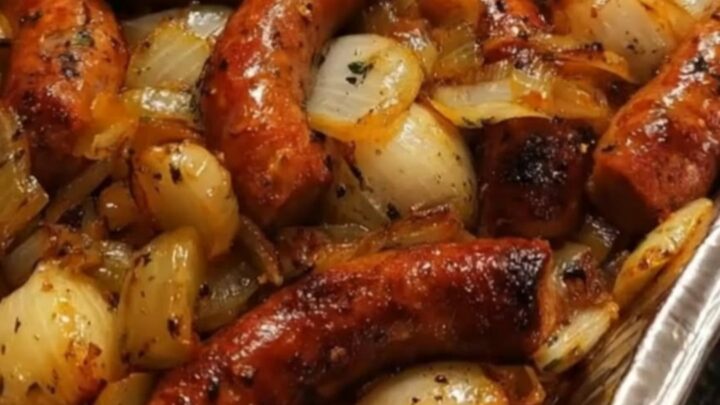
The sausages are browned, and the onions are soft and caramelized. The pan juices should be bubbling vigorously. Verify the internal temperature of the sausages before removing them from the oven. The kitchen should smell savory, and the sausages should have a deep, appetizing color.
Common mistakes
Avoid slicing the onions too thinly, as they will burn before the sausages are fully cooked; thick slices ensure they remain tender and sweet.
Do not overload the baking tray, as this prevents the hot air from reaching the bottom of the sausages and results in steamed, pale meat instead of crispy, browned skin.
Finally, ensure you do not skip the resting period, as this allows the juices to redistribute within the sausages, ensuring they remain succulent when sliced.
How to tell it’s done
The sausages are done when they are golden-brown on the outside and firm to the touch. Use a meat thermometer to verify that the thickest part of the sausage has reached an internal temperature of 160°F (71°C).
At this stage, the onions should appear deeply caramelized, soft, and slightly charred at the edges. The pan juices should be bubbling and thick, indicating that the flavors have concentrated perfectly during the roasting time.
- Ground meat: 160°F (71°C) in the thickest part
Up next · Part 3 of 3
2 variations · storage & make-ahead · 3 answers · printable card
Tips, FAQ & printable recipe (Part 3)← Back to the ingredients (Part 1)