Dinner · Part 2 of 3: Instructions
One-Pan Honey Garlic Chicken and Potatoes Step-by-step instructions
- Prep
- Cook
- Total
- Serves
- 4
Before you start
Before beginning, ensure all ingredients are measured and ready, as the cooking process moves quickly once the heat is applied. Wash and dry the chicken thighs thoroughly with paper towels to ensure the skin sears properly rather than steaming. Halve the baby potatoes into uniform pieces and mince the garlic finely.
Have your tongs and a small whisk within reach. Prepare a clean serving platter to transfer the finished chicken and vegetables once they are cooked through. Keeping the workspace organized allows for a smooth transition between searing, roasting, and glazing phases.
Ingredients at a glance (6)
- 4 pieces bone-in skin-on chicken thighs
- 1 lb baby potatoes, halved
- 1 cup cherry tomatoes
- 2 cups fresh baby spinach
- 1/3 cup honey
- 3 cloves garlic, minced
Instructions
Searing and Initial Roasting
- Sear the ChickenPlace the chicken thighs skin-side down in the hot cast-iron skillet. Sear for about 6 to 8 minutes until the skin becomes golden brown and crispy. Flip the chicken using tongs to ensure even cooking.Look for The chicken skin should release easily from the skillet once it is sufficiently browned and crispy.Tip Avoid moving the chicken pieces until they have developed a deep golden crust to prevent sticking.
- Add Aromatics and VegetablesArrange the halved baby potatoes around the chicken thighs in the skillet. Reduce heat to medium and cook for 10 minutes. Add the minced garlic and cherry tomatoes to the pan, stirring gently to coat them in the rendered chicken fat.Look for The tomatoes should begin to blister and soften, while the potatoes start to tenderize.Tip Make sure the potatoes are in a single layer to ensure they roast evenly alongside the chicken.
At the end of this phase, the chicken skin should be deep golden brown and crispy, and the potatoes should be arranged in the pan. The kitchen should begin to smell of rendered fat and roasted starch. Check that the chicken is not sticking to the skillet and that the potatoes are beginning to take on color from the pan's surface. Ensure the heat is adjusted to medium to allow the potatoes to cook through without burning the chicken skin.
Glazing and Reduction
- Glaze the DishIn a small bowl, whisk together the honey and minced garlic. Pour this mixture evenly over the chicken and vegetables in the skillet. Continue to cook for another 10 to 12 minutes, basting the chicken occasionally with the honey garlic sauce until it thickens and becomes glossy.Look for The sauce will bubble and thicken into a sticky, syrupy glaze that coats the back of a spoon.Tip Watch the heat closely during this stage to prevent the honey from burning at the bottom of the pan.
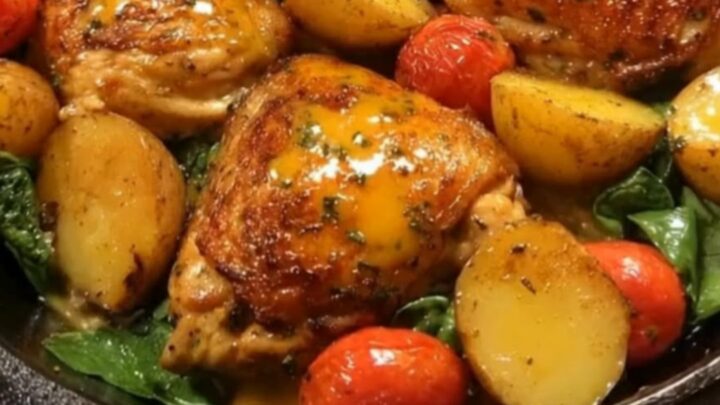
During this phase, the honey garlic sauce should be bubbling around the chicken and vegetables. The liquid should slowly transform into a thick, syrupy glaze that coats every surface. You should observe the sauce darkening in color and becoming glossy.
Check that the tomatoes have started to blister and soften. If the sauce is thickening too rapidly, lower the heat slightly to maintain a gentle simmer, ensuring the flavors meld together perfectly without burning.
Finishing and Wilted Spinach
- Finish and ServeToss the fresh baby spinach into the skillet and cook for 1 to 2 minutes until just wilted. Ensure the chicken has reached an internal temperature of 165°F (74°C). Remove from heat and let the chicken rest for 5 minutes before serving to allow the juices to redistribute.Look for The chicken meat should be opaque and pull away slightly from the bone.Safe temperature 165°F (74°C) internal temperature (poultry)Tip The residual heat from the skillet will continue to cook the spinach perfectly without making it soggy.
The final phase is marked by the addition of fresh spinach, which should wilt quickly into the hot glaze. The chicken should be fully cooked, tender, and coated in a rich, sticky sauce. Check that the potatoes are tender throughout. The overall dish should look vibrant, with the green of the spinach contrasting against the golden glaze of the chicken and the roasted potatoes. Ensure everything is heated through before removing from the heat to rest.
Common mistakes
A common mistake is overcrowding the pan, which prevents the chicken skin from crisping and causes the potatoes to steam instead of roast. Ensure there is enough space between pieces for heat to circulate. Another error is adding the honey garlic sauce too early, which can lead to burnt sugar before the chicken is cooked through.
Always wait until the chicken has been seared and the potatoes have started to soften before adding the glaze. Finally, avoid using high heat for the entire process, as this will burn the garlic and honey.
How to tell it’s done
The chicken is done when the skin is golden and crispy, and the meat reaches an internal temperature of 165°F (74°C). The potatoes should be fork-tender, meaning a knife or fork slides into them with no resistance. The glaze should be thick, syrupy, and glossy, clinging to the back of a spoon.
If the sauce appears too thin, continue to cook over medium heat for another minute or two, stirring constantly to prevent the sugars from scorching. Always verify the chicken temperature at the thickest part near the bone.
- Poultry: 165°F (74°C) in the thickest part
Up next · Part 3 of 3
2 variations · storage & make-ahead · 3 answers · printable card
Tips, FAQ & printable recipe (Part 3)← Back to the ingredients (Part 1)