Dinner · Part 2 of 3: Instructions
One-Pan Cincinnati Chili Spaghetti Bake Step-by-step instructions
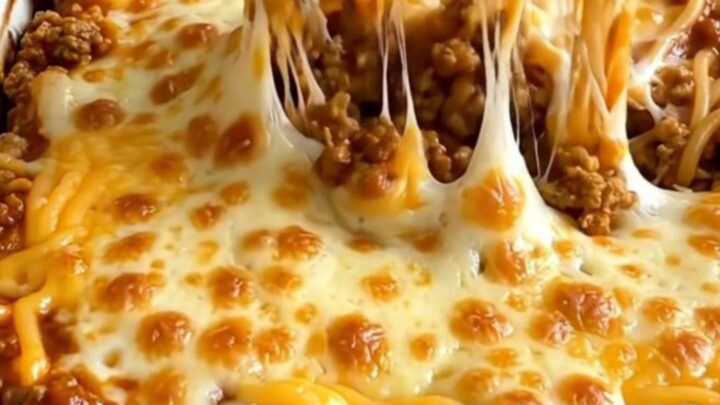
- Prep
- Cook
- Total
- Serves
- 6
Before you start
Before beginning, ensure that the oven is fully preheated to 375°F (190°C) to ensure the pasta starts cooking immediately. Have all ingredients measured and ready to assemble. Finely shred the mild cheddar cheese to ensure it melts evenly across the surface of the dish.
If the chili sauce is cold from the refrigerator, consider warming it slightly on the stovetop before pouring it over the pasta, as this helps reduce the overall baking time and ensures the meat cooks consistently.
Ingredients at a glance (4)
- 8 oz spaghetti, broken in half
- 1 lb ground turkey
- 2 cups chili-spiced tomato sauce, made ahead
- 2 cups mild cheddar cheese, finely shredded
Instructions
Layering the Dish
- Prepare the basePreheat the oven to 375°F (190°C). In a 9x13 inch ceramic baking dish, spread the broken spaghetti pieces evenly across the bottom. Place the raw ground turkey crumbles directly over the dry pasta layer.Look for The pasta should be spread out in an even layer to ensure it cooks evenly.Tip Break the pasta into smaller pieces to ensure it fits well in the dish and cooks through.
The dish should look clean with the pasta and turkey evenly distributed at the bottom. Check that the pasta pieces are broken small enough to fit within the perimeter of the dish without piling up too high, as even distribution is key to uniform cooking throughout the entire baking process.
Baking the Base
- Add sauce and bakePour the chili-spiced tomato sauce over the pasta and turkey. Ensure the sauce covers all the dry pasta. Cover the dish with foil and bake for 30 minutes. Remove the foil and continue baking until the turkey reaches 165°F (74°C).Look for The sauce should be bubbling and the pasta should begin to soften.Safe temperature 165°F (74°C) internal temperature (poultry)Tip If the sauce looks too thick, add a small splash of water or broth before covering.
The sauce should be bubbling vigorously and the aroma of the spices should be noticeable throughout the kitchen.
Carefully lift a corner of the foil to ensure the pasta is absorbing the liquid and softening. The meat should be fully cooked and incorporated into the sauce before proceeding to the cheese topping stage.
Melting the Cheese
- Add cheese and serveRemove the dish from the oven and sprinkle the finely shredded mild cheddar cheese over the top. Return the dish to the oven for an additional 5-10 minutes, or until the cheese is melted and bubbling. Let the dish rest for 5 minutes before serving.Look for The cheese should be completely melted with slightly browned, bubbling edges.Tip Use a large serving spoon to scoop through the layers, ensuring a mix of pasta, turkey, and sauce in every serving.
The cheese should be completely melted and bubbly, with a light golden hue on the surface. The entire dish should appear cohesive, with no dry spots. Once the cheese reaches this stage, the casserole is ready to be removed from the oven for its final resting period.
Common mistakes
A common mistake is failing to fully submerge the dry pasta in the sauce, which can lead to brittle, undercooked noodles. Ensure the sauce covers all pasta pieces before covering the dish with foil.
Another error is adding the cheese too early; wait until the final stage of baking to ensure the cheese melts perfectly without becoming tough or oily. Finally, avoid skipping the resting period, as it allows the sauce to settle and the layers to set.
How to tell it’s done
The dish is ready when the ground turkey has reached an internal temperature of 165°F (74°C) when checked with a food thermometer.
At this stage, the spaghetti should be tender but still hold its shape, and the sauce should have thickened into a rich, flavorful coating. The cheese on top should be melted, bubbling, and showing slight browning at the edges, indicating the final bake is complete.
- Poultry: 165°F (74°C) in the thickest part
- Ground meat: 160°F (71°C) in the thickest part
Up next · Part 3 of 3
2 variations · storage & make-ahead · 3 answers · printable card
Tips, FAQ & printable recipe (Part 3)← Back to the ingredients (Part 1)