Dinner · Part 2 of 3: Instructions
One-Dish Turkey and Ditalini Pasta Bake Step-by-step instructions
- Prep
- Cook
- Total
- Serves
- 6
Before you start
Before beginning, ensure the oven is preheated and your baking dish is clean and ready. Drain and rinse the cannellini beans thoroughly to remove excess sodium and starch.
If your carrots are not pre-diced, take a moment to cut them into small, uniform cubes to ensure they soften at the same rate as the pasta. Having all ingredients measured and ready to pour will make the assembly process seamless and quick.
Ingredients at a glance (7)
- 2 cups dry ditalini pasta
- 1 lb ground turkey
- 24 oz marinara sauce
- 1 cup chicken broth
- 15 oz cannellini beans, drained and rinsed
- 1/2 cup diced carrots
- 1/2 cup grated parmesan cheese
Instructions
Assembling the base
- Prepare the basePreheat the oven to 375°F (190°C). Arrange the dry ditalini pasta in an even layer at the bottom of a large ceramic baking dish. Take the raw ground turkey and crumble it evenly over the layer of dry pasta, ensuring the meat is distributed across the entire surface of the dish.Look for The pasta should form a flat, even base with the turkey crumbles spread on top.Tip Distribute the turkey in small, uniform pieces to ensure it cooks evenly.
At the end of this phase, the ditalini and turkey crumbles should be spread evenly across the bottom of the baking dish.
The turkey should be broken into small, uniform pieces to ensure even distribution and consistent cooking throughout the baking process. Ensure the dish is level.
Baking with sauce
- Combine and bakeIn a mixing pitcher, combine the marinara sauce, chicken broth, drained cannellini beans, and diced carrots. Pour this mixture over the pasta and turkey in the baking dish, ensuring all the pasta is submerged in liquid. Cover the dish tightly with foil and bake for 35 minutes.Look for The liquid should just cover the pasta, which will absorb the moisture while baking.Tip Ensure the foil is sealed well to trap the steam for tender pasta.
Once the sauce mixture is added and the dish is covered, the pasta begins to absorb the liquid. The foil must be completely sealed around the edges of the baking dish. The dish should feel heavy and the liquid should be visible around the sides of the pasta layer.
Final browning
- Final finish and temperature checkRemove the foil and sprinkle the grated parmesan cheese over the top. Return the dish to the oven uncovered for an additional 10 minutes, or until the cheese is melted and the internal temperature of the ground turkey reaches at least 165°F (74°C). Let the dish rest for 5 minutes before serving.Look for The edges should be bubbling, the sauce thickened, and the cheese melted and golden.Safe temperature 165°F (74°C) internal temperature (poultry)Tip Check the temperature of the largest turkey pieces to ensure safety.
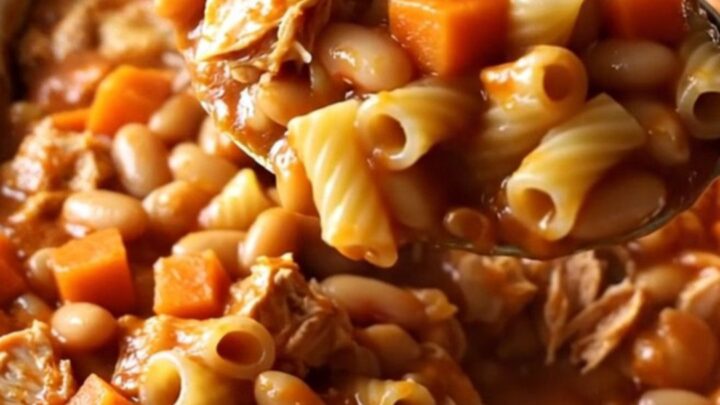
After removing the foil and adding the parmesan, the dish should look vibrant and aromatic. The sauce will have reduced slightly, and the cheese should be fully melted. The turkey must register 165°F (74°C) on a meat thermometer to ensure it is cooked through and safe to eat.
Common mistakes
A common mistake is failing to ensure all the dry pasta is fully submerged in the sauce and broth mixture, which can lead to unevenly cooked or crunchy pasta.
Another error is not sealing the foil tightly enough, which allows steam to escape and prevents the pasta from softening properly. Finally, avoid using pasta shapes that are too large, as they may require more liquid and a longer cooking time than specified here.
How to tell it’s done
The dish is done when the pasta is tender and the sauce has thickened into a rich, flavorful consistency. The ground turkey must reach a safe internal temperature of 165°F (74°C).
The edges of the dish should be bubbling vigorously, and the parmesan cheese should be melted and lightly browned. Always allow the bake to rest for 5 minutes; this allows the sauce to settle and makes serving much easier.
- Poultry: 165°F (74°C) in the thickest part
- Ground meat: 160°F (71°C) in the thickest part
Up next · Part 3 of 3
2 variations · storage & make-ahead · 3 answers · printable card
Tips, FAQ & printable recipe (Part 3)← Back to the ingredients (Part 1)