Dinner · Part 2 of 3: Instructions
Old Bay Butter Garlic Shrimp Crockpot Step-by-step instructions
- Prep
- Cook
- Total
- Serves
- 4
Before you start
Before starting, make sure the shrimp are peeled and deveined. If using frozen shrimp, thaw them completely and pat dry. Dice the bell peppers, onion, and celery and set aside.
Melt the butter and mince the garlic. Have the Old Bay seasoning measured and ready. This prep will take about 10 minutes and ensures everything is ready to layer into the slow cooker.
Ingredients at a glance (8)
- 2 lb jumbo shrimp, peeled and deveined
- 1 cup diced red bell pepper
- 1 cup diced green bell pepper
- 1 cup diced sweet onion (such as Vidalia)
- 1 cup celery ribbons
- 1/2 cup unsalted butter, melted
- 4 cloves garlic, minced
- 2 tbsp Old Bay seasoning
Instructions
Layer and Season
- Layer the ShrimpPlace the peeled and deveined jumbo shrimp in the bottom of a 6-quart slow cooker in an even layer.Look for Shrimp should be spread out to ensure even cooking.Tip If using frozen shrimp, thaw completely and pat dry before adding.
- Add VegetablesScatter the diced red and green bell peppers, sweet onion, and celery ribbons over the shrimp.Look for Vegetables should cover the shrimp evenly.Tip Cut vegetables into uniform sizes for even cooking.
At the end of this phase, the shrimp are in an even layer at the bottom of the slow cooker, topped with a colorful mix of bell peppers, onions, and celery.
The garlic butter mixture is poured over, coating everything lightly. The raw ingredients look fresh and vibrant, ready to transform during cooking.
Slow Cook
- Make Garlic ButterIn a small bowl, combine the melted butter, minced garlic, and Old Bay seasoning. Stir well.Look for The mixture should be well combined and fragrant.Tip Melt the butter gently to avoid burning the garlic.
- Pour OverPour the garlic butter mixture evenly over the shrimp and vegetables.Look for The sauce should coat everything lightly.Tip Use a spatula to scrape all the butter mixture out of the bowl.
After a couple of hours on low, the slow cooker is bubbling gently. The shrimp have turned pink and are curled into plump curls. The vegetables have softened, releasing their juices into the butter sauce, which has turned a rich golden color. The aroma of garlic, Old Bay, and butter fills the kitchen.
Serve and Savor
- Slow CookCover the slow cooker and cook on LOW for 2 hours, or until the shrimp are pink and opaque.Look for The sauce will be bubbling and the shrimp will be firm to the touch.Safe temperature 145°F (63°C) internal temperature (shellfish)Tip Do not overcook, as shrimp can become rubbery.
- ServeUse a slotted spoon to serve the shrimp and vegetables over steamed rice or with crusty bread. Spoon extra butter sauce over the top.Look for The shrimp should be coated in the glossy butter sauce.Tip Garnish with fresh parsley or lemon wedges if desired.
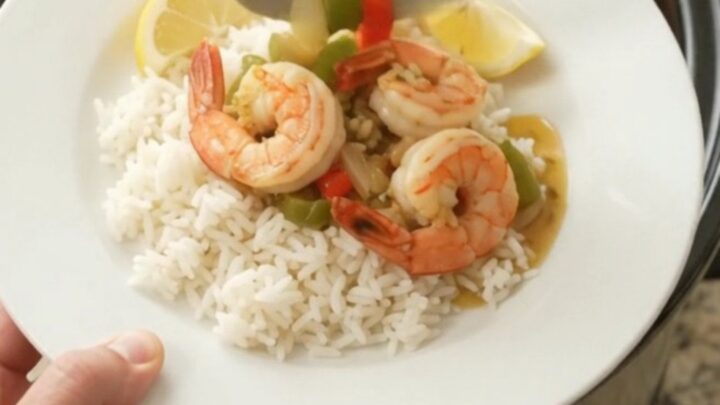
Using a slotted spoon, the shrimp and vegetables are piled onto a serving platter or over rice. The sauce is spooned over the top, glistening and fragrant. The dish looks like a low-country boil, with the bright colors of the peppers and onions contrasting with the pink shrimp. It's ready to enjoy.
Common mistakes
One common mistake is overcooking the shrimp, which makes them tough. Stick to the recommended cooking time and check for doneness early. Another mistake is adding too much liquid, as the shrimp and vegetables release moisture during cooking.
This recipe is designed to be saucy, but not watery. Also, avoid lifting the lid too often, as this releases heat and extends cooking time. Finally, don't skip the Old Bay — it's the flavor backbone of this dish.
How to tell it’s done
The shrimp are done when they are pink and opaque, and the internal temperature reaches 145°F (63°C). The sauce should be bubbling and fragrant, and the vegetables should be tender but still have a little bite.
Be careful not to overcook, as shrimp can become tough and rubbery. The butter sauce should be glossy and well combined.
- Shellfish: 145°F (63°C) in the thickest part
Up next · Part 3 of 3
4 variations · storage & make-ahead · 5 answers · printable card
Tips, FAQ & printable recipe (Part 3)← Back to the ingredients (Part 1)