Dinner · Part 2 of 3: Instructions
Old Bay Butter Garlic Corn Jumbo Shrimp Crockpot Recipe Step-by-step instructions
- Prep
- Cook
- Total
- Serves
- 4
Before you start
Before starting, make sure the shrimp are peeled and deveined, and the garlic is smashed. Melt the butter and mix it with the Old Bay seasoning.
If using frozen corn, measure it out and let it sit at room temperature for a few minutes. Have your slow cooker ready, and if you're serving with rice, start it cooking so it's ready when the shrimp are done.
Ingredients at a glance (7)
- 2 lb jumbo shrimp, peeled and deveined
- 2 cups frozen sweet corn kernels
- 12 cloves garlic, smashed
- 1/2 cup unsalted butter, melted
- 2 tbsp Old Bay seasoning
- 2 cups cooked white rice, for serving
- 1 lemon, cut into wedges, for serving
Instructions
Layer and Season
- Layer the IngredientsPlace the peeled and deveined jumbo shrimp in the bottom of a 6-quart slow cooker in an even layer. Scatter the frozen sweet corn kernels and smashed garlic cloves over the shrimp.Look for The shrimp should be in a single layer, with corn and garlic evenly distributed on top.Tip No need to thaw the corn; it will cook perfectly in the slow cooker.
- Add the Butter and SeasoningIn a small bowl, mix the melted butter with the Old Bay seasoning. Pour the mixture evenly over the shrimp, corn, and garlic in the slow cooker.Look for The butter and seasoning should coat the ingredients evenly.Tip Stir gently to coat everything, but avoid breaking the shrimp.
The shrimp, corn, and garlic are layered in the slow cooker, and the butter-Old Bay mixture is poured over. The ingredients should be evenly coated, and the butter should be fully melted.
The raw shrimp should look pinkish-gray and the corn still frozen. The aroma of Old Bay and garlic should be noticeable.
Slow Cook
- Slow Cook the SeafoodCover the slow cooker and cook on LOW for 2 hours, or until the shrimp are pink, opaque, and cooked through. The internal temperature of the shrimp should reach 145°F (63°C).Look for The shrimp will turn pink and curl slightly; the butter will be bubbling gently.Safe temperature 145°F (63°C) internal temperature (shellfish)Tip Check the shrimp at 1 1/2 hours; slow cookers vary.
After 2 hours on low, the shrimp are pink and opaque, and the corn is tender. The butter is bubbling gently, and the kitchen smells richly of garlic and seafood seasoning.
The shrimp should be firm but juicy, and the sauce should be a golden, seasoned butter. Avoid stirring too much to keep the shrimp intact.
Serve and Enjoy
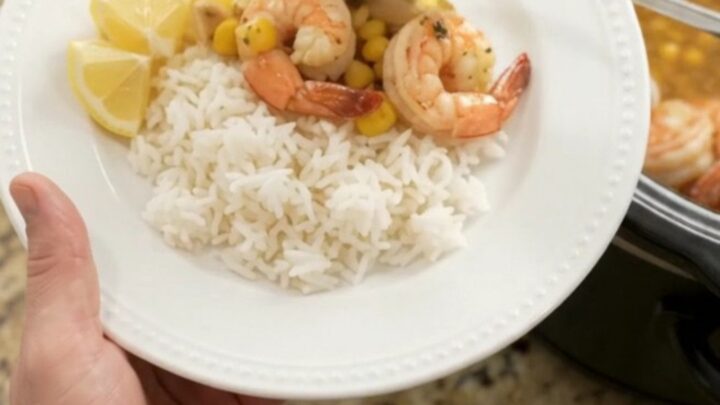
- Serve the Shrimp BoilUsing a slotted spoon, transfer the shrimp, corn, and garlic to a serving platter or individual plates. Spoon some of the buttery sauce over the top. Serve hot with cooked white rice and lemon wedges on the side.Look for The shrimp are plump and juicy, coated in a golden butter sauce.Tip Squeeze fresh lemon over the shrimp just before eating for brightness.
The shrimp and corn are lifted out with a slotted spoon, leaving the buttery sauce behind. The shrimp are plump and glossy, and the corn is coated in the seasoned butter. Serve over rice with lemon wedges, and spoon extra sauce over the top. The dish looks vibrant and inviting, with a golden sheen.
Common mistakes
One common mistake is overcooking the shrimp, which makes them rubbery. Stick to the recommended cooking time and check early. Another is using too much Old Bay, which can overpower the dish; start with 2 tablespoons and adjust to taste.
Also, avoid opening the slow cooker lid frequently, as it releases heat and extends cooking time. Finally, don't skip the lemon—it brightens the rich butter sauce.
How to tell it’s done
The shrimp are done when they are pink, opaque, and firm to the touch, with an internal temperature of 145°F (63°C). They should curl slightly and feel springy, not mushy. The butter will be bubbling gently, and the corn will be tender. Avoid overcooking, as shrimp can become tough if left too long.
- Shellfish: 145°F (63°C) in the thickest part
Up next · Part 3 of 3
4 variations · storage & make-ahead · 5 answers · printable card
Tips, FAQ & printable recipe (Part 3)← Back to the ingredients (Part 1)