Dinner · Part 2 of 3: Instructions
No-Boil Crockpot Stuffed Shells with Sweet Italian Sausage Step-by-step instructions
- Prep
- Cook
- Total
- Serves
- 6
Before you start
Take the ricotta out of the refrigerator 15 minutes ahead so it mixes smoothly. Shred the mozzarella and grate the parmesan if starting from blocks, chop the basil, and slice the bell pepper thin.
Set out the slow cooker with the insert in place, the skillet for the sausage, and a platter or baking sheet to hold the stuffed shells as they are filled. Check that the sausage is casings-free or remove the casings before the pan goes on the heat. With everything staged, assembly takes about half an hour from the first sizzle to the lid going on.
Ingredients at a glance (12)
- 24 jumbo pasta shells (about 12 oz), uncooked
- 1 lb sweet Italian sausage, casings removed
- 1 large bell pepper, thinly sliced
- 2 cups whole-milk ricotta
- 1/2 cup grated parmesan, divided
- 2 tbsp chopped fresh basil
- 1/2 tsp kosher salt
- 1/4 tsp black pepper
- 2 cups shredded mozzarella
- 3 cups marinara sauce, divided
- 1/2 cup water
- Fresh basil leaves, for serving
Instructions
Brown, soften, and mix the filling
- Brown the sausageSet a large skillet over medium heat and squeeze the sausage out of its casings in clumps. Cook, breaking the meat up with a wooden spoon, until it loses its pink color and picks up browned edges, 6 to 8 minutes. It does not need to finish cooking here — the slow cooker takes care of that — but browning builds the flavor the sauce will carry for four hours.Look for The crumbles are uniformly gray-brown with crisp, caramelized bits sticking to the pan.Tip Leave a few larger clumps of sausage; they stay juicy and make the filling more substantial.
- Soften the peppersPush the sausage to one side, add the sliced bell pepper to the empty side of the skillet, and cook for 3 minutes, stirring once or twice, until the slices relax and glisten. Stir everything together, then take the pan off the heat and let it cool for 5 minutes so the heat does not loosen the ricotta in the next step.Look for The pepper slices bend easily and smell sweet and lightly toasted.Tip A wide skillet browns instead of steaming; crowding the pan keeps the sausage pale.
- Mix the ricotta fillingIn a medium bowl, stir together the ricotta, half the parmesan, the chopped basil, the kosher salt, and the black pepper until evenly combined. Fold in the cooled sausage and peppers with a spatula, mixing just until the streaks disappear. The filling should be thick enough to hold its shape on a spoon without sliding off.Look for The mixture is pale, thick, and flecked with green and red throughout.Tip Cooling the sausage first keeps the ricotta smooth instead of greasy.
By the end of the first phase, the kitchen smells like fennel and browned pork. The sausage crumbles are gray-brown with crisp edges, the pepper slices are limp and glossy, and the ricotta mixture is thick, pale, and flecked with green and red.
Scoop a little filling with a spoon: it should mound and hold, not run. If the sausage is still pink anywhere, give it another minute or two of browning before folding it in — color now means flavor later.
Sauce, stuff, and layer the slow cooker
- Sauce the slow cookerSpread 1 1/2 cups of the marinara evenly over the bottom of the ceramic insert of a 6-quart slow cooker. This base layer does double duty: it keeps the shells from sticking during the long cook and becomes the sauce the pasta absorbs as it softens. Tilt the insert to level the sauce from edge to edge.Look for The bottom of the insert is fully covered with no dry patches showing.Tip A thin film of cooking spray under the sauce makes cleanup easier later.
- Stuff the shellsSpoon a generous tablespoon of the sausage-ricotta filling into each uncooked jumbo shell — no boiling needed, the pasta will hydrate in the sauce. Fill all 24 shells, using the back of the spoon to press the filling in without cracking the pasta. Work in batches on a platter if the counter space is tight.Look for Each shell is plump and closed around the filling, with no gaping openings.Tip Uncooked shells are brittle; cradle each one in your palm rather than pinching it.
- Arrange in a single layerNestle the stuffed shells open side up in the sauced slow cooker, packing them snugly in a single even layer. Snug is good — the shells swell as they cook — but leave a little breathing room so the sauce can circulate and every shell cooks at the same pace.Look for All 24 shells sit in one layer with sauce visible between them.Tip Open sides up means the sauce steams directly into the filling as it cooks.
- Sauce, water, and cheesePour the remaining 1 1/2 cups marinara over the shells, then add the water around the edges — it thins the sauce just enough for the dry pasta to absorb. Scatter the mozzarella over the top in an even blanket and finish with the remaining parmesan. Cover with the lid; no peeking from here on.Look for Every shell is covered in sauce and cheese, with no dry pasta peeking through.Tip The added water is what cooks the no-boil shells; do not skip it.
The insert now holds a complete, uncooked casserole. A even bed of sauce covers the bottom, all 24 shells sit open side up in a single layer, and the second half of the marinara thinned with water laps over them. The mozzarella blanket covers every shell with no dry pasta showing, and a dusting of parmesan sits on top. Nothing should move when the insert is tilted gently. If any shell is exposed, tuck sauce over it before the lid goes on.
Slow cook, rest, and serve
- Slow cook on LOWCook on LOW for 4 hours with the lid on. Resist lifting the lid — every peek releases the steam the pasta needs. The shells are done when they are tender all the way through and the sausage inside the filling registers 160°F (71°C) on an instant-read thermometer, with the cheese golden and bubbling at the edges.Look for The sauce bubbles lazily at the edges and the cheese has melted into a unified golden blanket.Safe temperature 160°F (71°C) internal temperature (ground meat)Tip An instant-read thermometer into the center of one thick shell confirms the sausage is done.
- Rest and serveTurn off the slow cooker and let the shells sit, covered, for 10 minutes so the sauce thickens and the filling sets up for clean scooping. Lift out portions with a large spoon or spatula, plate them sauce-first, and scatter fresh basil leaves over the top. Serve straight away while the cheese still pulls.Look for The sauce clings to the shells instead of pooling, and the cheese stretches when scooped.Tip A warm plate keeps the cheese stretchy all the way to the table.
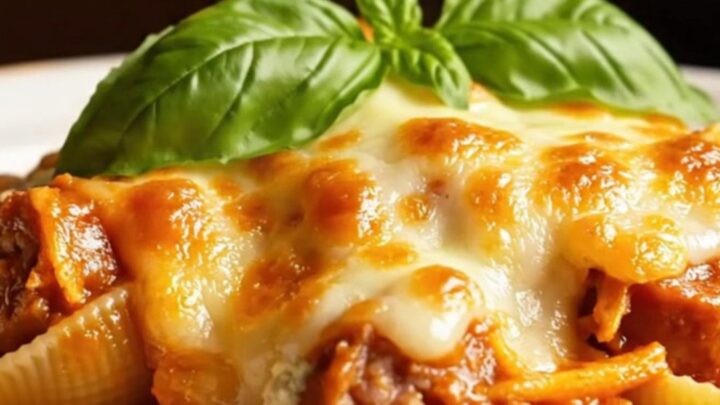
After four hours on LOW and ten minutes of rest, the lid comes off to a bubbling, golden casserole. The sauce has thickened and clings to the shells, the cheese stretches when a portion is lifted, and the filling inside each shell is hot, creamy, and cooked through to a safe 160°F (71°C) in the sausage. The basil goes on at the very end, bright against the red. If the shells resist the spoon, they need more time on LOW, not higher heat.
Common mistakes
The most common slip is stacking the shells; a second layer leaves the middle shells undercooked and gummy. Keep everything in one snug layer. Skipping the water is the next trap — dry pasta cannot hydrate in thick sauce alone, and the shells stay tough.
Lifting the lid during the cook releases steam and adds 20 to 30 minutes of cooking time each time, so trust the timer. Stuffing the shells with hot sausage straight from the pan can loosen the ricotta into a greasy smear; give the meat five minutes to cool.
How to tell it’s done
The dish is done when the shells are fully tender — press one with the back of a spoon and it should give with no chalky resistance — and the sauce is bubbling at the edges of the insert.
The cheese blanket should be melted through, golden at the rims, and stretchy when a portion is lifted. Because the sausage is ground meat, confirm it is fully cooked: an instant-read thermometer inserted into the center of a thick shell should read at least 160°F (71°C).
- Ground meat: 160°F (71°C) in the thickest part
Up next · Part 3 of 3
4 variations · storage & make-ahead · 5 answers · printable card
Tips, FAQ & printable recipe (Part 3)← Back to the ingredients (Part 1)