Desserts · Part 2 of 3: Instructions
No-Bake Peanut Butter Chocolate Pretzel Pie Step-by-step instructions
- Prep
- Cook
- Total
- Serves
- 8
Before you start
Before beginning, ensure all ingredients are at the appropriate temperatures. The butter should be melted but not boiling, as hot butter can make the pretzel crust greasy rather than crisp. Have the pie dish ready on a flat surface.
If the peanut butter is very thick or cold, warm it slightly in the microwave for ten seconds to make it easier to spread over the crust without tearing the pretzel base. Ensure the refrigerator has enough clear space to hold the pie dish level while it sets.
Ingredients at a glance (5)
- 2 cups crushed pretzels
- 1/2 cup melted butter
- 1 cup creamy peanut butter
- 1 cup chocolate pudding
- 1 cup whipped cream
Instructions
Crust Formation
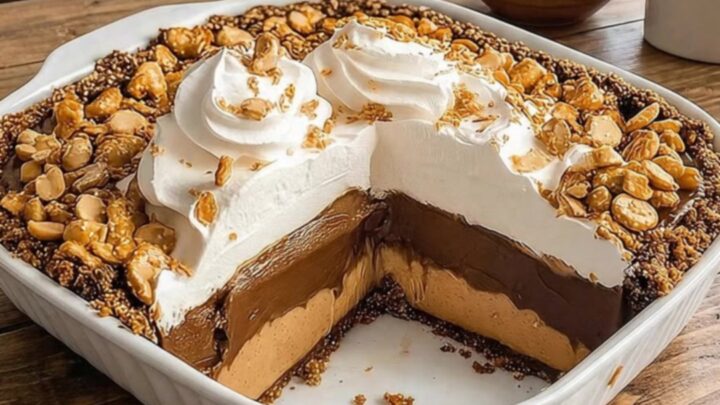
- Prepare the CrustCombine the crushed pretzels and melted butter in a mixing bowl. Stir until the mixture resembles wet sand. Press the mixture firmly into the bottom and up the sides of a 9-inch pie dish to create an even crust.Look for The crust should be firm and hold its shape when pressed.Tip Use the bottom of a measuring cup to pack the pretzel crumbs tightly for a sturdier base.
The crust is ready when the pretzel and butter mixture is thoroughly combined and holds together when pinched. It should look like damp sand and be pressed into a solid, even layer at the bottom of the dish. Verify that the edges are packed tightly against the sides of the pan to ensure a clean release when serving later.
Layering Fillings
- Layer the FillingSpread the creamy peanut butter evenly over the prepared pretzel crust. Carefully pour the chocolate pudding over the peanut butter layer, smoothing it out with a spatula to ensure it covers the surface completely without disturbing the peanut butter layer underneath.Look for The layers should be distinct and smooth.Tip Chill the crust for ten minutes before adding the peanut butter to help the layers set more cleanly.
At this stage, the peanut butter should be spread in an even, smooth layer, followed by the chocolate pudding. The pudding should sit neatly on top of the peanut butter without creating muddy streaks.
Check that the pudding reaches the edges of the dish for a uniform appearance, and ensure the surface is flat and smooth for the final topping.
Topping and Chilling
- Add Topping and ChillSpread the whipped cream over the chocolate layer, creating decorative swirls if desired. Place the pie in the refrigerator for at least two hours to allow the pudding and crust to set properly before slicing and serving.Look for The pie is set when the pudding layer is firm to the touch.Tip Cover the pie loosely with plastic wrap while chilling to prevent it from absorbing fridge odors.
The final phase involves adding the whipped cream and letting the pie rest. The pie is ready to serve when the whipped cream is stable and the pudding layer beneath has set into a firm, sliceable consistency. Ensure the pie is completely cold and the layers are distinct before you attempt to cut into it with a sharp knife.
Common mistakes
A common error is not packing the pretzel crust firmly enough, which results in a crumbly base that falls apart upon serving. Another mistake is adding the chocolate pudding while the peanut butter is too warm, causing the layers to bleed into one another.
Always allow the crust to chill briefly before adding the filling. Finally, rushing the chilling process is a mistake; the pie needs at least two hours in the refrigerator to fully firm up, otherwise, the layers will lose their definition.
How to tell it’s done
The pie is considered done once the chocolate pudding layer has fully set and is no longer runny or loose. When you gently touch the center of the pie, it should feel firm and hold its shape. The whipped cream should remain light and airy.
Because this is a no-bake dessert, there are no proteins to cook, so no internal temperature check is required. Simply rely on the visual cues of a stable, firm structure that maintains its layers when a slice is removed.
Up next · Part 3 of 3
2 variations · storage & make-ahead · 3 answers · printable card
Tips, FAQ & printable recipe (Part 3)← Back to the ingredients (Part 1)