Desserts · Part 2 of 3: Instructions
No-Bake Nutella Coffee Icebox Cake Step-by-step instructions
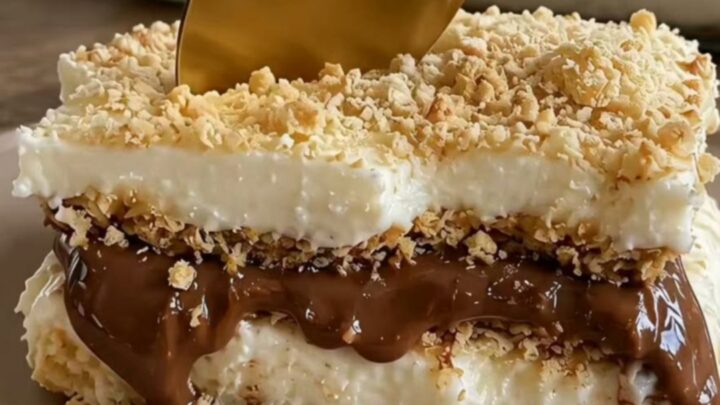
- Prep
- Cook
- Total
- Serves
- 8
Before you start
Before you begin, ensure you have all your ingredients measured and ready, as the assembly process moves quickly once you start dipping the cookies. Brew your coffee early so it has ample time to reach room temperature or chill in the refrigerator.
Prepare an 8-inch square baking dish by clearing space in your refrigerator, as the dish needs to be placed on a level surface to set properly. Having your electric mixer, mixing bowls, and spatula clean and dry is essential for achieving the perfect whipped cream consistency.
Ingredients at a glance (4)
- 24 pieces crisp cookies
- 1 cup strong brewed coffee, cooled
- 2 cups heavy whipping cream
- 1 cup hazelnut spread
Instructions
Preparing the filling
- Prepare the cream fillingIn a large mixing bowl, whip the heavy cream until stiff peaks form. Gradually fold in half of the hazelnut spread until the mixture is smooth, light, and uniform in color. Do not overmix, or the cream may become grainy.Look for The cream holds stiff peaks and is evenly combined with the hazelnut spread.Tip Ensure the heavy cream is very cold before whipping to achieve the best volume.
The whipped cream and hazelnut spread mixture should be light, airy, and uniform in color. It should hold its own shape when lifted with a spatula, indicating that it is thick enough to support the weight of the cookie layers without thinning out during the assembly or the long refrigeration period.
Layering the cake
- Layer the cakeBriefly dip each crisp cookie into the cooled coffee, ensuring it is moistened but not soggy. Place a single layer of the coffee-dipped cookies in the bottom of an 8-inch square baking dish. Spread a generous layer of the hazelnut cream mixture over the cookies, smoothing it out with an offset spatula. Repeat the layers until all ingredients are used, finishing with a final layer of cream.Look for The dish is filled with alternating layers of cookies and cream.Tip Work quickly so the cookies do not fall apart in the coffee.
The assembly should look orderly, with each layer of coffee-dipped cookies covered by a consistent, smooth layer of the hazelnut cream. Ensure the corners of the dish are filled properly so the final slice looks professional. The layers should be visible from the side of the glass or clear dish if you choose to use one.
Chilling and final set
- Chill and setDrizzle the remaining hazelnut spread over the top of the cake, using a knife to create a decorative swirl pattern if desired. Cover the baking dish tightly with plastic wrap and refrigerate for at least 4 hours, or preferably overnight, to allow the cookies to soften and the flavors to meld perfectly.Look for The cake is firm to the touch and the cookies have softened completely.Tip Chilling overnight yields the best texture for slicing.
After the chilling period, the cake should feel solid and cold to the touch. The top layer of cream should be firm enough to hold the decorative swirls of hazelnut spread without them sinking. The entire structure should appear unified, with no loose liquid visible at the bottom of the baking dish.
Common mistakes
A common mistake is dipping the cookies for too long, which results in a soggy cake that loses its structural integrity. Dip each cookie for just a second or two, ensuring it is moistened but not saturated.
Another error is over-whipping the cream; watch closely as the cream reaches stiff peaks, as continuing to mix will cause it to separate and become buttery.
Finally, do not rush the chilling process; cutting into the cake too early will result in layers that slide apart rather than holding their beautiful, defined shape.
How to tell it’s done
The cake is considered done when the layers have set firmly after the required chilling time. When you insert a knife into the center, it should pass through the layers with minimal resistance, and the texture should be consistent throughout.
The cookies should be softened completely, providing a cohesive, sliceable structure that holds its shape when lifted onto a plate. There is no protein to cook, so no temperature check is required; simply rely on the firm, chilled texture.
Up next · Part 3 of 3
2 variations · storage & make-ahead · 3 answers · printable card
Tips, FAQ & printable recipe (Part 3)← Back to the ingredients (Part 1)