Desserts · Part 2 of 3: Instructions
No-Bake Condensed Milk Cheesecake (Foolproof, Creamy) Step-by-step instructions
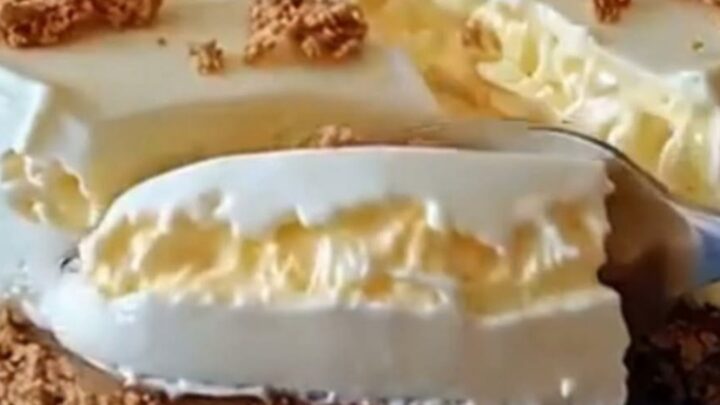
- Prep
- Cook
- Total
- Serves
- 8
Before you start
Set out the cream cheese an hour ahead so it softens properly — cold cream cheese is the only realistic way to end up with a lumpy filling. Chill the bowl and beaters for the whipped cream in the freezer. Line or grease nothing if using a springform; the crust releases on its own. Measure everything before starting, because the filling comes together quickly once the cream cheese is smooth, and the whipped cream should be folded in while it is still at its peak.
Ingredients at a glance (5)
- 1 1/2 cups graham cracker crumbs (about 12 full sheets)
- 16 oz cream cheese, softened to room temperature
- 14 oz sweetened condensed milk (one can)
- 1 cup heavy cream, cold
- 1/2 cup crushed cookies, for sprinkling
Instructions
Build the cookie base
- Crush the cookiesPulse the graham crackers in a food processor until they turn into fine, even crumbs with no large pieces left. If using a zip-top bag, crush them with a rolling pin, pressing firmly and working from the center outward. Aim for a sandy texture that holds together lightly when pinched.Look for Every crumb should look the same size, like coarse sand, with no chunks bigger than a pea anywhere in the bag.Tip Fine crumbs pack tighter than chunky ones, so the base slices cleanly instead of crumbling on the plate.
- Press and chill the baseTip the crumbs into a 9-inch springform pan and press them firmly into an even layer with the bottom of a measuring cup, bringing them slightly up the sides. Press hard — the denser the layer, the cleaner the slices. Set the pan in the refrigerator while you make the filling.Look for The base should feel solid under light pressure, not sandy or loose at the edges.Tip A flat-bottomed measuring cup presses more evenly than fingers and keeps the layer level.
At the end of this phase the base should look like a smooth, even sand-colored disk filling the bottom of the pan, solid at the edges and slightly up the sides. Press a fingertip into it: it should resist firmly with no give and no loose crumbs shifting.
If it feels sandy or shifts under pressure, it needs more pressing before the filling goes on. The chilling time in the refrigerator is short — just enough to firm the compressed crumbs while the filling is made.
Whip the condensed milk filling
- Beat the cream cheesePlace the softened cream cheese in a large bowl and beat it with an electric mixer on medium speed for about 2 minutes, scraping the bowl once halfway through. Keep going until it is completely smooth and glossy, with no lumps left anywhere. Lumps now will never disappear later, so be thorough.Look for The cream cheese should look like thick, shiny pudding and slide off the beaters in smooth ribbons.Tip Cold cream cheese is the number one cause of lumpy filling; leave it out for an hour before starting.
- Add the condensed milkPour in the sweetened condensed milk in a slow, steady stream while mixing on low speed. Scrape the sides and bottom of the bowl, then beat another 30 seconds until the mixture is uniform, thick and satiny. The condensed milk brings all the sweetness and body this filling needs.Look for The mixture should be noticeably thicker than plain beaten cream cheese and fall in a heavy ribbon.Tip Pour slowly along the side of the bowl so the milk incorporates instead of pooling at the bottom.
- Whip the creamIn a separate chilled bowl, whip the cold heavy cream on medium-high speed until it forms firm, defined peaks that stand upright when the beaters lift. Watch closely near the end; overwhipped cream turns grainy. This whipped cream is what makes the finished cheesecake light instead of dense.Look for The peaks should hold their shape and bend just slightly at the tips, not flop over.Tip Chill the bowl and beaters in the freezer for 10 minutes first — the cream whips faster and stiffer.
- Fold the two togetherAdd the whipped cream to the condensed milk mixture in two additions, folding gently with a rubber spatula after each one. Scoop from the bottom up and turn the bowl as you go, stopping as soon as no white streaks remain. Overfolding deflates the cream and costs the filling its airy, velvety texture.Look for A uniform, pillowy cream that holds soft peaks when the spatula lifts away.Tip Fold with the spatula flat rather than stirring in circles; it keeps far more air in the mixture.
The filling should now be a pale, uniform, pillowy cream that holds soft peaks when the spatula lifts, with no lumps, no streaks of white cream and no liquid pooling at the bottom of the bowl. Taste it: sweet, rich, unmistakably condensed milk. If it looks grainy anywhere, the whipped cream went too far — fold in a spoonful of unwhipped cream to smooth it. Move promptly to assembly while the air is still in the cream.
Assemble, chill and slice
- Fill the panPour the filling over the chilled crust and spread it gently to the edges with an offset spatula or the back of a spoon. Smooth the top, then tap the pan lightly on the counter twice to release any large air pockets. Work calmly — the filling is thick and moves easily.Look for An even, glossy surface with the crust fully hidden and no gaps at the pan edges.Tip Spread toward the edges first, then finish in the center to avoid dragging crust crumbs into the filling.
- Add the cookie toppingSprinkle the crushed cookies evenly over the surface, letting some crumbs sit on top and others sink slightly into the cream. Cover the pan with plastic wrap without letting it touch the surface. A generous, uneven sprinkle looks better than a perfectly even one, so do not fuss over it.Look for The whole surface should be dusted with crumbs, with a few bare cream patches for contrast.Tip Reserve a spoonful of crumbs and add them just before serving so some pieces stay crisp.
- Chill and sliceRefrigerate the cheesecake for at least 4 hours, ideally overnight, until the filling is completely set and firm to a light touch in the center. To serve, run a thin knife around the edge, release the springform ring and slice with a hot, dry knife, wiping it between cuts.Look for The center should feel set with a very slight give, and the slices should stand tall on the plate.Tip Dip the knife in hot water and dry it before each cut for bakery-clean edges every time.
The finished cheesecake should have a level, glossy surface dusted with cookie crumbs, and after at least 4 hours — ideally overnight — the center should feel set with only a slight give.
A knife run around the edge should release the sides cleanly, and the first slice should stand tall with a visible, intact crust line at the bottom. If the filling still feels soft in the middle, give it another hour or two; a longer chill only improves both the texture and the flavor.
Common mistakes
Three things go wrong most often, and all are easy to avoid. First, cold cream cheese: it never beats smooth, and the lumps stay in the finished filling, so give it a full hour at room temperature. Second, overwhipping the cream, which turns it grainy and makes folding difficult — stop at firm peaks.
Third, stirring instead of folding, which knocks the air out and leaves a dense filling rather than a velvety one. Finally, cutting too early: a cheesecake chilled only two hours will hold its shape loosely but not slice cleanly.
How to tell it’s done
There is no oven temperature to chase — doneness is all about feel and chill. The crust is done when it resists a firm press and no loose crumbs shift at the edges. The filling is done when it is smooth and glossy with no cream cheese lumps, and when the whipped cream holds firm peaks.
The finished cheesecake is ready when the center feels set under a light fingertip after at least 4 hours of chilling, ideally overnight, and the slices lift away from the knife with clean edges.
Up next · Part 3 of 3
4 variations · storage & make-ahead · 5 answers · printable card
Tips, FAQ & printable recipe (Part 3)← Back to the ingredients (Part 1)