Desserts · Part 2 of 3: Instructions
Easy No-Bake Chocolate Eclair Cake Step-by-step instructions
- Prep
- Cook
- Total
- Serves
- 12
Before you start
Before beginning, ensure all ingredients are at the appropriate temperatures. Clear enough space in the refrigerator for the 9x13 inch pan to sit perfectly flat for several hours.
Have all equipment clean and ready, specifically a sturdy spatula and an offset spatula for smooth application of the frosting. Verify that the pan is clean and dry before starting the assembly process to ensure the first layer of crackers sits securely.
Ingredients at a glance (4)
- 1 box graham crackers
- 2 packages cream filling
- 1 can chocolate frosting
- 1/2 cup crushed nuts
Instructions
Cream filling preparation
- Prepare the cream fillingIn a large mixing bowl, prepare the cream filling according to the package instructions until it is smooth and fluffy. Ensure the mixture is uniform and free of lumps before proceeding to the assembly stage.Look for The mixture should be thick, creamy, and hold its shape well.Tip Keep the ingredients chilled until the moment of preparation to ensure the best texture.
At the end of this phase, the cream filling should be thick and aerated. It should look like a smooth, fluffy mousse. Check that no powder lumps remain and that the mixture is fully incorporated. The mixture should feel substantial when lifted with a spatula.
Layering the cake
- Assemble the cake layersLine the bottom of a 9x13 inch metal pan with a single layer of graham crackers, breaking them to fit the edges if necessary. Spread half of the prepared cream filling evenly over the crackers. Add a second layer of graham crackers, then top with the remaining filling. Finish with a final layer of graham crackers.Look for Ensure each layer of crackers is tightly packed to create a solid foundation for the cake.Tip If the crackers seem to slide, press them down gently into the filling.
By the end of this phase, the cake should be neatly assembled in the pan. Check that each layer of graham crackers is uniform and covers the previous layer of cream completely. The edges should look tidy. The final appearance should be a compact, level structure ready for the final topping.
Frosting and chilling
- Frost and garnishSpread the chocolate frosting over the top layer of graham crackers using an offset spatula for a smooth finish. Sprinkle the crushed nuts evenly over the frosting. Refrigerate the cake for at least four hours, or preferably overnight, to allow the crackers to soften into a cake-like texture.Look for The top should be smooth and evenly coated with chocolate frosting.Tip To make spreading easier, soften the chocolate frosting slightly in the microwave for a few seconds.
After applying the frosting and nuts, the cake should look smooth and finished. The surface should be evenly coated.
Before moving to the final stage, ensure the cake is placed in the refrigerator on a level surface. It should look clean, professional, and ready for its long rest to develop the final texture.
Common mistakes
A common mistake is rushing the chilling process. If the cake is served too soon, the graham crackers will remain hard and the filling will be too soft to hold its structure. Ensure the layers are tight, as gaps can cause the cake to crumble upon serving.
Another error is over-mixing the filling, which can incorporate too much air and affect the final density. Always use an offset spatula to spread the frosting carefully to avoid dragging the top layer of crackers.
How to tell it’s done
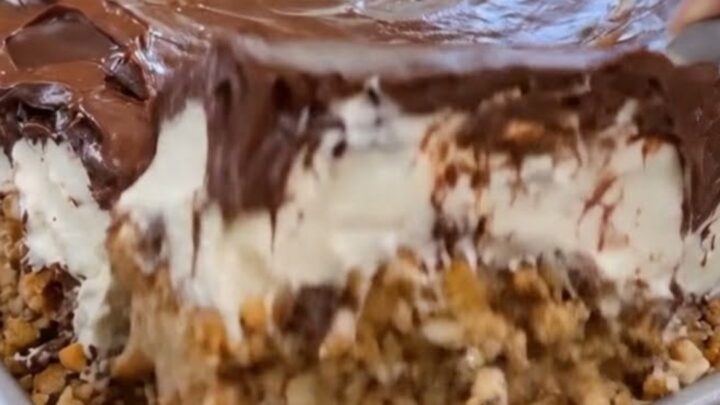
The cake is ready to serve once it has been thoroughly chilled, which allows the layers to set and the crackers to soften sufficiently. When properly set, the cake should hold its shape cleanly when sliced with a sharp knife.
The filling should be firm, and the layers should be distinct and moist. There is no protein to cook, so no internal temperature check is required; simply rely on the chilling time to ensure the proper texture is achieved.
Up next · Part 3 of 3
2 variations · storage & make-ahead · 3 answers · printable card
Tips, FAQ & printable recipe (Part 3)← Back to the ingredients (Part 1)