Dinner · Part 2 of 3: Instructions
Neiman Marcus Chicken Casserole with a Crispy Cracker Crust Step-by-step instructions
- Prep
- Cook
- Total
- Serves
- 6
Before you start
Before beginning, gather all your ingredients and measure them out to ensure a smooth assembly process. Shred your pre-cooked chicken breasts and grate the sharp cheddar cheese from the block. Crush the Ritz crackers into coarse crumbs and melt the butter.
Preheating your oven to 350°F (175°C) beforehand ensures it reaches the correct baking temperature right as you finish assembling the casserole layers, allowing for an efficient and seamless cooking experience.
Ingredients at a glance (5)
- 2 cans (10.5 oz each) cream of chicken soup
- 4 cups shredded cooked chicken
- 2 cups cheddar cheese, shredded and divided
- 1 sleeve Ritz crackers, crushed
- 1/4 cup butter, melted
Instructions
Preparing the Creamy Filling
- Combine Soup and ChickenIn a large mixing bowl, combine the cream of chicken soup and the shredded cooked chicken. Stir the mixture thoroughly with a spatula until the chicken is completely and evenly coated by the creamy soup base.Look for The chicken should be completely enveloped in the creamy soup.Tip Use a rubber spatula to scrape the sides of the bowl to ensure no unmixed pockets remain.
- Fold in CheeseFold half of the shredded cheddar cheese into the chicken mixture until it is evenly distributed throughout the creamy filling.Look for The cheese should be evenly dispersed without large clumps.Tip Ensure the shredded chicken is well-shredded so it distributes evenly.
At the end of this phase, the filling should be completely uniform and thick. The shredded chicken must be evenly coated in the smooth, velvety cream of chicken soup base, with half of the cheddar cheese distributed throughout. You should not see any large pockets of dry chicken or unmixed soup. The mixture will smell savory and rich, ready to be transferred to the baking dish.
Assembling the Layers
- Layer in Baking DishSpread the creamy chicken mixture into an even layer in a 9x13-inch glass baking dish. Sprinkle the remaining shredded cheddar cheese evenly over the top of the chicken layer.Look for The cheese should form a neat, uniform layer covering the entire surface.Tip Use the back of a spoon to smooth out the chicken mixture before adding the cheese.
- Add Cracker ToppingIn a medium bowl, toss the crushed Ritz crackers with the melted butter until the crumbs are evenly coated. Sprinkle this buttery cracker mixture evenly over the cheese layer, covering it completely.Look for The cracker crumbs should completely blanket the cheese layer.Tip Do not over-crush the crackers; some larger pieces provide a better texture.
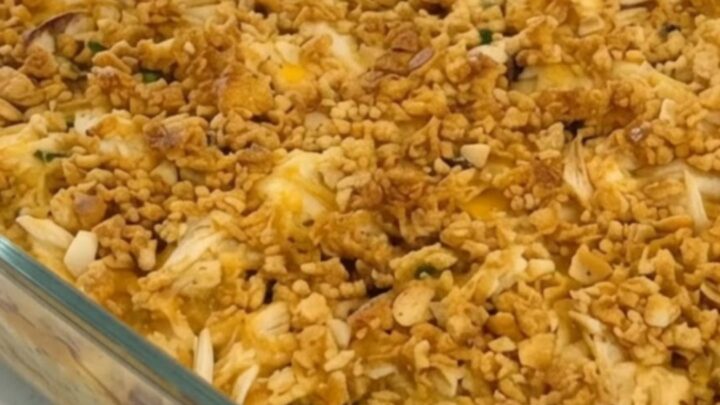
By the end of this phase, the casserole is fully assembled in the baking dish and ready for the oven. The creamy chicken mixture should form a flat, even base, covered by a uniform layer of the remaining shredded cheddar cheese. The top must be completely blanketed with the golden, butter-tossed cracker crumbs. There should be no bare patches of cheese showing through the cracker topping, ensuring an even, crispy crust.
Baking to Golden Perfection
- Bake the CasserolePlace the baking dish in an oven preheated to 350°F (175°C). Bake for 25 to 30 minutes until the edges are bubbling and the cracker topping is golden brown. Ensure the casserole is heated through to a safe internal temperature of 165°F (74°C).Look for The edges should bubble and sizzle, and the top should be golden.Safe temperature 165°F (74°C) internal temperature (poultry)Tip If the crackers brown too quickly, loosely tent the dish with aluminum foil.
- Rest and ServeRemove the casserole from the oven and let it rest for 10 minutes before serving. This brief rest allows the creamy filling to set slightly, making it easier to scoop and serve.Look for The bubbling will subside, and the sauce will thicken slightly.Tip Serve warm with a crisp green salad to balance the rich, creamy flavors.
At the final checkpoint, the casserole will look spectacular. The edges should be vigorously bubbling with melted cheese, and the cracker topping will have transformed into a beautiful, deep golden-brown crust.
You will hear a gentle sizzling sound from the sides of the baking dish, and a rich, comforting aroma of baked cheese and toasted butter will fill your kitchen. The casserole must rest for ten minutes to set properly before serving.
Common mistakes
One common mistake is crushing the crackers into too fine a powder, which results in a dense, pasty topping rather than a light, crispy crust. Another frequent error is failing to spread the chicken filling into an even layer, which can lead to uneven heating in the oven.
Lastly, do not skip letting the casserole rest after baking; scooping it immediately will cause the creamy sauce to run, making the servings look messy rather than neat and cohesive.
How to tell it’s done
The casserole is perfectly done when the entire top is a beautiful golden brown and the sauce is bubbling actively around the edges of the baking dish. Since the chicken used in this recipe is already fully cooked, you do not need to worry about cooking raw meat.
However, you want to ensure the entire dish is heated through to a hot, steaming internal temperature of at least 165°F (74°C) in the center to guarantee it is safe and delicious to serve.
- Poultry: 165°F (74°C) in the thickest part
Up next · Part 3 of 3
2 variations · storage & make-ahead · 3 answers · printable card
Tips, FAQ & printable recipe (Part 3)← Back to the ingredients (Part 1)