Desserts · Part 1 of 3: Ingredients
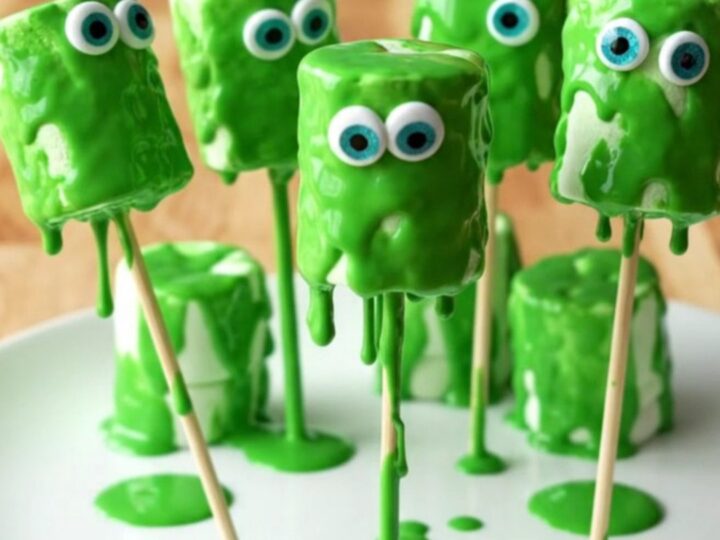
Monster Marshmallow Pops for Fun Treats
- Prep
- Cook
- Total
- Serves
- 12
Bring a touch of whimsy to your next event with these simple, eye-catching monster marshmallow pops. These treats are designed for maximum visual appeal with minimal effort, making them an ideal choice for busy hosts who want to impress guests. Whether you are planning a themed party or simply want to brighten up a rainy afternoon, these pops are a delightful and festive solution that requires no baking and minimal cleanup.
Monster marshmallow pops are the perfect project for those who enjoy creating fun, edible crafts. By combining soft marshmallows with a crisp candy shell, you achieve a balanced texture that is enjoyable to eat.
The bright green color and singular candy eye provide a playful, monstrous appearance that is universally appealing. These pops are designed to be assembled quickly, ensuring that you spend more time enjoying the festivities and less time laboring in the kitchen over complex dessert preparations.
Ingredients
- 12 large marshmallows
- 12 lollipop sticks
- 1 cup green candy melts
- 12 large candy eyes
Why this recipe works
The method relies on the contrast between the pillowy soft marshmallow interior and the smooth, firm candy exterior. Using candy melts is particularly effective because they provide a stable coating that sets quickly and maintains a vibrant, uniform color.
This technique ensures that each pop looks professional and consistent, which is essential when creating multiple pieces for a party platter or display. The simplicity of the process allows for precise control over the final appearance of every individual treat.
The use of parchment paper is critical in this process as it provides a non-stick surface that prevents the coating from tearing when you remove the pops. This approach minimizes damage to the delicate candy shell and ensures a clean, polished finish.
By working in a systematic way—inserting sticks first, then dipping, and finally decorating—the workflow remains efficient and organized. This methodical approach is the secret to achieving consistent results every time you prepare this delightful dessert.
Notes and substitutions
When selecting ingredients, ensure that the candy melts are specifically formulated for melting, as these have a lower viscosity than standard chocolate chips. This ensures a smooth, thin coating that covers the marshmallow evenly without creating heavy, uneven drips.
If you find the coating is too thick, you can stir in a very small amount of vegetable oil or shortening to thin it out to your desired consistency, though this is rarely necessary with quality candy melts.
The choice of equipment is straightforward, but using a narrow, deep bowl for melting the candy is highly recommended. A narrow vessel allows for a deeper pool of coating, which makes it much easier to submerge the entire marshmallow in one smooth motion. This reduces the need for excessive manipulation, which helps keep the candy coating looking pristine. Always ensure your workspace is free from moisture, as even a tiny drop of water can cause the candy melts to seize.
- green candy melts: white chocolate tinted with green food-grade oil-based coloring
- large candy eyes: miniature chocolate chips or small round colorful candies
Equipment
- baking sheet
- parchment paper
- microwave-safe bowl
- lollipop sticks
Up next · Part 2 of 3
3 steps · 5 min of cooking · what to look for at each stage
Step-by-step instructions (Part 2)