Desserts · Part 2 of 3: Instructions
Molten Hazelnut Chocolate Shortbread Cookies Step-by-step instructions
- Prep
- Cook
- Total
- Serves
- 24
Before you start
Before starting, soften the butter to room temperature. Measure all ingredients accurately: use a kitchen scale for the butter and oil, and spoon the flour into measuring cups to avoid packing.
Have a baking sheet lined with parchment paper ready. Prepare a clean work surface for shaping the dough. If using chocolate truffles, you may want to chill them briefly to make them easier to handle.
Ingredients at a glance (7)
- 250 g unsalted butter, softened
- 100 ml vegetable oil
- 4 tbsp cornstarch
- 5 tbsp powdered sugar
- 1/2 tsp baking powder
- 4 1/2 cups all-purpose flour
- 24 pieces hazelnut chocolate squares or truffles
Instructions
Make the Dough
- Cream the Butter and OilIn a large bowl, beat the softened butter and vegetable oil together until smooth and creamy. Add the cornstarch, powdered sugar, and baking powder, and mix until well combined. The mixture should look glossy and homogenous.Look for The mixture is pale and creamy, with no streaks of butter or oil.Tip Ensure the butter is truly soft so the dough comes together without lumps.
- Add the FlourGradually add the all-purpose flour, mixing until a soft, pliable dough forms. Turn the dough out onto a lightly floured surface and knead gently just until it holds together. Do not overwork the dough, or the cookies will be tough.Look for The dough is smooth, slightly crumbly at first, then comes together into a ball.Tip If the dough is too sticky, add a little more flour; if too dry, add a teaspoon of water.
- Shape the Dough BallsPinch off walnut-sized pieces of dough and roll them into balls between your palms. Place them on a clean wooden board or work surface. You should have about 24 balls.Look for The balls are uniform in size, about 1.5 inches in diameter.Tip Keep the dough balls covered with a clean towel to prevent them from drying out.
- Create the HollowUse your thumb or the end of a citrus press to press a deep hollow into the center of each dough ball, forming a small cup. The walls should be about 1/4 inch thick. Make sure the hollow is deep enough to hold the chocolate.Look for Each dough ball has a distinct well, with no cracks on the bottom.Tip If the dough cracks, gently press the edges back together with your fingers.
The dough is smooth and pliable, with no dry spots. It should hold together when pressed but not be sticky. The dough balls are uniform and have a deep, clean hollow in the center, ready for filling.
Fill and Bake
- Fill with ChocolatePlace one piece of hazelnut chocolate into each hollow. Gently press the chocolate down so it sits below the rim of the dough. The dough should cover the chocolate completely, so pinch the edges together if needed.Look for The chocolate is hidden inside the dough, with no visible gaps.Tip If using chocolate truffles, chill them briefly before filling to make them easier to handle.
- Seal and Re-shapeCarefully bring the dough up and over the chocolate, sealing it completely. Roll the ball gently in your hands to smooth the surface, making sure the chocolate is fully enclosed. Place the filled balls on a parchment-lined baking sheet, spacing them about 2 inches apart.Look for The balls are smooth and round, with no cracks or exposed chocolate.Tip Chill the filled cookies for 15 minutes if the dough feels too soft to handle.
- Bake Until SetPreheat the oven to 320°F (160°C). Bake the cookies for 15 minutes, or until they are set and pale, without any browning. The cookies should look dry on the surface and feel firm to a gentle touch.Look for The cookies are puffed slightly, with a pale golden color and no dark edges.Tip Bake one test cookie first to check your oven's timing; ovens vary.
The filled cookies are sealed and smooth on the surface. After baking, they are pale golden, set, and slightly puffed. A gentle touch confirms they are firm, and the aroma of butter and chocolate fills the kitchen.
Serve and Enjoy
- Cool SlightlyRemove the baking sheet from the oven and let the cookies cool on the sheet for 2 to 3 minutes. They will be very soft while warm, so allow them to set slightly before transferring. Use a spatula to move them to a wire rack.Look for The cookies are firm enough to lift without breaking.Tip Do not skip the cooling time; the centers are molten and very hot.
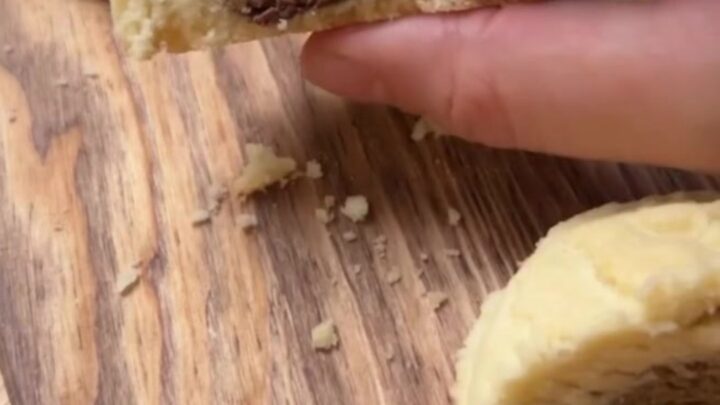
- Serve WarmServe the cookies warm, while the chocolate is still molten. To enjoy the full effect, break one open to reveal the glossy, flowing center. The shortbread should be tender and crumbly, contrasting with the smooth chocolate.Look for The chocolate oozes slowly when the cookie is broken.Tip If the cookies cool completely, reheat them in a 300°F (150°C) oven for 3-4 minutes to re-melt the center.
The cookies are warm, with a tender crumb and a molten center that flows when broken. The contrast between the crisp shell and the glossy chocolate is perfect. Serve immediately for the best experience.
Common mistakes
One common mistake is overworking the dough, which can make the cookies tough. Mix just until the flour is incorporated. Another is pressing the hollow too shallow, leaving the chocolate exposed during baking.
Make the hollow deep enough to hold the chocolate completely. Also, avoid overbaking: the cookies should not brown, or they will become dry and lose their tender crumb.
Finally, use a high-quality chocolate that melts well; cheap chocolate may seize or stay solid.
How to tell it’s done
The cookies are done when they are set and pale, without any browning. The surface should look dry and feel firm to a gentle touch. They will be soft while warm, so allow them to cool on the baking sheet for a few minutes before transferring.
The centers will be molten, so handle them gently. If you insert a toothpick into the center, it should come out mostly clean, but the chocolate will be liquid.
Up next · Part 3 of 3
4 variations · storage & make-ahead · 5 answers · printable card
Tips, FAQ & printable recipe (Part 3)← Back to the ingredients (Part 1)