Desserts · Part 2 of 3: Instructions
Red Velvet Cheesecake Stuffed Cookies Step-by-step instructions
- Prep
- Cook
- Total
- Serves
- 16
Before you start
Before starting, ensure the cream cheese is softened to room temperature so it can be scooped and rolled easily. Freeze the cream cheese balls for at least 30 minutes, or up to a few hours, until they are solid.
Preheat the oven to 350°F (175°C) and line a baking sheet with parchment paper. Have all the dough ingredients measured and ready, and make sure the butter is softened for easy creaming.
Ingredients at a glance (9)
- 4 oz sweetened cream cheese, softened
- 1/2 cup unsalted butter, softened
- 1 cup granulated sugar
- 2 tbsp unsweetened cocoa powder
- 1 tbsp red velvet emulsion
- 1 3/4 cups all-purpose flour
- 1 large egg
- 1 tsp vanilla extract
- 1/2 cup white chocolate chips
Instructions
Freeze and Form
- Freeze the Cream CheeseLine a small tray or plate with parchment paper. Scoop the softened sweetened cream cheese into 16 equal portions, about 1/4 ounce each, and roll each into a ball. Place the balls on the prepared tray and freeze for at least 30 minutes, until firm.Look for The cream cheese balls should be solid and hold their shape when touched.Tip If the cream cheese is too soft to roll, chill it in the refrigerator for 15 minutes first.
- Make the Red Velvet DoughIn a large bowl, beat the butter and sugar together until light and fluffy. Beat in the egg and vanilla extract until combined. Add the cocoa powder and red velvet emulsion, mixing until the color is uniform. Gradually add the flour, mixing just until a soft dough forms. Fold in the white chocolate chips.Look for The dough will be soft but not sticky, and a deep red color with white chips throughout.Tip Do not overmix once the flour is added, or the cookies will be tough.
- Assemble the Stuffed CookiesDivide the red velvet dough into 16 equal portions. Flatten one portion into a disk about 3 inches across. Place a frozen cream cheese ball in the center and wrap the dough around it, sealing the edges completely. Roll gently to smooth the ball. Repeat with the remaining dough and cream cheese balls. Place the stuffed balls on a parchment-lined baking sheet, spacing them 2 inches apart.Look for The dough should completely enclose the cream cheese, with no cracks showing.Tip If the dough cracks, press it back together with your fingers. Chilling the dough for 10 minutes helps.
The cream cheese balls should be solid and easy to handle. The dough should be a uniform red color, soft but not sticky.
When you wrap the dough around the frozen cream cheese, the balls should be smooth and free of cracks, with the filling completely hidden.
Bake to Crackly Perfection
- Bake the CookiesPreheat the oven to 350°F (175°C). Bake the cookies for 11 minutes, until the edges are set and slightly crackled, but the centers still look slightly soft. The cream cheese will melt and create a gooey center.Look for The cookies will have crackled tops and a slightly glossy sheen in the center.Safe temperature 160°F (71°C) internal temperature (egg dishes)Tip Baking time may vary by a minute or two; start checking at 10 minutes.
- Cool Slightly and Press on Extra ChipsRemove the baking sheet from the oven and let the cookies cool on the sheet for 5 minutes. While still warm, press a few extra white chocolate chips onto the tops of the cookies for a glossy finish.Look for The cookies will be puffed and the centers will look molten.Tip Do not move the cookies immediately; they are fragile when warm.
The cookies will puff and spread slightly, with crackled tops and a glossy sheen in the center. The edges will be set and slightly firm, while the centers will look soft and molten. The kitchen will smell of cocoa and vanilla.
Serve and Savor
- Serve WarmTransfer the cookies to a wire rack or serve directly from the baking sheet while warm. The centers will be molten and creamy. Enjoy immediately for the best texture.Look for The cookies are best when the center is still warm and flowing.Tip If they cool completely, the centers will set but still be creamy.
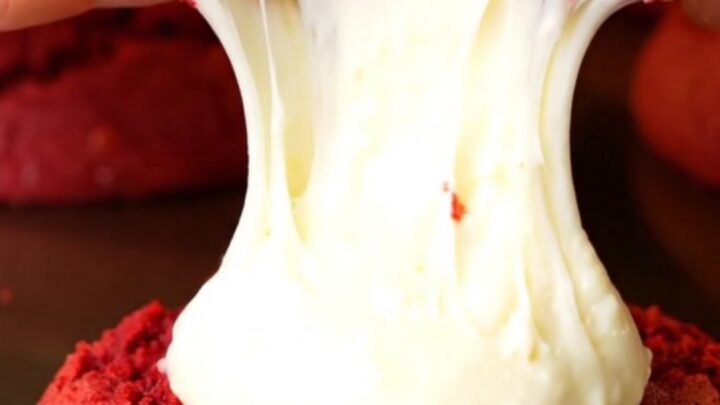
The cookies are best served warm, with the cream cheese center flowing out as you bite. The exterior should be tender with a slight crackle, and the white chocolate chips on top will be just softened.
Common mistakes
One common mistake is overbaking, which dries out the cookies and makes the cream cheese center lose its molten quality. Keep a close eye on the oven and pull the cookies at 11 minutes, even if they look slightly soft.
Another pitfall is not sealing the dough around the cream cheese properly; if any cream cheese is exposed, it will leak out during baking. Press the dough firmly around the filling and smooth any seams.
How to tell it’s done
The cookies are done when the edges are set and slightly crackled, and the centers look just barely soft. The internal temperature of the cookie dough (including the egg) should reach 160°F (71°C).
To test, insert an instant-read thermometer into the center of a cookie, avoiding the cream cheese pocket. The cookies will continue to set as they cool on the baking sheet, so remove them from the oven while the centers still look slightly underdone.
- Egg dishes: 160°F (71°C) in the thickest part
Up next · Part 3 of 3
4 variations · storage & make-ahead · 5 answers · printable card
Tips, FAQ & printable recipe (Part 3)← Back to the ingredients (Part 1)