Desserts · Part 2 of 3: Instructions
Moist Wacky Chocolate Cake with Glossy White Frosting Step-by-step instructions
- Prep
- Cook
- Total
- Serves
- 9
Before you start
Set up a clean, dry workspace on your countertop with your square glass dish centered in front of you. Retrieve your offset spatula, a tall chef knife, and a clean damp kitchen towel for wiping the blade during slicing.
Ensure the frosting is at room temperature so that it spreads smoothly without tugging at the delicate chocolate crumb underneath.
Ingredients at a glance (2)
- 1 8-inch chocolate cake, baked in a square glass dish, store-bought or made ahead
- 1 1/2 cups glossy white frosting, store-bought or made ahead
Instructions
Base Inspection
- Prepare the Cake BasePlace the cooled chocolate cake in its square glass dish onto a flat, stable countertop. Ensure the surface of the cake is level and completely cool to the touch before adding any topping.Look for The cake surface should be cool, firm, and free of excess loose crumbs.Tip Never frost a warm cake, as the heat will melt the frosting into an oily layer.
The chocolate cake must be fully settled inside the square glass dish, completely cooled, and flat. Touch the center gently to verify that no residual warmth remains. The surface should be free from loose crumbs that could mix into the white topping and muddy the glossy finish.
Frosting Application
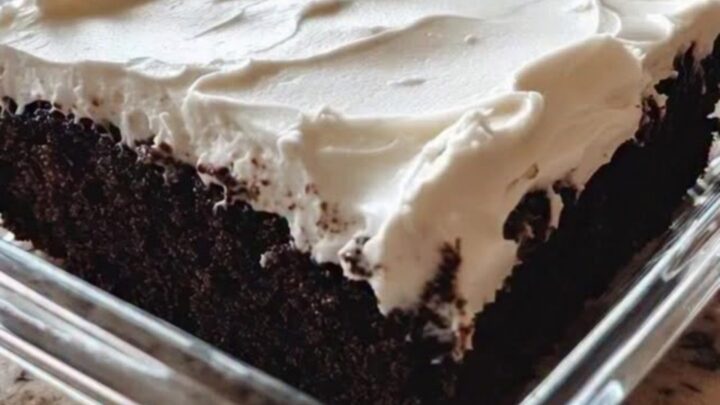
- Apply and Swirl FrostingDollop the glossy white frosting directly onto the center of the chocolate cake. Use an offset spatula to spread it smoothly to all four corners, creating decorative ripples and textured swirls as you sweep across the surface.Look for The frosting forms a thick, even layer with pronounced, glossy swoops across the top.Tip Wipe the offset spatula clean occasionally to keep the swirled pattern crisp and sharp.
The frosting must form a continuous, generous blanket across the entire top surface, reaching all four glass corners.
The surface should display elegant, soft swirls that retain their shape without running. Verify that no dark cake crumbs show through the top of the white icing.
Precision Slicing
- Slice and ServePress a sharp knife cleanly through the frosted cake, cutting it into nine even squares. Wipe the knife blade clean between each cut to ensure sharp, distinct edges, then serve directly from the dish.Look for Cleanly defined squares with distinct layers of dark cake and white frosting.Tip Dip the knife blade in warm water and wipe dry between cuts for bakery-quality slices.
The cuts should form a neat grid of nine uniform squares with razor-sharp borders. Check that the frosting has not smeared down the sides of the cake pieces. Each portion should lift easily on a fork with both frosting and moist crumb intact in a single cohesive bite.
Common mistakes
The most frequent error is attempting to frost the cake while it retains even a hint of warmth from baking. This causes the white frosting to melt into an unappealing, translucent liquid.
Another common mistake is dragging the knife back and forth like a saw when cutting; always press straight down in a single firm motion, wiping the knife clean after each pass.
How to tell it’s done
The cake is ready when the thick layer of white frosting covers the surface evenly from corner to corner with distinct, glossy ripples.
When sliced, the knife should pass cleanly through to the bottom of the dish, yielding neatly separated squares. The interior crumb should look dark, dense, and deeply moist against the stark white topping.
Up next · Part 3 of 3
2 variations · storage & make-ahead · 3 answers · printable card
Tips, FAQ & printable recipe (Part 3)← Back to the ingredients (Part 1)