Desserts · Part 2 of 3: Instructions
Moist Chocolate Wacky Cake with Vanilla Frosting Step-by-step instructions
- Prep
- Cook
- Total
- Serves
- 9
Before you start
Set up a clean, clear work area on the kitchen counter with the prepared cake dish placed firmly on the surface. Prepare a flat white dessert plate, a sharp slicing knife, a metal spatula, and a fork for serving.
If the cake was refrigerated, let it sit on the counter for about fifteen minutes so the crumb softens slightly and the frosting reaches a creamy, spoonable consistency.
Ingredients at a glance (2)
- 1 8-inch chocolate wacky cake, made ahead
- 1 cup vanilla frosting, store-bought or made ahead
Instructions
Surface inspection
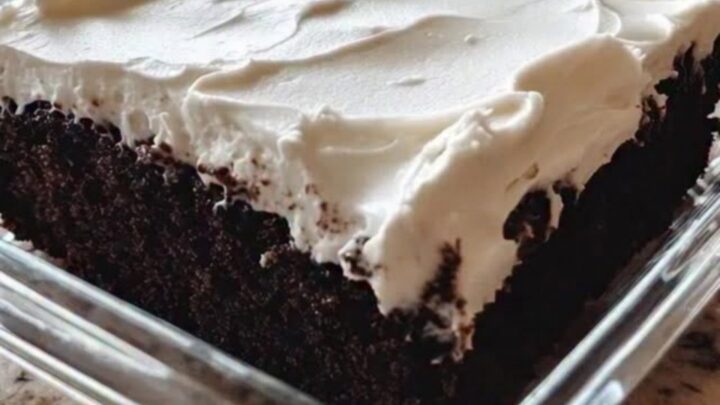
- Check the frosted cakeSet the prepared square glass baking dish containing the baked chocolate wacky cake topped with fluffy white vanilla frosting onto a level granite countertop.Look for The white frosting should be fluffy, even, and set firmly across the dark cake surface.Tip Keeping the cake in the square glass dish makes portioning clean and easy.
Inspect the frosted cake in the baking dish to ensure the vanilla frosting is spread evenly from edge to edge. The frosting should look opaque, white, and billowy with gentle textural swirls on top.
There should be no melted spots or discoloration. The kitchen should carry the sweet, inviting scent of vanilla extract and deep cocoa.
Grid portioning
- Slice the cake into squaresTake a clean knife and slice down through the thick frosting and cake base to cut nine equal squares inside the dish.Look for Crisp grid lines appear through the creamy frosting layer without dragging.Tip Wiping the knife blade between cuts helps produce sharp, clean edges.
Check the grid of cut lines across the cake surface. The knife should leave distinct divisions separating nine thick squares. Look closely to verify that the blade cut completely through the bottom crust of each slice so that none remain attached to neighboring pieces or stuck to the bottom of the glass dish.
Plating and texture test
- Lift and serve each sliceSlide a metal spatula under a center slice, lift the thick square cleanly from the dish, and place it gently onto a white serving plate.Look for The slice stands upright with distinct layers of soft dark crumb and fluffy white frosting.Tip Use a fork to press through the tender crumb before serving to confirm the delicate texture.
Observe the lifted slice sitting atop the white plate. The dark chocolate base should look moist, springy, and evenly crumbed beneath the thick white vanilla crown. Pressing lightly with a fork should meet tender softness, yielding a perfect bite that holds the frosting securely without separating or crumbling excessively.
Common mistakes
A common mistake is using a dull or warm knife to cut into the cake, which can drag the frosting across the chocolate crumb and smudge the clean lines.
Another issue occurs when trying to lift the squares using a plastic spatula that is too thick, often resulting in cracked or broken slices. Always slide a thin metal spatula all the way to the bottom corner before lifting.
How to tell it’s done
The dessert is ready when the frosting is set into a stable, fluffy layer that holds soft peaks. A knife inserted through the cake should meet gentle resistance from the soft, springy crumb before gliding cleanly to the bottom of the dish.
Each lifted square should hold its shape on the plate without sagging, revealing a moist dark base beneath a pristine layer of white frosting.
Up next · Part 3 of 3
2 variations · storage & make-ahead · 3 answers · printable card
Tips, FAQ & printable recipe (Part 3)← Back to the ingredients (Part 1)