Desserts · Part 2 of 3: Instructions
Moist Chocolate Wacky Cake with Fluffy Frosting Step-by-step instructions
- Prep
- Cook
- Total
- Serves
- 9
Before you start
Set out the fully cooled chocolate cake in its glass baking dish along with the prepared fluffy white frosting, a clean spatula, and individual dessert plates.
Clear a flat work surface near the serving area so the dish remains steady during slicing. If the cake was refrigerated, let it rest on the counter for at least thirty minutes so the crumb softens before cutting.
Ingredients at a glance (2)
- 1 chocolate cake, baked in a glass baking dish (store-bought or made ahead)
- 1 cup fluffy white frosting (store-bought or made ahead)
Instructions
Topping the Cake Base
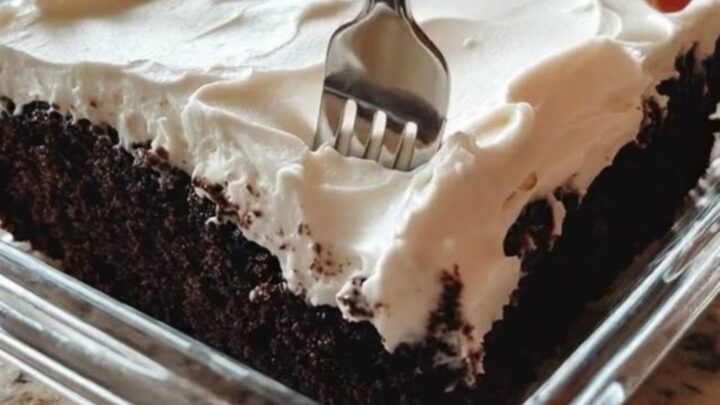
- Prepare and Top the CakePlace the baked chocolate cake in its glass baking dish on a level workspace. Spread the fluffy white frosting in an even, smooth layer across the entire top surface, ensuring full coverage from edge to edge.Look for The white frosting should sit pillowy and flat over the deep dark crumb without dragging cake particles.Tip Ensure the cake base is completely at room temperature before spreading so the frosting holds its structure.
The frosting forms a uniform, thick blanket over the entire top surface of the cake. There should be no bare chocolate patches or uneven ridges, and the glass dish edges should remain tidy.
The frosting looks fluffy, holds soft decorative peaks, and shows no signs of melting or running along the perimeter.
Slicing and Lifting Squares
- Slice and Lift the SquareCut the frosted cake into nine even squares directly inside the dish. Slide a flat spatula gently beneath a center square and lift it upward carefully to reveal the moist, tender crumb underneath.Look for The slice should lift cleanly in one intact square without crumbling or separating from the bottom.Tip Wipe the blade of your knife or spatula clean between slices to keep the white frosting pristine.
The slice releases cleanly from the bottom and edges of the glass dish without leaving large chunks behind. Looking at the sides of the lifted square, the crumb appears fine-grained, rich in color, and visibly moist. The spatula holds the piece steady and level as it leaves the dish.
Plating and Presenting
- Plate and ServeTransfer the lifted cake square directly onto the center of a clean white plate. Press the tines of a fork through the frosted top to cut a soft bite and serve immediately.Look for The fork should glide smoothly through the tender crumb, lifting a clean, soft bite ready to enjoy.Tip Serve at comfortable room temperature to experience the softest texture and deepest chocolate flavor.
The square rests upright in the center of the white plate with crisp, sharp edges and an undisturbed white topping. When the fork presses down, it cuts through smoothly and cleanly, separating a tender, decadent bite that holds together without turning into loose crumbs or smearing across the porcelain.
Common mistakes
Attempting to cut and lift slices while the cake base is still warm is a common mistake that causes the crumb to collapse and the frosting to melt into liquid.
Another frequent pitfall is using a dull or thick spatula, which can crush the delicate structure and drag dark crumbs across the snowy surface of the frosting during portioning.
How to tell it’s done
The cake is ready to serve when the square holds its defined cubical form on the plate with the fluffy frosting resting cleanly on top.
Pressing a dessert fork into the center should meet gentle resistance from the frosting followed by an effortless glide through the ultra-soft, moist crumb without breaking into dry crumbs or feeling sticky.
Up next · Part 3 of 3
2 variations · storage & make-ahead · 3 answers · printable card
Tips, FAQ & printable recipe (Part 3)← Back to the ingredients (Part 1)