Desserts · Part 2 of 3: Instructions
Mini No-Bake Pumpkin Pie Bites for Easy Autumn Entertaining Step-by-step instructions
- Prep
- Cook
- Total
- Serves
- 12
Before you start
Before beginning, ensure all ingredients are ready and at the appropriate temperatures. The pumpkin cheesecake filling should be chilled to ensure it holds its shape once spooned into the shells.
Have the parchment-lined baking sheet placed on a flat, stable surface in a cool area of the kitchen. Keep the whipped cream in the refrigerator until the final moment to maintain its stability, and ensure the ground cinnamon is in a shaker for an even, light dusting.
Ingredients at a glance (4)
- 12 mini graham cracker shells
- 1 cup pumpkin cheesecake filling
- 1/2 cup whipped cream
- ground cinnamon, for serving
Instructions
Base Preparation
- Prepare the BaseLine a large baking sheet with parchment paper to ensure easy cleanup. Arrange the twelve mini graham cracker shells in even rows on the prepared baking sheet. Ensure they are spaced slightly apart to make filling them easier.Look for The shells should be stable and ready for filling on the flat surface.Tip Check each shell for cracks before filling to ensure they hold the cream mixture securely.
The graham cracker shells should be arranged neatly on the parchment paper. They should be stable and ready for the filling. Verify that all shells are intact and free from any significant damage before proceeding to the next step, ensuring a clean and professional presentation for the final dessert.
Filling Assembly
- Fill the BitesUsing a small spoon, carefully scoop the pumpkin cheesecake filling into each graham cracker shell. Fill them until they are nearly level with the top edge of the shell. Smooth the surface slightly with the back of the spoon for a clean appearance.Look for The filling should be evenly distributed among all twelve shells.Tip Use a piping bag if a cleaner, more uniform look is desired for the filling layers.
The pumpkin cheesecake filling should be evenly distributed into each of the twelve shells. The surface of the filling should be relatively smooth and level with the top edge of the shell.
Check that no filling has dripped onto the parchment paper, ensuring a clean look for the final plated presentation.
Garnish and Finishing
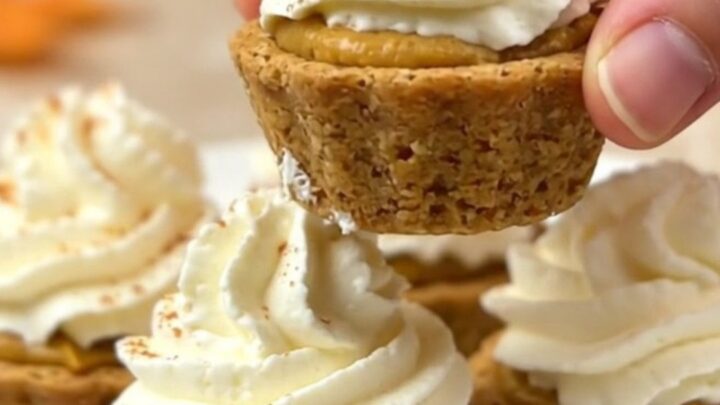
- Garnish and ServeTop each filled bite with a generous dollop of whipped cream. Immediately dust the tops lightly with ground cinnamon. Transfer the finished bites to a clean white serving plate and serve chilled for the best texture and flavor experience.Look for The cinnamon should be lightly dusted over the whipped cream peaks.Tip Add the whipped cream topping just before serving to prevent it from softening the shells.
Each bite should be topped with a neat dollop of whipped cream and a light, even dusting of ground cinnamon. The final assembly should look cohesive, with the whipped cream maintaining its shape atop the pumpkin filling. Ensure the bites are ready for immediate service on the white plate.
Common mistakes
A common mistake is overfilling the shells, which can cause them to become unstable or spill over during handling. Another error is adding the whipped cream too far in advance, which can lead to the graham cracker shell absorbing moisture and losing its signature crunch.
Ensure the cinnamon is applied sparingly; too much can overwhelm the delicate balance of the pumpkin and cream flavors, detracting from the overall enjoyment of the dessert.
How to tell it’s done
These bites are considered done once the pumpkin cheesecake filling has been neatly portioned into the graham cracker shells and topped with whipped cream. There is no cooking required, so doneness is determined by the visual completion of the assembly steps.
The filling should look smooth and set, and the whipped cream should hold its form. No specific temperature check is necessary for this dessert as it does not contain raw proteins that require heat treatment.
Up next · Part 3 of 3
2 variations · storage & make-ahead · 3 answers · printable card
Tips, FAQ & printable recipe (Part 3)← Back to the ingredients (Part 1)