Desserts · Part 2 of 3: Instructions
Maple Walnut Toffee Dark Chocolate Butter Crunch Step-by-step instructions
- Prep
- Cook
- Total
- Serves
- 16
Before you start
Before starting, measure all ingredients and have them ready. Toast the walnuts and let them cool completely. Grate the chocolate and set it aside. Line a 9x13-inch baking sheet with parchment paper, leaving overhang for easy removal.
Fill a small bowl with ice water for testing the toffee, if not using a thermometer. Clear a work area for pouring the hot toffee, as it sets quickly.
Ingredients at a glance (8)
- 1 1/2 cups walnut halves
- 1 cup unsalted butter (2 sticks)
- 1 1/4 cups granulated sugar
- 1/4 cup pure maple syrup
- 2 tbsp water
- 1/2 tsp kosher salt
- 1/2 tsp baking soda
- 8 oz 70% dark chocolate, grated (about 1 1/2 cups shavings)
Instructions
Prep and Toast
- Toast the walnutsSpread the walnut halves in a single layer on a baking sheet and toast in a 350°F (175°C) oven for 8-10 minutes, stirring once, until fragrant and lightly browned. Let cool completely, then chop coarsely. Keep the oven on for the chocolate? No, the chocolate is grated at room temperature.Look for The walnuts smell nutty and look slightly darker; they crisp as they cool.Tip Watch closely after 8 minutes; nuts can burn quickly.
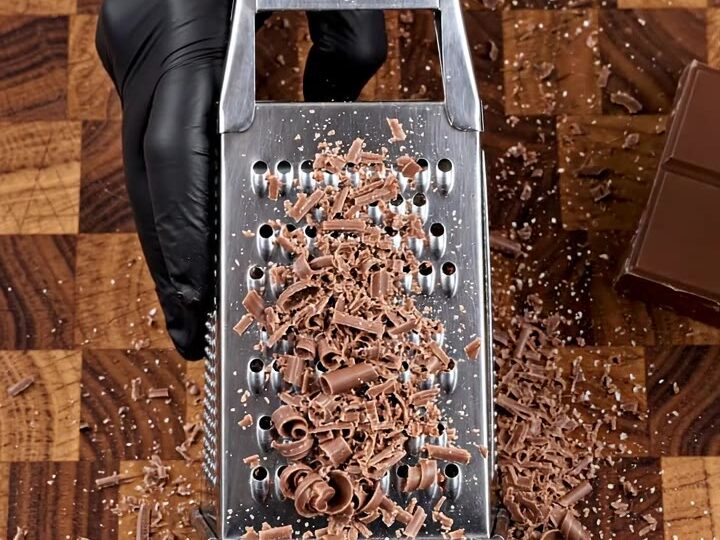
- Grate the chocolateUsing a box grater, grate the dark chocolate into a bowl to create fine shavings. Set aside at room temperature. The shavings will melt quickly when spread over the hot toffee.Look for The chocolate shavings are light and fluffy, not clumped.Tip Chill the chocolate for 10 minutes before grating for cleaner shavings.
- Prepare the panLine a 9x13-inch baking sheet with parchment paper, leaving overhang on two sides for easy lifting. Have the chopped walnuts ready to sprinkle over the toffee.Look for The parchment is smooth and flat against the pan.Tip Use a light-colored pan to help monitor the toffee color.
The walnuts are toasted and fragrant, with a slightly darker color. The chocolate is grated into fine shavings, and the pan is lined with parchment. Everything is ready to go before the toffee starts cooking.
Cook and Top
- Cook the toffeeIn a medium saucepan, combine the butter, sugar, maple syrup, water, and salt. Cook over medium heat, stirring occasionally, until the butter melts and the sugar dissolves. Attach a candy thermometer and continue cooking without stirring until the mixture reaches 300°F (149°C), the hard-crack stage.Look for The toffee turns deep amber and smells caramelized; a spoonful drizzled into cold water turns brittle.Tip Brush down any sugar crystals with a wet pastry brush to prevent graininess.
- Add baking soda and walnutsRemove the pan from the heat and quickly stir in the baking soda until fully incorporated; the mixture will foam. Immediately fold in the chopped walnuts, then pour the toffee onto the prepared baking sheet. Use a spatula to spread it into an even layer.Look for The toffee bubbles and turns lighter in color from the baking soda; it spreads smoothly.Tip Work quickly; the toffee sets fast.
- Top with chocolateLet the toffee cool for 2 minutes, then sprinkle the grated chocolate evenly over the hot surface. Wait 2 minutes for the chocolate to soften, then spread it into a smooth, even layer with an offset spatula.Look for The chocolate melts into a glossy, spreadable layer without pooling.Tip If the chocolate doesn't melt fully, place the pan in a 200°F (95°C) oven for 1 minute.
The toffee has reached a deep amber color and bubbles when the baking soda is added. The walnuts are folded in, and the toffee is spread into an even layer. The chocolate melts into a smooth, glossy topping that covers the entire surface.
Set and Slice
- Cool and setLet the slab cool at room temperature for 30 minutes, then refrigerate for at least 1 hour until the chocolate is fully set and the toffee is firm. The slab should be completely hard before cutting.Look for The chocolate is matte and firm; the toffee feels solid when pressed.Tip Cooling slowly prevents the chocolate from cracking.
- Slice and serveLift the slab out of the pan using the parchment overhang. Place on a cutting board and use a large chef's knife to cut into thick bars, about 2 inches wide. Serve at room temperature for the best snap.Look for The bars break cleanly, showing distinct golden toffee and dark chocolate layers.Tip For clean cuts, score the chocolate lightly before pressing down firmly.
The slab is firm and the chocolate is set. When cut, the bars break cleanly, revealing a distinct golden toffee layer and a smooth dark chocolate layer. The texture is crunchy, not sticky.
Common mistakes
One common mistake is stirring the toffee after it starts boiling, which can cause crystallization and a grainy texture.
Let it boil undisturbed. Another is undercooking the toffee, which results in a chewy, sticky texture instead of a crisp snap.
Use a thermometer to avoid this. Also, be careful not to burn the toffee; if it smells burnt, it's overdone. Finally, don't spread the chocolate too thin or it may not cover the toffee evenly; use enough to create a substantial layer.
How to tell it’s done
The toffee is done when it reaches 300°F (149°C) on a candy thermometer. If testing in cold water, a small amount of syrup dropped into ice water will form hard, brittle threads that snap when bent.
The toffee should be deep amber and smell caramelized. The chocolate is ready when it has melted into a smooth, glossy layer. The slab is fully set when the chocolate is firm and the toffee is hard; it should not bend when lifted.
Up next · Part 3 of 3
4 variations · storage & make-ahead · 5 answers · printable card
Tips, FAQ & printable recipe (Part 3)← Back to the ingredients (Part 1)