Desserts · Part 2 of 3: Instructions
Maple Walnut Butter Crunch Dark Chocolate Bark Step-by-step instructions
- Prep
- Cook
- Total
- Serves
- 12
Before you start
Gather everything before you start, because the chocolate sets quickly and the toppings must go on while it is still wet. Line a rimmed metal baking sheet with parchment paper so it covers the bottom and sides, and keep it close to your work area. Place the dark chocolate in the refrigerator for about ten minutes so it grates cleanly over a box grater.
Chop the walnuts roughly with a large knife and set them aside with the flaky sea salt in a small bowl. Have the maple walnut toffee and butter crunch ready, either store-bought or made ahead, and break it into pieces that fit your bars. Set up a wooden cutting board, a microwave-safe bowl for melting the chocolate and a sharp knife for the final cut.
Ingredients at a glance (4)
- 1 cup walnuts, roughly chopped
- flaky sea salt, to taste
- 8 oz dark chocolate, plus extra for grating
- 1 cup maple walnut toffee and butter crunch, store-bought or made ahead
Instructions
Build the toffee and grated chocolate base
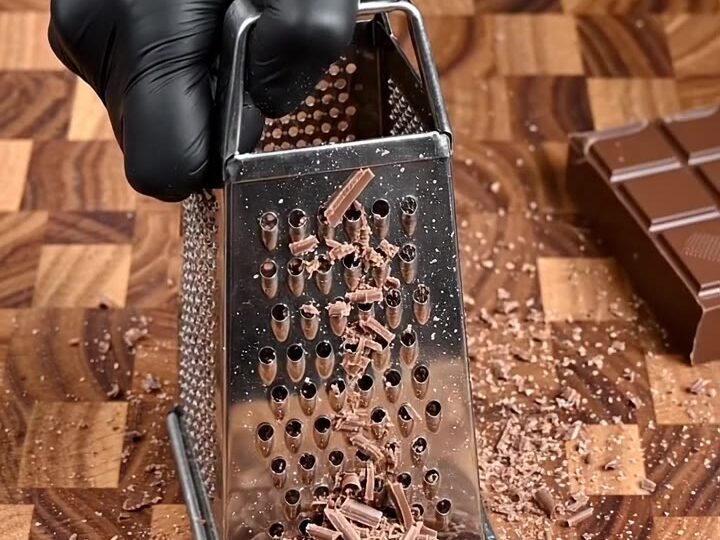
- Chop the walnuts and grate chocolateRoughly chop the walnuts with a large knife and scatter them with flaky sea salt across a wooden cutting board. Grate a block of dark chocolate over a box grater so fine shavings fall onto the board beside the nuts.Look for Walnuts in irregular pieces and fine chocolate shavings scattered across the board.Tip Chill the chocolate block for ten minutes first so it grates cleanly without smearing.
- Line the pan with toffeeLine a metal baking sheet with parchment paper. Spread the golden maple walnut toffee and butter crunch across one half of the tray in an even layer, leaving the other half open for the chocolate.Look for An even golden layer covers one side of the parchment with no gaps.Tip Break any large toffee pieces slightly so the layer lies flat and level.
At the end of this phase, the baking sheet holds a flat, even layer of golden maple walnut toffee and butter crunch covering about half of the parchment. Grated dark chocolate shavings and chopped walnuts sit scattered on the board beside it, and the parchment edges are neatly folded.
Check that the toffee is not thick in any spot and that the chocolate shavings are fine rather than chunky. The toffee should look glossy and firm, with no soft or sticky patches. Only move on once the base is level and the toppings are measured and ready, so the melted chocolate can be poured straight after without any waiting.
Pour, top and set the chocolate
- Melt and spread the chocolateMelt the remaining dark chocolate in a microwave-safe bowl in short bursts, stirring until smooth. Pour it over the tray and spread it into a large sheet that partly covers the toffee layer.Look for Melted chocolate that is smooth, glossy and pourable.Tip Stir between short heating bursts to avoid scorching the chocolate.
- Add walnuts and toffee bitsWhile the chocolate is still wet, sprinkle the chopped walnuts and pieces of butter crunch over it from a small bowl, pressing lightly so they stick. Keep the toppings spread across the whole sheet.Look for Walnuts and toffee pieces are evenly distributed on the glossy chocolate.Tip Work quickly while the chocolate is still soft so the toppings adhere.
- Set the chocolate until firmLet the chocolate set at room temperature, or chill the tray in the refrigerator, until firm, glossy and no longer soft anywhere on the surface.Look for The surface is firm, glossy and no longer soft when pressed lightly.Tip Chilling speeds setting and helps the chocolate release cleanly from the parchment.
At the end of this phase, the melted dark chocolate covers the rest of the sheet and partly overlaps the toffee in one large, smooth glossy sheet. Walnut pieces and toffee bits are pressed evenly across the wet surface, and nothing looks streaked or dull. Check that the chocolate has spread to the edges and that no toppings are clumping in one corner. Let the tray rest until the chocolate is firm, glossy and no longer soft when lightly touched. The set surface should feel dry and smooth, ready for lifting and cutting into bars without any runny or tacky areas.
Lift, cut and arrange the bars
- Lift and cut the slabLift the set slab from the tray using the parchment. Place it on a cutting board and cut it into rectangular bars with a sharp knife, revealing the layers of toffee, chocolate and walnut.Look for Clean layers of toffee, chocolate and walnut show along each cut edge.Tip Wipe the knife between cuts for neat, clean edges on every bar.
- Arrange and serve the barsArrange the bars neatly on the board, topping each with walnut halves and crunchy toffee flecks. Serve at once or store until ready to eat.Look for Bars are neatly portioned and topped, ready to serve.Tip Sprinkle a few final grains of sea salt over the bars just before serving.
At the end of this phase, the set slab has been lifted from the tray and sits on the cutting board, cut into neat rectangular bars that reveal clear layers of toffee, chocolate and walnut pieces. Each bar is topped with walnut halves and crunchy toffee flecks, and they are arranged in an orderly pattern on the board. Check that the cut edges are clean and that no bar has broken away from the others. The chocolate should be firm enough to hold its shape, and the bars should look ready to serve or to store.
Common mistakes
The most common problem is pouring the chocolate before the toffee base is ready, which lets it mix into the toffee and blur the layers. Wait until the toffee is spread evenly across one half of the tray before you begin melting the chocolate. Another frequent error is overheating the chocolate in the microwave, which makes it thick and dull.
Heat it in short bursts and stir until smooth so it stays glossy and pourable. Scattering the walnuts and toffee after the chocolate has already set means they will not stick, so work quickly while the surface is still wet. Cutting the slab before it is firm can crack the chocolate and pull toppings loose, so check that it is fully set first.
How to tell it’s done
The bark is ready when the chocolate is firm, glossy and no longer soft or tacky when lightly pressed. The surface should feel dry and smooth, and the toppings should stay fixed when you tilt the parchment. Lift one corner of the slab: if it holds its shape and the chocolate breaks cleanly along a cut line, the bark is set. Look at a cut edge as well.
You should see distinct layers of golden toffee, dark chocolate and walnut pieces without any runny streaks. Because this bark contains no eggs, meat or other raw protein, there is no internal cooking temperature to reach, and the setting of the chocolate is the sign of doneness. If the surface still looks dull or feels soft, give the slab more time in the refrigerator before cutting.
Up next · Part 3 of 3
4 variations · storage & make-ahead · 5 answers · printable card
Tips, FAQ & printable recipe (Part 3)← Back to the ingredients (Part 1)