Desserts · Part 1 of 3: Ingredients
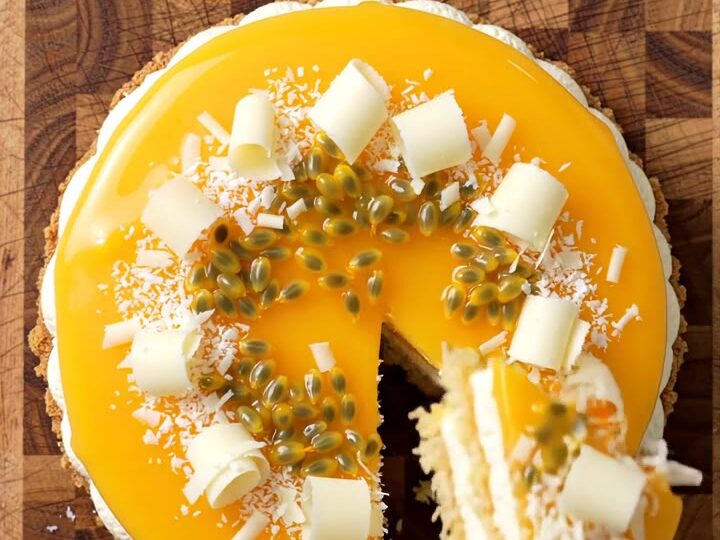
Mango Passion Fruit Coconut Mousse Mirror Cake: Showstopper
- Prep
- Cook
- Total
- Serves
- 10
This mirror-glazed mousse cake is pure tropical indulgence: a cloud of coconut mousse wrapped around a sweet mango compote, all under a glossy mirror finish. The crunchy chocolate curls and tangy passion fruit seeds add texture and brightness, making every slice a celebration. It’s a showstopper for birthdays, dinner parties, or any day that calls for something extraordinary.
Imagine a dessert that looks like it came from a high-end patisserie but is surprisingly achievable at home. This mango passion fruit coconut mousse mirror cake combines creamy coconut mousse, vibrant mango compote, and a shiny glaze that mirrors the light.
The contrast of textures—silky mousse, juicy mango, crunchy chocolate—creates a symphony in every bite. With a few make-ahead steps, you can assemble this stunning cake and impress your guests without the last-minute stress. The result is a dessert that tastes as exquisite as it looks.
Ingredients
- 8 oz coconut white chocolate, grated
Coconut Mousse
- 2 cups coconut milk, chilled
- 1 cup heavy cream
- 1/2 cup granulated sugar
- 2 tsp powdered gelatin
- 3 tbsp cold water
Mango Compote
- 2 cups diced mango
- 1/4 cup granulated sugar
- 1 tbsp lemon juice
Mirror Glaze
- 1 batch mirror glaze (store-bought or homemade)
Garnish
- 1/4 cup fresh passion fruit seeds
- 1/2 cup coconut chocolate curls
Why this recipe works
The coconut mousse is light and airy, thanks to whipped cream folded into a coconut-gelatin base. This technique creates a stable yet delicate texture that holds its shape when unmolded, while the gelatin ensures the cake sets firmly enough to slice cleanly.
The mango compote, cooked briefly with sugar and lemon, intensifies the fruit’s natural sweetness and adds a tangy contrast to the rich coconut.
The mirror glaze is the crowning glory: when poured over the frozen cake, it sets to a smooth, shiny surface that reflects light beautifully. The key is to use a glaze that is fluid enough to coat evenly but thick enough not to run off completely.
Freezing the cake before glazing ensures a clean finish and prevents the mousse from melting into the glaze. The result is a professional-looking dessert that tastes as good as it looks.
Notes and substitutions
Coconut white chocolate is a specialty product that combines white chocolate with coconut flavor. If unavailable, use regular white chocolate and add a pinch of coconut extract to the mousse. The grated chocolate is used for garnish, but you can also mix some into the mousse for extra texture.
The mirror glaze can be store-bought or homemade; both work well. If making from scratch, use a recipe that includes gelatin and sweetened condensed milk for a glossy finish.
The passion fruit seeds are a delightful pop of tartness; if you can’t find fresh, use canned passion fruit pulp with seeds. The cake is best served chilled, so plan to keep it refrigerated until serving.
- coconut white chocolate: white chocolate (regular) if coconut flavor is not desired; add a pinch of coconut extract.
- coconut milk: full-fat coconut cream for a richer mousse.
- fresh passion fruit seeds: canned passion fruit pulp with seeds, drained.
Equipment
- Box grater
- 8-inch ring mold
- Mixing bowls
- Whisk or electric mixer
- Saucepan
- Spatula
- Offset spatula
- Serving plate
Up next · Part 2 of 3
6 steps · 15 min of cooking · what to look for at each stage
Step-by-step instructions (Part 2)