Desserts · Part 1 of 3: Ingredients
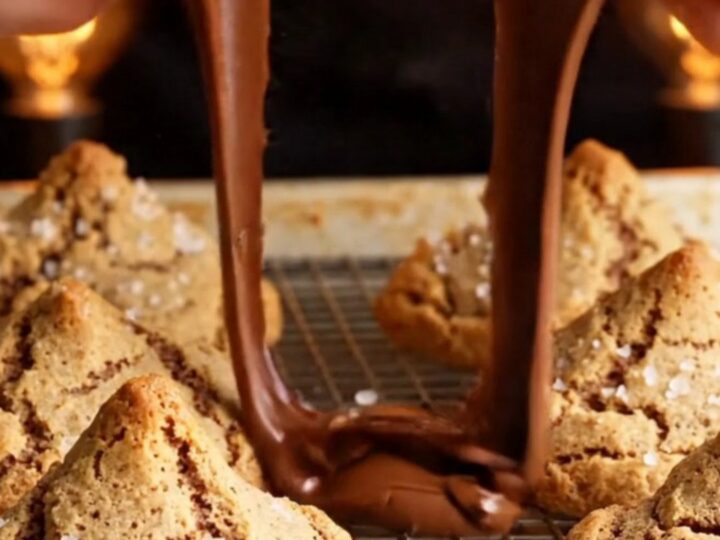
Levain-Style Thick Cookies: Gooey Molten Chocolate
- Prep
- Cook
- Total
- Serves
- 8
These thick, bakery-style cookies are the ultimate indulgence: crisp golden edges, soft chewy centers, and pools of molten chocolate that stretch with every bite. The secret is a high oven temperature and a short bake time, which creates a craggy exterior while keeping the inside gloriously gooey.
Made with cold butter and a mix of two chocolates, these cookies deliver the same dramatic break-open moment as the famous Levain Bakery treats. Whether you're baking for a crowd or just treating yourself, this recipe is straightforward, reliable, and guaranteed to impress.
There's something magical about pulling a tray of giant cookies from the oven, their tops golden and craggy, and breaking one open to reveal a river of melted chocolate. These Levain-style thick cookies are designed to do exactly that. They are tall, dense, and loaded with chocolate, with a texture that's crisp on the outside and almost doughy in the center.
The method is simple: whisk dry ingredients, cream cold butter with sugars, fold in chocolate, shape into rough mounds, and bake hot and fast. The result is a cookie that looks and tastes like it came from a high-end bakery, but it's made entirely in your own kitchen with everyday ingredients.
Ingredients
- 2 1/4 cups all-purpose flour
- 1/4 tsp baking soda
- 1/2 tsp baking powder
- 1 tbsp cornstarch
- 1 cup cold cubed butter
- 1 cup dark brown sugar
- 3 tbsp granulated sugar
- 1 cold egg
- 1 egg yolk
- 1 tbsp vanilla bean paste
- 1 cup semi-sweet chocolate chips
- 1/2 cup milk chocolate chunks
Why this recipe works
The combination of cold butter and a high oven temperature is what gives these cookies their signature texture. Cold butter melts slowly in the oven, creating steam that puffs the cookies up while the exterior sets quickly.
This leads to a crispy shell and a soft, almost underbaked center that stays gooey even after cooling. The high heat also caramelizes the sugars on the outside, adding a deep, toasty flavor that contrasts beautifully with the molten chocolate inside.
The use of both baking soda and baking powder provides the perfect lift. Baking soda helps spread the cookies, while baking powder adds height and a lighter crumb. Cornstarch tenderizes the dough, making the centers soft and chewy. The rough, jagged shaping of the dough mounds is intentional: the uneven surface creates peaks that brown faster, giving the cookies their characteristic craggy appearance and a mix of textures in every bite.
Notes and substitutions
For the best flavor, use high-quality chocolate. Semi-sweet chips provide a classic chocolate flavor, while milk chocolate chunks add creaminess and sweetness. You can substitute dark chocolate for a more intense taste, or use white chocolate for a different twist. The vanilla bean paste adds a rich, aromatic flavor; vanilla extract works as a substitute. Make sure the butter is cold — straight from the fridge — as this is crucial for the texture.
This recipe calls for a stand mixer, but a hand mixer or even a sturdy spoon will work. If using a hand mixer, beat the butter and sugars until crumbly, then add the eggs and vanilla, and finally fold in the dry ingredients with a spatula.
The dough is thick, so be prepared for a bit of arm work. For the most accurate results, weigh your ingredients, especially the flour. Too much flour will make the cookies dry, so spoon and level it if using cups.
- dark brown sugar: light brown sugar can be used, but the cookies will be slightly less molasses-rich.
- vanilla bean paste: Use 1 tablespoon vanilla extract instead.
- semi-sweet chocolate chips: Use dark chocolate chips or chopped dark chocolate for a more intense flavor.
- milk chocolate chunks: Use white chocolate chunks or butterscotch chips for a different twist.
Equipment
- Mixing bowls
- Whisk
- Stand mixer with paddle attachment
- Rubber spatula
- Baking sheets
- Parchment paper
- Wire rack
Up next · Part 2 of 3
8 steps · 11 min of cooking · what to look for at each stage
Step-by-step instructions (Part 2)