Appetizers
Lemon Lava Cake Dessert
Please note: this recipe comes from an earlier version of this site, before our current process, and has not been through our automatic checks. Its first-person passages, which do not describe real events, are hidden whenever they can be detected automatically; some old wording may remain. How we make recipes today
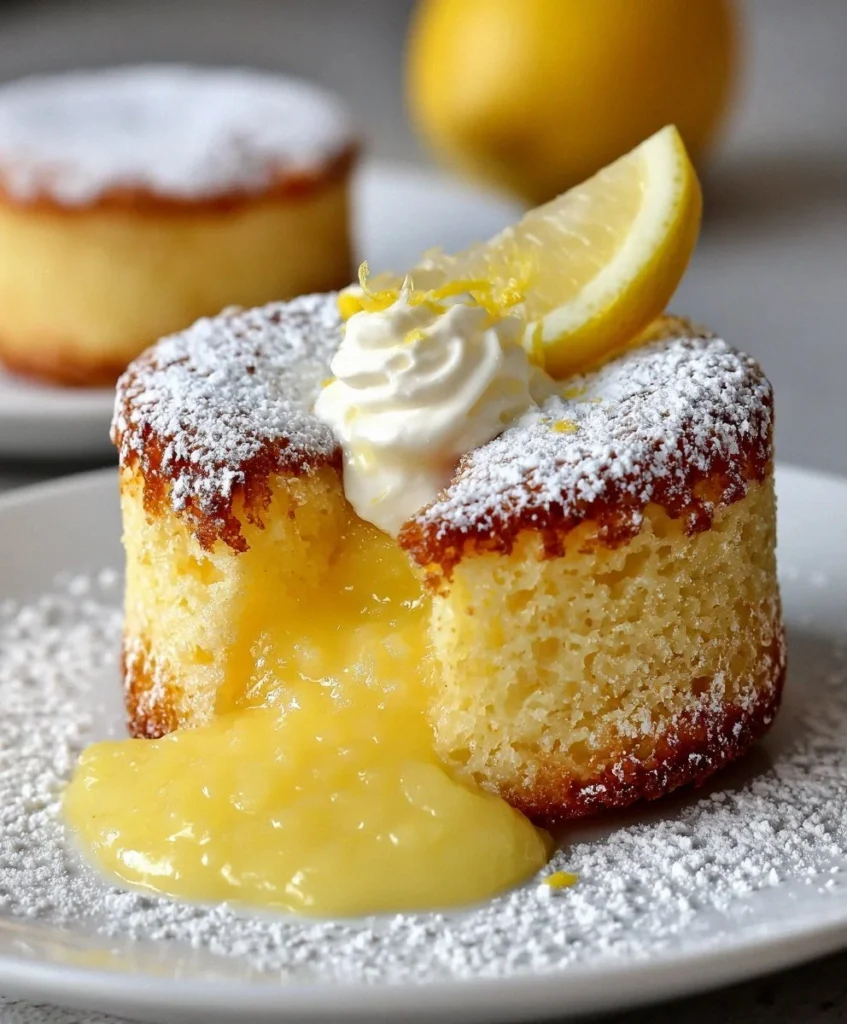
What Makes This Version Stand Out
- White Chocolate Magic: Unlike recipes that rely solely on butter, white chocolate adds cocoa butter’s unique crystallization properties. This creates a firmer outer shell that holds the lava until the exact moment your spoon breaks through — no premature leaks, no deflated cakes.
- Make-Ahead Marvel: You can assemble these completely, freeze them solid, then bake straight from frozen for 14 minutes. Try that with chocolate lava cake and you’ll get chocolate hockey pucks. The lemon curd’s lower freezing point keeps everything fluid and fabulous.
Alright, let’s break down exactly what goes into this masterpiece…
Inside the Ingredient List
The Flavor Base
White chocolate baking chips aren’t just sugary filler — they’re the unsung hero that carries lemon’s bright notes without competing for attention. Choose a brand with real cocoa butter listed first; skip the ones with palm oil unless you want your cakes to taste like birthday candles. When melted with unsalted butter, they create a glossy emulsion that keeps the crumb tender even if you accidentally over-bake by a minute. The vanilla extract isn’t optional here — it bridges the gap between chocolate’s sweetness and lemon’s acidity, creating a harmonious flavor that tastes like summer vacation in the South of France.
The Unexpected Star
Lemon zest is where the real personality lives. Those tiny yellow flecks contain essential oils that pack ten times the flavor of the juice alone. But here’s the trick: zest your lemons directly into the sugar and rub them together with your fingertips. The sugar’s abrasiveness releases more oils, and the crystals act like tiny sponges, carrying flavor throughout the batter instead of letting it cluster in bitter pockets.
Don’t even think about using that dried zest from the spice aisle — it tastes like furniture polish. Fresh zest starts losing its magic within an hour of zesting, so wait until you’re ready to mix before you break out the microplane. And please, for the love of all that’s citrusy, avoid the white pith like it’s your ex at a party — one scrape too deep and your dessert tastes like earwax.
The Final Flourish
Powdered sugar for dusting isn’t just pretty — it dissolves on contact with the warm cake, creating a whisper-thin glaze that adds subtle sweetness without the graininess of regular sugar. Some recipes call for a lemon glaze, but that over-sweetens and masks the curd’s tang. A light snowfall of powdered sugar lets the lemon shine while giving you that gorgeous bistro presentation that makes people reach for their phones before their forks.
Everything’s prepped? Good. Let’s get into the real action…
The Method — Step by Step
- Start by making your lemon curd spheres if you haven’t already. Line a small plate with parchment and drop eight teaspoons of cold lemon curd, spacing them apart. Freeze for at least 30 minutes — you want them rock solid so they don’t bleed into the batter. This is the moment of truth that separates amateur hour from pastry shop perfection. While they freeze, clarify your mind: these frozen drops are time bombs of flavor that will detonate at exactly the right moment.
- Preheat your oven to 425°F (220°C) and position the rack in the center. Butter four 6-ounce ramekins with softened butter, then dust with granulated sugar, tapping out the excess. This sugar coating creates a micro-thin caramelized edge that helps the cakes release like silk. Don’t use cooking spray — it creates a greasy film that prevents the cakes from climbing properly. The sugar should adhere in a thin, even layer that sparkles like frost.
- Melt the white chocolate and butter together using a double boiler or microwave in 20-second bursts. Stir until smooth — it should coat the back of a spoon like liquid velvet. Let this mixture cool for exactly 5 minutes; too hot and it’ll scramble your eggs, too cool and it’ll seize when you add other ingredients. The surface should look glossy, not greasy. If you see any lumps, pass it through a fine-mesh sieve — your future self will thank you.
- In a separate bowl, whisk together the eggs, egg yolks, sugar, lemon zest, and vanilla for a full 2 minutes. You’re not just combining — you’re incorporating air that will lighten the dense chocolate mixture. The batter should lighten in color and fall in thick ribbons when you lift the whisk. Don’t rush this step; think of it as your arm workout for the day. The mixture should smell like lemon pound cake had a baby with vanilla ice cream.
- Fold the cooled chocolate mixture into the egg mixture using a rubber spatula. Cut down the center, scrape the bottom, and fold over — rotate the bowl a quarter turn and repeat. This isn’t stirring; it’s a gentle incorporation that maintains the air you just beat in. The batter should be smooth and pourable, like thick pancake batter. If you see streaks of chocolate, keep folding — patience here prevents marbleized cakes.
- Sift the flour directly over the batter and fold just until no dry streaks remain. Over-mixing develops gluten, which gives you tough cakes that refuse to release from the ramekins. The batter should look like sunshine in liquid form — pale yellow with tiny flecks of zest. Let it rest for 5 minutes while you retrieve your frozen curd bombs. This brief rest allows the flour to hydrate fully, preventing that raw flour taste.
- Fill each prepared ramekin halfway with batter. Gently press one frozen curd sphere into the center of each — it should sit just below the surface. Don’t push it to the bottom or you’ll get a curd puddle underneath. Top with remaining batter, filling each ramekin three-quarters full. The curd should be completely encased like a hidden treasure. Tap the ramekins gently on the counter to release air bubbles.
- Bake for exactly 12-14 minutes — set your timer and don’t walk away. The cakes are done when the edges are set and the centers jiggle slightly when you gently shake the rack. They should rise like proud soufflés with a matte finish on top. Don’t wait for a toothpick to come out clean or you’ll have lemon hockey pucks. The edges will start pulling away from the sides when they’re ready to emerge.
Insider Tricks for Flawless Results
The 5-Minute Rest That Changes Everything
Creative Twists and Variations
Raspberry Lemon Romance
Insert a frozen raspberry along with your lemon curd sphere. The tart berry explodes during baking, creating a marbled effect that’s stunning. Use raspberry coulis instead of powdered sugar for a dramatic red drizzle. This version is what happens when lemon cake and raspberry jam decide to elope.
Earl Grey Infusion
Steep a tea bag in the melted butter for 10 minutes before combining with chocolate. The bergamot adds sophisticated depth that makes these feel like they came from a Parisian patisserie. Serve with a dollop of honey-sweetened whipped cream to balance the tannins.
Meyer Lemon Elegance
Use Meyer lemons for a sweeter, more floral version that’s less puckery. Their thinner skin means more zest per lemon, and the juice is less acidic. These are perfect for people who think they don’t like lemon desserts — they’re like lemon’s charming, well-mannered cousin.
Lavender Honey Dream
Add 1/2 teaspoon of culinary lavender to the sugar when you zest your lemons. The floral notes marry beautifully with lemon, creating a Provencal vibe. Just don’t overdo it — too much lavender tastes like soap. A light hand creates magic; a heavy hand creates potpourri.
Passion Fruit Passion
Replace half the lemon curd with passion fruit curd for an exotic twist. The tropical acidity adds complexity that makes people ask “what’s in this?” in the best way. The black seeds add visual interest, though you can strain them if you prefer smooth sailing.
Storing and Bringing It Back to Life
Fridge Storage
Cooked cakes will keep for up to 3 days in the refrigerator, but they’ll lose their molten magic. Wrap each ramekin tightly with plastic wrap once completely cool. To reheat, microwave on 50% power for 20-25 seconds — just until warm, not hot. The curd won’t flow like originally, but it softens into a spoonable sauce that’s still delicious. Add a scoop of vanilla ice cream to compensate for the textural change.
Best Reheating Method
If you’ve refrigerated baked cakes, the microwave is your friend but needs finesse. Place a small mug of water in the microwave alongside your cake — the steam prevents the curd from becoming rubbery. Heat in 10-second bursts, checking after each. You’re looking for warm, not hot. For the oven method (better texture but longer), place the ramekin in a 300°F (150°C) oven for 8-10 minutes with a small pan of water on the rack below.
Lemon Lava Cake Dessert
Homemade Recipe
Ingredients
- 0.5 cup white chocolate baking chips
- 0.25 cup unsalted butter
- 2 large eggs
- 2 large egg yolks
- 0.25 cup granulated sugar
- 2 tablespoons all-purpose flour
- 0.25 cup lemon curd
- 1 teaspoon lemon zest
- 0.5 teaspoon vanilla extract
- Powdered sugar for dusting
- Butter and sugar for ramekins
Directions
- Freeze 8 teaspoons of lemon curd on a parchment-lined plate for 30 minutes until solid.
- Preheat oven to 425°F. Butter and sugar four 6-ounce ramekins.
- Melt white chocolate and butter together until smooth; cool 5 minutes.
- Whisk eggs, yolks, sugar, lemon zest, and vanilla until light and thick.
- Fold chocolate mixture into egg mixture until combined.
- Sift flour over batter and fold just until incorporated.
- Fill ramekins halfway, add frozen curd sphere, top with remaining batter.
- Bake 12-14 minutes until edges are set but centers jiggle slightly.
- Let rest 5 minutes, then invert onto plates and dust with powdered sugar.
Common Questions
Can I make these ahead of time?
What if I don’t have ramekins?
My cakes didn’t flow — what went wrong?
Can I use bottled lemon juice?
How do I know when they’re done?
Can I double the recipe?
Next recipe

Sweet Cocktail Meatballs: 3-Ingredient Slow Cooker Appetizer
See the recipe → →More recipes to try

Crispy Blooming Eggplant Fan Fries with Garlic Yogurt Dip
Total time: 45 min
Crispy Blooming Eggplant Fan Fries with Smoky Paprika
Total time: 32 min
Crispy Blooming Eggplant Fan Fries with Garlic Herb Yogurt Sauce
Total time: 45 min
Crispy Smiley Face Potato Fries
Total time: 35 min
Crispy Sesame Potato Pockets with Flaky Puff Pastry
Total time: 50 min