Dinner · Part 2 of 3: Instructions
Juicy Persian-Style Minced Chicken Kebabs With Saffron Rice Step-by-step instructions
- Prep
- Cook
- Total
- Serves
- 6
Before you start
Before starting, gather all ingredients and equipment. Grate the onion and squeeze out excess liquid. Mince the garlic and chop the green chilies and parsley. Measure out the spices.
If using wooden skewers, soak them in water for 30 minutes. Prepare the saffron rice ingredients and the salad components. Have a large skillet or grill pan ready, along with tongs and a baking sheet for the shaped kebabs.
Ingredients at a glance (22)
- 1 1/2 lb minced chicken thighs
- 1 lb minced chicken breast
- 1 medium onion, grated
- 4 cloves garlic, minced
- 2 green chilies, finely chopped
- 1/2 cup fresh parsley, chopped
- 2 tsp ground cumin
- 2 tsp ground coriander
- 1 tsp chili flakes
- 1 tsp paprika
- 1 1/2 tsp kosher salt
- 1/2 tsp black pepper
- 2 tbsp vegetable oil, for grilling
- 2 cups basmati rice
- 1/4 tsp saffron threads, crushed
- 3 1/2 cups water
- 2 tbsp unsalted butter
- 1 medium cucumber, diced
- 2 medium tomatoes, diced
- 1/4 cup fresh mint leaves, chopped
- 1 lemon, juiced
- 2 tbsp extra-virgin olive oil
Instructions
Mix and Shape
- Prepare the Chicken MixtureIn a large bowl, combine the minced chicken thighs, minced chicken breast, grated onion, minced garlic, chopped green chilies, parsley, ground cumin, ground coriander, chili flakes, paprika, kosher salt, and black pepper. Knead the mixture with your hands for 10 minutes until it becomes sticky and cohesive. This step is crucial for the kebabs to hold together on the skewers.Look for The mixture should feel sticky and paste-like, with no crumbly bits.Tip Grate the onion and squeeze out excess liquid before adding to keep the mixture firm.
- Shape and Chill the KebabsDivide the chicken mixture into 6 equal portions. Mold each portion into a long, flat kebab shape around a flat skewer, pressing firmly so the meat adheres. Place the shaped kebabs on a baking sheet lined with parchment paper. Cover and refrigerate for at least 2 hours, or up to 24 hours, to allow the flavors to meld and the kebabs to firm up.Look for The kebabs should be firm and hold their shape when lifted.Tip Chilling is essential—do not skip it, or the kebabs may fall apart on the grill.
The chicken mixture should be sticky and well combined, with no visible pockets of spices. The shaped kebabs should be smooth and uniform, holding their shape when placed on the baking sheet. After chilling, they should be firm to the touch and ready for the grill.
Grill and Cook
- Grill the KebabsHeat a large skillet or grill pan over medium-high heat and add the vegetable oil. Once the oil shimmers, carefully place the chilled kebabs in the pan. Cook for 8 minutes total, turning every 2 minutes, until the kebabs are blistered and charred on all sides and cooked through. The internal temperature should reach 165°F (74°C) in the thickest part.Look for The kebabs should have deep golden-brown char marks and feel firm to the touch.Safe temperature 165°F (74°C) internal temperature (poultry)Tip Do not overcrowd the pan; cook in batches if needed to get a good sear.
- Cook the Saffron RiceWhile the kebabs chill, prepare the saffron rice. In a medium saucepan, bring the water to a boil. Add the basmati rice, saffron threads, and butter. Stir once, reduce the heat to low, cover, and simmer for 15 minutes, or until the rice is tender and the liquid is absorbed. Remove from heat and let stand, covered, for 5 minutes, then fluff with a fork.Look for The rice should be fluffy and each grain separate, with a golden yellow color.Tip Rinse the rice in cold water until clear before cooking to remove excess starch.
- Make the SaladIn a medium bowl, combine the diced cucumber, diced tomatoes, chopped mint, lemon juice, and extra-virgin olive oil. Toss gently to coat. Season with a pinch of salt if desired. Set aside to let the flavors meld while the kebabs finish cooking.Look for The salad should be bright and refreshing, with the mint and lemon shining through.Tip For the best texture, dice the cucumber and tomatoes into small, uniform pieces.
The kebabs should be sizzling in the pan, with deep golden-brown char marks developing. The rice should be fluffy and fragrant, with each grain separate and tinted yellow.
The salad should be vibrant and aromatic with mint and lemon. The kitchen should smell of warm spices and grilled meat.
Assemble and Serve
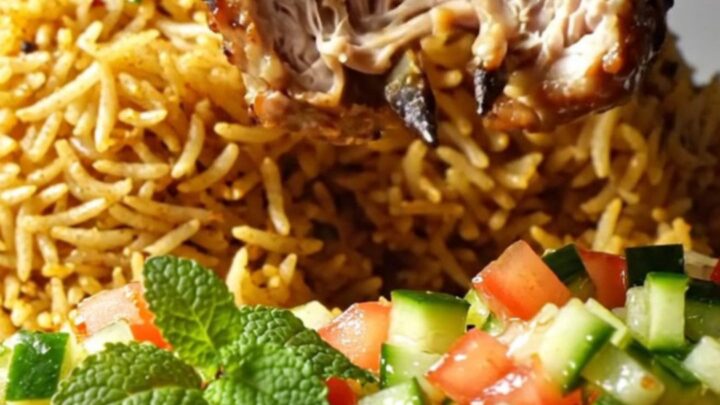
- Assemble and ServeSlide the cooked kebabs off the skewers. Serve the kebabs over a bed of saffron rice, with the cucumber-tomato salad on the side. Drizzle any juices from the pan over the kebabs for extra flavor. Serve immediately while hot.Look for The kebabs should be juicy and charred, the rice fluffy and golden, and the salad crisp.Safe temperature 165°F (74°C) internal temperature (poultry)Tip Warm the serving plates to keep the dish hot longer.
The kebabs should be juicy and tender, with a blistered exterior. The rice should be steaming and golden, and the salad crisp and refreshing. Everything should be arranged on plates, with the kebabs resting on the rice and the salad on the side. The dish is ready to serve.
Common mistakes
One common mistake is not kneading the meat mixture enough—it must become sticky to hold together. Another is skipping the chilling step, which leads to crumbling kebabs. Overcrowding the pan can cause steaming instead of charring, so cook in batches if needed.
Also, avoid flipping the kebabs too often; let them develop a good crust before turning. Finally, don't skip the saffron—it gives the rice its signature color and aroma.
How to tell it’s done
The kebabs are done when they are charred on the outside and cooked through, with an internal temperature of 165°F (74°C) in the thickest part. They should feel firm to the touch and release easily from the pan.
The rice is done when all the liquid is absorbed and the grains are tender. The salad should be crisp and bright. Let the kebabs rest for a few minutes before serving to allow the juices to redistribute.
- Poultry: 165°F (74°C) in the thickest part
Up next · Part 3 of 3
4 variations · storage & make-ahead · 5 answers · printable card
Tips, FAQ & printable recipe (Part 3)← Back to the ingredients (Part 1)