Dinner · Part 2 of 3: Instructions
Juicy Italian Meatloaf with Rich Tomato Glaze Step-by-step instructions
- Prep
- Cook
- Total
- Serves
- 8
Before you start
Before starting, verify that your oven is fully preheated to 350°F (175°C) so the loaf begins cooking immediately upon entering the heat. Gather your baking pan, spatula, and digital meat thermometer in advance.
Ensure raw meat is kept chilled in the refrigerator until ready to shape into the pan, maintaining proper food safety standards throughout your workspace.
Ingredients at a glance (2)
- 2 lb Italian meatloaf mixture
- 3/4 cup rich tomato glaze
Instructions
Shaping and pan preparation
- Shape the loaf in the baking panPreheat the oven to 350°F (175°C). Transfer the Italian meatloaf mixture into a 9x5-inch baking pan. Press gently and shape the mixture into an even, compact loaf so it cooks uniformly throughout the entire baking process.Look for The meatloaf should be evenly pressed and level across the top.Tip Do not pack the meat too tightly into the pan to avoid a dense texture.
The meat mixture should be pressed evenly into the baking pan, forming a uniform loaf with a flat, level top surface. There should be no irregular mounds or thin corners, ensuring that heat penetrates the entire structure at an equal rate during roasting.
Glazing and oven baking
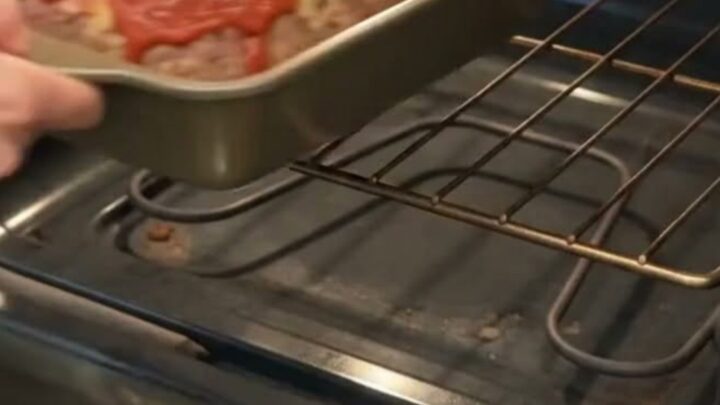
- Apply glaze and bakeSpread the rich tomato glaze evenly over the top surface of the loaf in the baking pan. Place the pan in the preheated oven and bake for about 60 minutes. Cook until the center reaches an internal temperature of at least 160°F (71°C) on a meat thermometer.Look for The glaze should be bubbling and caramelized around the edges.Safe temperature 160°F (71°C) internal temperature (ground meat)Tip Check the internal temperature in the thickest part of the loaf.
The tomato glaze should be distributed in a continuous layer across the top of the loaf. By the end of baking, the glaze appears set, shiny, and bubbly, and the thermometer reading in the middle of the loaf confirms an internal temperature of at least 160°F (71°C).
Resting, slicing, and plating
- Rest, slice, and serveRemove the baking pan from the oven and allow the meatloaf to rest for 10 minutes. Use a spatula to slice into the freshly baked, glazed meatloaf resting in its baking pan. Lift a thick, juicy, steaming slice, transfer onto a plate, and serve warm.Look for Slices hold their shape firmly while showing a moist, steaming interior.Tip Allowing the meatloaf to rest keeps the juices locked inside.
After resting undisturbed for 10 minutes, the meatloaf should feel firm yet tender under a spatula.
Clean, thick slices should lift easily from the baking pan onto plates without falling apart, showing a visibly moist, steaming interior with the glaze remaining intact on top.
Common mistakes
The most common mistake is slicing into the meatloaf immediately after taking it out of the oven. Cutting too soon causes the hot juices to spill out onto the board or pan, leaving the interior dry.
Another frequent error is overcrowding or uneven shaping, which leads to raw centers or overcooked, tough outer edges.
How to tell it’s done
The meatloaf is fully cooked and safe when a meat thermometer inserted into the thickest center part registers at least 160°F (71°C).
At this point, the rich tomato glaze will appear glossy, bubbling, and slightly caramelized at the edges. When sliced, the interior should be juicy, steaming, and consistently cooked throughout without looking dry.
- Ground meat: 160°F (71°C) in the thickest part
Up next · Part 3 of 3
2 variations · storage & make-ahead · 3 answers · printable card
Tips, FAQ & printable recipe (Part 3)← Back to the ingredients (Part 1)