Appetizers · Part 2 of 3: Instructions
Juicy Garlic Butter Mushrooms in Minutes Step-by-step instructions
- Prep
- Cook
- Total
- Serves
- 4
Before you start
Before starting, ensure all ingredients are prepped and ready to go, as the cooking process moves quickly once the heat is on. Wash and thoroughly dry the mushrooms, then trim the stems if they are particularly woody.
Mince the garlic cloves finely so they distribute evenly throughout the butter, and have your fresh thyme leaves measured out.
Having your skillet heated to the correct temperature before adding the butter will ensure the mushrooms begin to sear immediately upon contact with the pan.
Ingredients at a glance (4)
- 1 lb whole mushrooms, cleaned
- 3 tbsp unsalted butter
- 3 cloves garlic, minced
- 1 tsp fresh thyme leaves
Instructions
Preparing the mushrooms
- Prepare the mushroomsClean the mushrooms gently using a damp cloth or soft brush to remove any dirt. Leave them whole or cut into halves if they are very large to ensure even cooking.Look for Mushrooms should be clean and dry.Tip Avoid soaking mushrooms in water, as they will absorb liquid and become mushy during cooking.
The mushrooms should be clean and dry. Check that any large mushrooms are cut into uniform pieces to ensure they finish cooking at the same time as the smaller ones.
Sautéing the mushrooms
- Sauté the mushroomsMelt the butter in a large skillet over medium-high heat. Add the mushrooms to the pan and cook for about 5 to 7 minutes, stirring occasionally, until they are browned and tender.Look for Mushrooms should look golden brown and tender.Tip Give the mushrooms space in the pan so they sear instead of steaming.
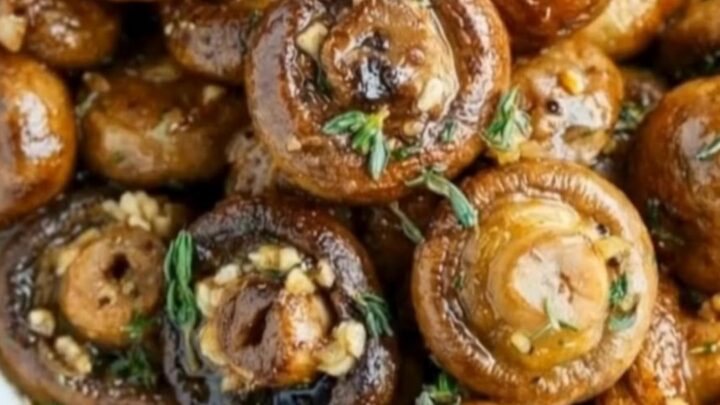
The mushrooms should be golden brown and have lost their raw, spongy texture. They will have reduced significantly in size and be tender to the touch, indicating they are ready for the aromatics.
Adding aromatics
- Finish with aromaticsReduce the heat to medium and stir in the minced garlic and fresh thyme. Cook for another 1 to 2 minutes until the garlic is fragrant.Look for The sauce should be fragrant and bubbling.Tip Watch the garlic closely to prevent it from burning, which can turn the dish bitter.
The kitchen should smell strongly of garlic and fresh thyme. The sauce should be coating the mushrooms evenly, appearing glossy and rich without being overly oily or separated, indicating the dish is finished.
Common mistakes
A common mistake is overcrowding the pan, which causes the mushrooms to release their liquid and steam instead of browning. Always cook in batches if necessary to keep the mushrooms in a single layer.
Another error is adding the garlic too early; because garlic burns quickly, it should only be added in the final minutes of cooking. Finally, using too much heat at the beginning can draw out moisture too early, so it is best to monitor the pan carefully to maintain the best texture.
How to tell it’s done
The mushrooms are done when they have achieved a deep, golden-brown color and are tender throughout. They should be soft enough to be easily pierced by a fork but should still retain a slight structure.
The butter sauce in the pan should be glossy and bubbling, clinging to the mushrooms rather than pooling excessively. Because there is no raw protein in this dish, doneness is based entirely on achieving the desired texture and the aromatic development of the garlic and fresh thyme.
Up next · Part 3 of 3
2 variations · storage & make-ahead · 3 answers · printable card
Tips, FAQ & printable recipe (Part 3)← Back to the ingredients (Part 1)