Appetizers · Part 2 of 3: Instructions
Jalapeño Popper Garlic Bread: A Spicy, Cheesy Side Dish Step-by-step instructions
- Prep
- Cook
- Total
- Serves
- 8
Before you start
Before you start, heat the oven to 400°F (200°C) and line a baking sheet with parchment paper. Soften the cream cheese and butter by leaving them at room temperature for about 30 minutes, or microwave in 10-second bursts until soft but not melted.
Cook the bacon until crispy, then crumble it. Grate the garlic and shred the cheddar if needed. Dice the jalapeños, removing seeds for a milder heat. Have all the ingredients measured and ready; the assembly goes quickly once the oven is hot.
Ingredients at a glance (9)
- 1 loaf French bread
- 8 oz cream cheese, softened
- 4 cloves garlic, grated
- 4 tbsp butter, softened
- 1 cup sharp cheddar, shredded
- 6 strips bacon, cooked and crumbled
- 3 jalapeños, diced
- 1/2 cup mozzarella, shredded
- 1 jalapeño, sliced into coins
Instructions
Mix and Prepare
- Mix the Popper FillingIn a medium bowl, combine the softened cream cheese, grated garlic, softened butter, shredded sharp cheddar, crumbled bacon, and diced jalapeños. Stir until the mixture is thoroughly blended and evenly distributed. The filling should be thick and spreadable, with the bacon and jalapeños evenly dispersed throughout the creamy base.Look for The mixture is smooth, thick, and flecked with bacon and green jalapeño bits.Tip Make sure the cream cheese and butter are truly softened to avoid lumps.
- Split the BreadCut the French loaf in half lengthwise, creating two long halves. Place both halves cut-side up on a parchment-lined baking sheet. If the bread is very crusty, lightly score the cut sides with a knife to help the filling adhere, but do not cut all the way through.Look for The two halves lie flat and stable on the baking sheet.Tip A serrated knife works best for slicing crusty bread without crushing it.
The cream cheese mixture is smooth, thick, and evenly blended, with visible bits of bacon and jalapeño. The bread is split into two halves, ready for the filling. The filling should hold its shape when scooped, not runny or stiff.
Assemble and Top
- Spread the FillingDivide the cream cheese mixture evenly between the two bread halves, spreading it thickly from edge to edge. Use a rubber spatula to create an even layer, making sure the filling reaches the corners. The layer should be substantial, about 1/2 inch thick, so every bite is loaded.Look for The filling covers the entire cut surface of the bread.Tip Spread gently to avoid tearing the bread's crumb.
- Top with Mozzarella and Jalapeño CoinsSprinkle the shredded mozzarella evenly over both halves, covering the cream cheese layer. Arrange the jalapeño coins on top, pressing them lightly into the cheese so they stay in place during baking. The jalapeño coins will blister and char slightly in the oven, adding a smoky heat.Look for The bread is fully topped with cheese and jalapeño slices.Tip For more even browning, keep the jalapeño coins in a single layer.
The filling is spread thickly across both bread halves, covering every bit of the cut surface. The mozzarella is scattered evenly, and the jalapeño coins are nestled into the cheese. The bread looks generously loaded, with no bare spots.
Bake and Serve
- Bake Until Golden and BlisteredBake the bread in a preheated 400°F (200°C) oven for 14 minutes, or until the cheese is melted and bubbly, the edges of the bread are golden and crisp, and the jalapeño coins are blistered in spots. Rotate the baking sheet halfway through for even browning if your oven has hot spots.Look for The cheese is molten and lightly browned, and the bread edges are deeply golden.Tip If the top browns too quickly, loosely tent with foil for the last few minutes.
- Slice and ServeRemove the baking sheet from the oven and let the bread cool for 2 to 3 minutes. Use a sharp knife to slice each half into individual portions, cutting through the crispy edges and creamy center. Pull the slices apart to reveal the long cheese stretch, and serve warm.Look for The slices pull apart with a dramatic, creamy cheese pull.Tip Use a serrated knife for clean cuts through the crust.
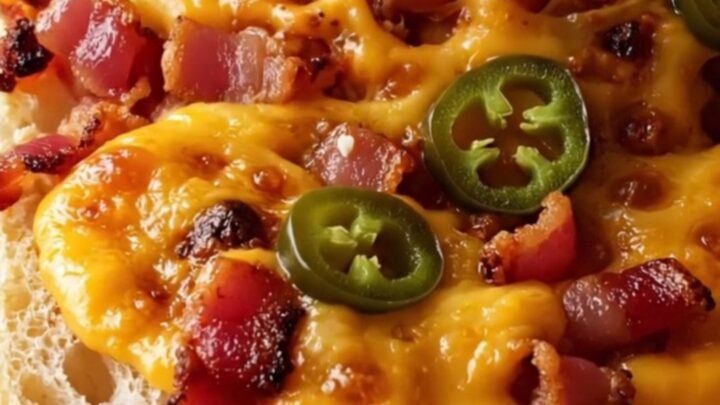
The cheese is molten and lightly browned, the edges of the bread are crisp and golden, and the jalapeño coins are blistered. When sliced, the cheese pulls in long, creamy strands. The aroma is smoky, garlicky, and irresistible.
Common mistakes
One common mistake is using cold cream cheese, which leads to a lumpy filling. Always soften it first. Another is overloading the bread with too much filling, causing it to slide off during baking; spread it thick but not overflowing.
Skipping the parchment paper makes cleanup harder and can cause sticking. Also, be careful not to overbake, as the bread can become too hard and the cheese can turn rubbery.
Finally, let the bread rest for a few minutes before slicing so the cheese sets slightly and doesn't run everywhere.
How to tell it’s done
The bread is done when the cheese is fully melted and bubbly, the edges of the bread are deep golden brown and crisp, and the jalapeño coins are blistered and charred in spots. The filling should be hot all the way through, with no cold spots in the center.
If you insert a knife into the middle, it should come out hot to the touch. The total baking time is 14 minutes; if your oven runs cool, add a minute or two, but watch closely to avoid burning the crust.
Up next · Part 3 of 3
4 variations · storage & make-ahead · 5 answers · printable card
Tips, FAQ & printable recipe (Part 3)← Back to the ingredients (Part 1)