Dinner · Part 2 of 3: Instructions
Italian Pasta Bake with Cheesy Pull Step-by-step instructions
- Prep
- Cook
- Total
- Serves
- 6
Before you start
Before beginning, ensure all ingredients are measured and ready. Preheat the oven to 375°F (190°C) early so it reaches the required temperature before the pasta goes in.
Have the colander ready to drain the pasta quickly to prevent it from becoming mushy. Clear enough counter space to accommodate the large pot and baking dish comfortably, ensuring a smooth assembly process without any clutter in the workspace.
Ingredients at a glance (3)
- 1 lb penne pasta
- 24 oz pasta sauce
- 2 cups shredded mozzarella cheese
Instructions
Stovetop Preparation
- Prepare the PastaBring a large pot of salted water to a boil and cook the penne pasta until al dente. Drain the pasta using a colander and set aside.Look for The pasta is tender.Tip Do not overcook the pasta, as it will continue to soften in the oven.
The pasta should be cooked to an al dente texture, providing a slight resistance when bitten. Once the pasta is ready, it should be drained and combined with the sauce to create a uniform mixture that is ready for the baking phase.
Assembly and Baking
- Assemble the BakePreheat the oven to 375°F (190°C). In a large bowl, combine the cooked pasta and pasta sauce. Stir the mixture until the pasta is evenly coated with the sauce. Transfer the mixture into a 9x13 inch baking dish, spreading it out into an even layer with a spatula.Look for The mixture is evenly combined and spread in the dish.Tip Ensure the baking dish is lightly greased to prevent sticking.
The assembly should look cohesive, with the sauce evenly coating all the pasta. When placed in the oven, the dish should be level to ensure even heating.
As it bakes, the kitchen should start to smell savory and aromatic, indicating that the flavors are beginning to meld together within the hot baking dish.
Final Browning
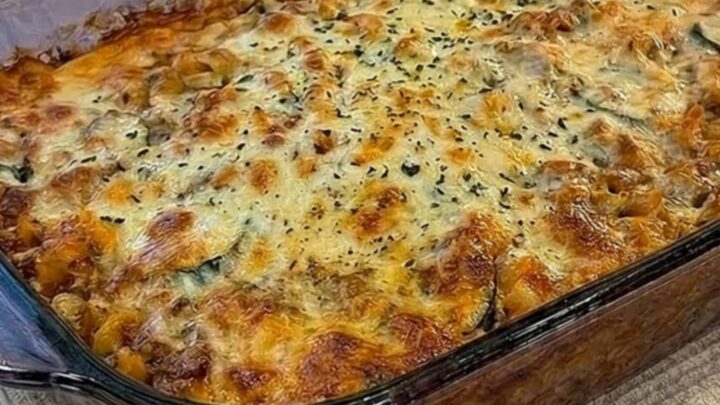
- Bake and ServeTop the pasta mixture with the shredded mozzarella cheese. Place the baking dish in the preheated oven and bake for 20 to 25 minutes, or until the cheese is melted and bubbling with golden-brown spots. Remove from the oven and let it rest for 5 minutes before serving to allow the layers to settle.Look for The cheese is melted, bubbling, and golden brown.Tip Use a metal spatula to achieve that perfect, dramatic cheese pull when serving.
The final result should feature a vibrant, golden-brown crust of melted mozzarella. The cheese should be bubbling vigorously, particularly around the edges of the dish.
A quick check with a spatula should reveal that the bottom layers are hot and the sauce has thickened slightly, signaling that the pasta bake is ready to be removed from the oven.
Common mistakes
A common mistake is overcooking the pasta before it hits the oven; ensure it remains slightly firm to the bite. Another issue is using too much liquid, which can lead to a watery sauce; ensure the sauce is thick and well-distributed.
Finally, do not rush the cooling step, as attempting to serve immediately can result in the layers sliding apart, making it difficult to achieve that signature, clean cheese pull.
How to tell it’s done
The dish is done when the cheese is fully melted, bubbling across the entire surface, and has developed golden-brown spots. The internal temperature of the pasta bake should be hot throughout. Let the dish rest for at least 5 minutes before scooping to ensure the layers hold together.
Up next · Part 3 of 3
2 variations · storage & make-ahead · 3 answers · printable card
Tips, FAQ & printable recipe (Part 3)← Back to the ingredients (Part 1)