Dinner · Part 2 of 3: Instructions
Italian Loaded Cheese Melt Sandwich for an Easy Meal Step-by-step instructions
- Prep
- Cook
- Total
- Serves
- 2
Before you start
Before beginning, ensure all ingredients are ready and within reach. Slice the tomatoes and onions as thinly as possible to ensure they warm through quickly without releasing too much liquid.
If the mozzarella is very wet, pat it dry with a paper towel to keep the sandwich from becoming soggy. Having a clean cutting board and a sharp bread knife ready before you start cooking will ensure a smooth service once the sandwiches are finished.
Ingredients at a glance (5)
- 4 slices crusty artisan bread
- 8 oz fresh mozzarella cheese, sliced
- 6 oz Italian deli meats, such as salami or ham
- 1 medium tomato, thinly sliced
- 1/4 cup red onion, thinly sliced
Instructions
Assembly of the layers
- Prepare the sandwich layersArrange the slices of artisan bread on a clean surface. Layer the Italian deli meats evenly across two slices of bread, followed by the fresh mozzarella slices, tomato slices, and red onion. Top with the remaining bread slices to create two sandwiches.Look for ensure the cheese is placed directly against the meat for stabilityTip use room temperature ingredients to ensure even melting throughout the sandwich
At the end of this phase, the sandwiches should be neatly stacked and ready for the pan. Ensure that the cheese is placed in a way that it touches the bread on both sides, as this acts as the glue to hold the sandwich together. Check that the bread slices are of uniform size and that the fillings are not hanging over the edges, which would lead to uneven browning or burning in the skillet.
Grilling the bread
- Grill the sandwichesHeat a large non-stick skillet over medium-low heat. Place the sandwiches in the skillet and cook until the bread is golden brown and crispy, then carefully flip to brown the other side while the cheese begins to melt.Look for the bread turns golden brown and the cheese begins to softenTip press down lightly with a spatula to ensure good contact with the pan
The sandwiches are ready for the final step when the bread has achieved a deep, mahogany-gold color on both sides. The heat should be consistent, creating a fragrant, toasted aroma. The edges of the cheese should start to visibly soften and bulge out slightly from the sides of the bread. If the bread is browning too rapidly, lower the heat immediately to avoid a bitter, burnt taste.
Final melt and slice
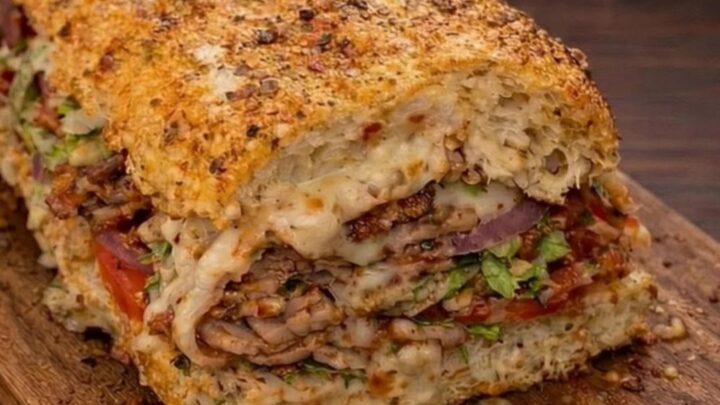
- Final melt and serveContinue cooking until the cheese is completely melted and pulling apart when the sandwich is cut. Remove from the skillet using a wide spatula, place on a wooden cutting board, and slice in half to reveal the layers. Serve immediately while hot and crispy.Look for the cheese pulls apart when slicingTip let the sandwich sit for thirty seconds before cutting to keep the filling in place
The sandwich is finished when the internal structure feels cohesive and the cheese stretches when the sandwich is pulled apart. The bread should offer a distinct crunch upon the first cut.
Check that the tomato and onion layers are warm and have softened slightly. If the cheese does not pull, cover the pan with a lid for thirty seconds to trap the steam and finish the melting process before serving.
Common mistakes
A common mistake is using heat that is too high, which results in dark, burnt bread with a cold, unmelted center. Always start on medium-low and be patient. Another error is overstuffing the sandwich, which makes it difficult to flip and results in ingredients falling out into the pan.
Finally, skipping the rest period before slicing can cause the cheese to run out immediately; allowing the sandwich to sit for a brief moment helps the ingredients set slightly, ensuring you get that perfect, clean cross-section.
How to tell it’s done
The sandwich is done when the exterior is a deep, uniform golden brown and the cheese has fully melted and begun to stretch. You can test the doneness by gently pressing the center of the sandwich with your spatula; it should feel soft and slightly yielding, indicating that the mozzarella has reached a molten consistency.
The deli meats should be warmed through, and the bread should sound crisp when tapped. There is no raw protein in this recipe, so precise internal temperature monitoring is not required for safety.
Up next · Part 3 of 3
2 variations · storage & make-ahead · 3 answers · printable card
Tips, FAQ & printable recipe (Part 3)← Back to the ingredients (Part 1)