Desserts · Part 1 of 3: Ingredients
Tokyo Strawberry Sando with Mascarpone Cream
- Prep
- Cook
- Total
- Serves
- 2
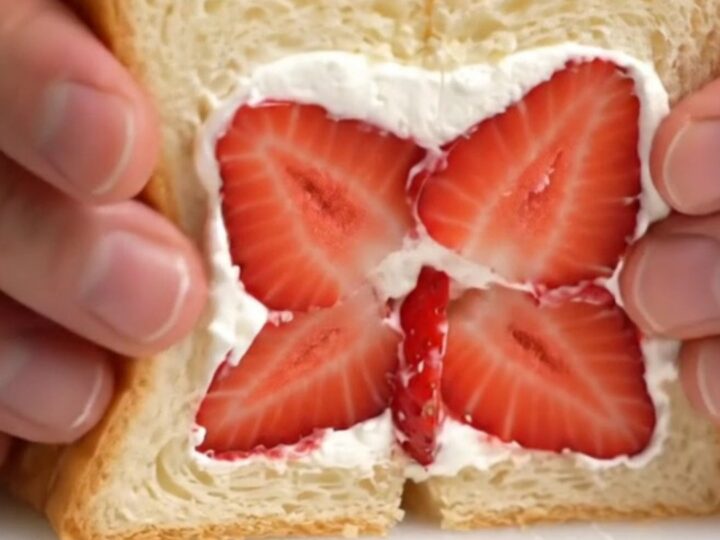
This Tokyo strawberry sando is the dessert that looks like a jewel box and tastes like a cloud. Pillowy milk bread is spread with a whipped mascarpone cream that's stable enough to hold its shape, then filled with ruby-red strawberries arranged in a geometric flower.
A short chill in the fridge sets the cream so every slice is clean and picture-perfect. The result is a Japanese café classic that's surprisingly simple to make at home—no oven, no fuss, just a few quality ingredients and a little patience.
The strawberry sando, or ichigo sando, is a beloved Japanese convenience store treat that has become a global sensation. This version uses a whipped cream enriched with mascarpone, which adds richness and stability without making the cream heavy.
The key is to whip the cream to stiff peaks, arrange the strawberries in a precise pattern, and chill the assembled sandwich before slicing.
The result is a dessert that's both visually stunning and irresistibly soft, with the tart-sweet berries cutting through the creamy filling. Serve it for brunch, tea, or a special occasion—it's guaranteed to impress.
Ingredients
- 4 slices pillowy milk bread (shokupan), crusts removed
- 1 1/4 cups heavy cream (42% fat)
- 1/4 cup mascarpone cheese
- 2 1/2 tbsp granulated sugar
- 7 large strawberries, preferably Amaou
Why this recipe works
The whipped mascarpone cream is the heart of this recipe. Heavy cream alone can deflate quickly, but adding mascarpone—a thick Italian cream cheese—stabilizes the foam and gives it a luxurious, velvety texture.
The cream whips to stiff peaks that hold their shape for hours, making it ideal for sandwiching and slicing. The sugar is just enough to sweeten without overpowering the natural flavor of the strawberries.
Chilling the wrapped sandwich is non-negotiable for clean slices. The cold sets the cream, firming it up so the knife glides through without squishing the filling. The diagonal cut not only looks beautiful but also showcases the strawberry pattern in cross-section. This technique is the secret to the café-perfect look that makes the sando so photogenic.
Notes and substitutions
Use the best strawberries you can find—ideally Amaou or another premium variety that's large, sweet, and deeply red. The berries should be dry before assembling; any excess moisture will make the bread soggy. If your strawberries are very large, you may need only six or seven; adjust the pattern accordingly.
Milk bread (shokupan) is the traditional choice because it's pillowy, slightly sweet, and has a fine crumb. If you can't find it, use brioche or a soft white sandwich bread. The crusts must be removed for the classic look. The cream is best made fresh, but it can be whipped up to 4 hours ahead and refrigerated in a covered bowl.
- Mascarpone: Use 1/4 cup (60 g) cream cheese softened, or 1/4 cup (60 ml) crème fraîche for a slightly tangier cream.
- Heavy cream: Use full-fat coconut cream (chilled) for a dairy-free version; whip with 2 tbsp powdered sugar.
- Granulated sugar: Use 2 tbsp powdered sugar for a finer texture, or 2 tbsp honey for a floral note (reduce cream slightly).
- Milk bread: Use brioche, challah, or a soft white sandwich bread; remove crusts for the classic look.
Equipment
- Large mixing bowl
- Electric hand mixer or stand mixer
- Plastic wrap
- Sharp knife
- Cutting board