Appetizers · Part 2 of 3: Instructions
Hot Street Corn Esquites Dip for Parties Step-by-step instructions
- Prep
- Cook
- Total
- Serves
- 10
Before you start
Pull the cream cheese from the refrigerator about 30 minutes ahead so it melts smoothly into the hot corn instead of sitting in stubborn lumps. Shred the pepper jack, crumble the cotija, dice the jalapeño, and squeeze the limes before the skillet gets hot — the charring stage moves fast and leaves no time to prep.
If using frozen corn, thaw it and spread it on a towel to dry thoroughly; surface water is the enemy of a good char. Chop the cilantro last so it stays bright, and set the chile-lime seasoning next to the stove. Preheat the oven to 375°F (190°C) now so it is ready the moment the mixing is done, and set out a trivet for the hot skillet.
Ingredients at a glance (11)
- 4 cups sweet corn kernels (fresh or frozen, thawed)
- 2 tbsp unsalted butter
- 4 oz cream cheese, softened
- 1/3 cup mayonnaise
- 1 jalapeño, diced
- 1 cup shredded pepper jack cheese
- 1/2 cup crumbled cotija cheese
- 2 tbsp fresh lime juice
- Chile-lime seasoning (such as Tajín), to taste, for dusting
- Chopped fresh cilantro, to taste, for sprinkling
- Thick tortilla chips, to taste, for serving
Instructions
Char the corn
- Heat the skilletSet a 10-inch cast-iron skillet over high heat and let it get properly hot before anything goes in. Add the butter and swirl until it foams and the foam just begins to subside, about 1 minute. A rippling, shimmering surface with no smoking means the corn will sear instead of steam.Look for The butter foams, then quiets, and the pan surface shimmers with a faint haze of vapor.Tip Cast iron holds heat better than stainless here; if using another heavy skillet, preheat 2 extra minutes.
- Char the cornAdd the corn kernels in an even layer and let them sit undisturbed for a minute before stirring. Cook for about 6 minutes total, stirring only every minute or so, until blistered and spotted deep golden-brown in places. The popping, crackling sound and a toasty smell tell you the char is building.Look for Kernels blister and show dark golden spots, with a nutty, toasty corn smell filling the kitchen.Tip Resist stirring constantly; kernels need direct contact with the hot pan to blister properly.
By the end of this phase the corn should look genuinely blistered — dark golden spots on most kernels, a few edges nearly brown, and a toasty, nutty smell in the air. The kernels should have shrunk slightly and glistened with butter.
If most kernels are still uniformly yellow with no color, the pan was not hot enough or the corn was wet; keep them over high heat another 2 minutes before moving on, because this char carries the entire flavor of the finished dip.
Build the creamy base
- Melt in the cream cheeseLower the heat to medium and drop in the cream cheese, cut into a few pieces so it melts quickly. Stir with a wooden spoon until it is completely smooth and coats every kernel, 2 to 3 minutes. If the mixture seems stiff, keep stirring gently; the melted butter and released corn juices loosen it.Look for The mixture turns glossy and uniform, with no visible streaks of white cream cheese left.Tip Softened cream cheese melts far faster than a cold block, so pull it from the fridge 30 minutes ahead.
- Stir in mayo and jalapeñoFold in the mayonnaise until the base looks silky and creamy, then add the diced jalapeño with all its seeds if genuinely spicy is the goal, or seed it first for moderate warmth. Stir for about 1 minute so the raw edge of the chile softens slightly in the hot mixture.Look for The base slides slowly off the spoon in a thick, creamy ribbon rather than running.Tip Wear gloves or wash hands right after dicing the jalapeño, and keep fingers away from eyes.
- Fold in the cheeses and limeTake the skillet off the heat. Fold in the shredded pepper jack, the crumbled cotija and the fresh lime juice, reserving a small handful of each cheese for the top if the pan looks full. The lime should brighten the mix immediately; taste and adjust before the skillet goes into the oven.Look for Shreds of pepper jack are evenly distributed and the mixture looks thick and studded with white cheese.Tip Off-heat folding keeps the shreds in distinct pockets that melt into stretchy strands while baking.
The base should now look thick, glossy and completely smooth — no white streaks of cream cheese, no visible mayo pooling, and the jalapeño distributed evenly. It should slide off the spoon slowly, in a heavy ribbon, and hold a ridge for a second. Taste it here: it should taste noticeably of lime and salt. This is the last chance to adjust seasoning, since the cheeses going in next are salty and the bake will dull any brightness left in the mix.
Bake, finish and serve
- Bake until bubblingSmooth the surface, place the skillet in the oven, and bake for about 12 minutes, until the edges are bubbling and the top turns golden in spots. Peek through the door rather than opening it early; steady heat gives an even, molten center. Rotate the pan halfway if the oven runs uneven.Look for The surface bubbles actively at the edges and shows light golden browning across the top.Tip Set the skillet on a middle rack so the bottom heats without the top browning too fast.
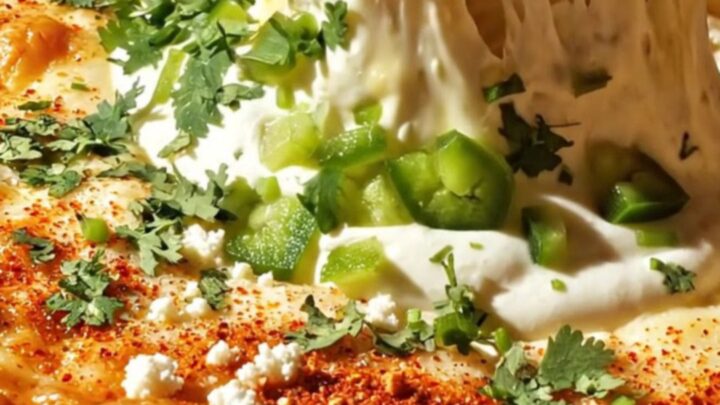
- Finish with Tajín and cilantroPull the skillet from the oven with a dry towel or sturdy mitt — the handle stays scorching hot. Dust the bubbling surface generously with the chile-lime seasoning and scatter the chopped cilantro over the top. Work quickly so the dip arrives at the table still bubbling and steaming.Look for The chile-lime dusting darkens slightly where it touches the hot, bubbling surface.Tip Add the cilantro at the table if serving family-style so the leaves stay bright and fresh.
- Serve hot with chipsSet the skillet on a trivet with a big bowl of thick tortilla chips alongside, and scoop while the dip is at its stretchy, molten peak. A thick chip is essential here; thin ones snap under the weight of a loaded scoop. Refill the chip bowl as it empties — this dip goes fast.Look for The first scoop pulls long, stretchy strands of melted pepper jack from the surface.Tip Warm the chips on a sheet pan in the last 5 minutes of baking so every scoop stays hot.
Out of the oven, the surface should be bubbling at the edges with light golden browning across the top, and the chile-lime seasoning should sit darkening on the hot cheese. The center must look molten, not stiff. The first scoop with a thick chip should pull long stretchy strands of pepper jack. If the dip has cooled while garnishing, slide it back into the oven for 2 minutes — it is at its best served actively steaming.
Common mistakes
The most common misstep is crowding the charring stage: stirring constantly keeps the kernels from touching the hot metal, so they steam and stay pale instead of blistering. Stir only once a minute. Underseasoning is the second trap — cotija is salty, but the dip still needs the lime fully tasted and adjusted before baking, since the oven dulls brightness.
Overbaking dries the cheese and turns the dip greasy, so pull it at the first lively bubbling. Finally, cold cream cheese never melts in cleanly; it leaves white streaks that no amount of baking will fix.
How to tell it’s done
The dip is done when the edges bubble actively around the rim and the surface shows light golden browning in spots, about 12 minutes at 375°F. The center should look molten and glossy, with the cheese fully melted and no pale, unmixed patches anywhere.
A chip inserted at the center should come out coated in a thick, stretchy layer that clings rather than runs off. The chile-lime dusting should sit on the surface, darkening slightly from the heat below. If the top has colored but the center still looks stiff, cover loosely with foil and give it 3 more minutes.
Up next · Part 3 of 3
4 variations · storage & make-ahead · 5 answers · printable card
Tips, FAQ & printable recipe (Part 3)← Back to the ingredients (Part 1)